Use SlashID with React
In this tutorial, we’ll build an essential (but functional) React application to explore the capabilities of the SlashID JavaScript SDK. If you want to check out the SlashID React SDK in ~15 minutes, this tutorial is for you. You can also find the complete source code of this tutorial in our CodeSandbox!
Goal
You will build a simple UI that handles user authentication and user data storage using the SlashID React SDK. Along the way, we will touch several concepts that are key to understanding our SDK, such as Organizations and Attribute Buckets.
Prerequisites
Before starting, you should sign up to SlashID and create your first organization and retrieve the ORGANIZATION_ID, required to complete this tutorial.
If you don’t have them already, now’s the time to install:
Like our Core SDK, all examples in this tutorial use TypeScript. SlashID ❤️ TypeScript!
1. Set up the project
First, create a new React app. We’ll use Vite to bootstrap the project:
npm create vite@latest slashid-demo -- --template react-ts
cd slashid-demo && npm install
Now, run the dev server:
npm run dev
You should now have a React application running on your local machine.
Last, let’s do some cleanup in src/App.tsx:
function App() {
  return <div>It works!</div>
}

export default App
Also, feel free to grab this CSS snippet:
:root {
  font-family: Inter, system-ui, Avenir, Helvetica, Arial, sans-serif;
  line-height: 1.5;
  font-weight: 400;
  color: #213547;
  background-color: #e5e5e5;
}

body {
  margin: 0;
  display: flex;
  place-items: center;
  min-width: 320px;
  min-height: 100vh;
}

#root {
  max-width: 1280px;
  margin: 0 auto;
  padding: 2rem;
  display: flex;
  justify-content: center;
}

.formWrapper {
  width: 390px;
  margin: 32px;
}

.storage {
  box-sizing: border-box;
  background-color: #ffffff;
  background: #ffffff;
  border: 1px solid rgba(20, 32, 73, 0.06);
  box-shadow: 0px 12px 24px rgba(29, 25, 77, 0.03);
  border-radius: 32px;
  padding: 16px;
  min-width: 390px;
  padding: 32px;
}

.storage form {
  display: flex;
  flex-direction: column;
}

.storage form > input {
  margin-bottom: 16px;
  padding: 12px 16px;
  font-size: 16px;
  line-height: 122%;
  background: rgba(20, 32, 73, 0.01);
  border: 1px solid rgba(20, 32, 73, 0.06);
  border-radius: 12px;
}

.storage form > button[type="submit"] {
  margin-bottom: 8px;
  padding: 16px 22px;
  font-size: 16px;
  font-weight: 600;
  line-height: 122%;
  background: linear-gradient(0deg, rgba(15, 14, 27, 0.1), rgba(15, 14, 27, 0.1)), #2a6aff;
  border-radius: 12px;
  outline: none;
  border: none;
  color: #ffffff;
}
At this point your src directory should contain the following files:
src
|-- App.tsx
|-- index.css
|-- main.tsx
`-- vite-env.d.ts
Great, you’re now good to go! Let’s build something cool using that SlashID magic.
2. Initialize the SDK
First, install SlashID React SDK.
Since the React SDK is built around the Core SDK, it must also be installed as a peer dependency.
npm install @slashid/slashid @slashid/react
Once the dependencies are installed, we need to wrap our application with <SlashIDProvider>. This ensures that all the components have access to the SlashID Context, most importantly the sid object, which is our stable reference to the Core SDK. Make sure to check the documentation for more details!
You must request a demo SlashID account in order to get your ORGANIZATION_ID (See Prerequisites).
import ReactDOM from "react-dom/client";
import { SlashIDProvider } from "@slashid/react";
import App from "./App";
import "./index.css";

ReactDOM.createRoot(document.getElementById("root") as HTMLElement).render(
  <React.StrictMode>
    <SlashIDProvider oid="ORGANIZATION_ID">
      <App />
    </SlashIDProvider>
  </React.StrictMode>
);
Your application should now be connected to SlashID through the Core SDK. To verify it, you can try accessing it through the useSlashID() hook included in the React SDK.
import { useSlashID } from "@slashid/react"

function App() {
  const { sid } = useSlashID()
  return <div>{sid ? "It works!" : "SDK is being loaded…."}</div>
}

export default App
Make sure that the SlashID SDK loads successfully before moving any further!
3. Add Login functionality
Now, let’s add login capabilities to our application. The React SDK exposes a ready to use configurable Login Form component for this purpose.
The Form comes with <ConfigurationProvider /> to easily customize some UI properties, such as theme and form factors. You can read more about SlashID Login Form customization here. You can choose from a variety of authentication factors, such as Passkeys (WebAuthn), SMS or SSO with third party providers like Google or Facebook. Let’s start with a basic onboarding form setup, choosing to only allow login with email via magic link.
import React from "react";
import ReactDOM from "react-dom/client";
import { SlashIDProvider, ConfigurationProvider } from "@slashid/react";
import { Factor } from "@slashid/slashid";
import App from "./App";
import "./index.css";

const factors: Factor[] = [{ method: "email_link" }];

ReactDOM.createRoot(document.getElementById("root") as HTMLElement).render(
  <React.StrictMode>
    <SlashIDProvider oid="ORGANIZATION_ID">
      <ConfigurationProvider factors={factors}>
        <App />
      </ConfigurationProvider>
    </SlashIDProvider>
  </React.StrictMode>
);
SlashID React SDK also provides first-class UI components to help you render different flows for authenticated and not authenticated users. Let’s use those as well!
import { LoggedIn, LoggedOut, Form } from "@slashid/react"

import "@slashid/react/style.css"

function App() {
  return (
    <div>
      <LoggedOut>
        <div className="formWrapper">
          <Form />
        </div>
      </LoggedOut>
      <LoggedIn>You're authenticated!</LoggedIn>
    </div>
  )
}

export default App
Now you can authenticate into your React app using the email address associated with your SlashID organization.
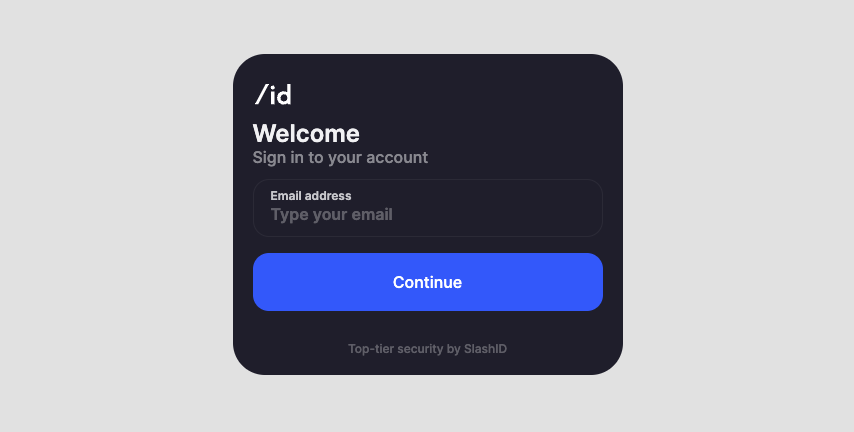
When you click the Continue button, you should receive an email from SlashID with a magic link. Use the link to complete the authentication process. After that, return to your React application - you should be authenticated now!
Make sure that you can authenticate using your email before you proceed!
4. Store authenticated user data
You can build a simple key-value storage for authenticated users using SlashID’s Data Vault. The useSlashID() hook exposes the user object: in the first instance it’s undefined, but once you authenticate, it becomes your interface to SlashID Attributes and Multi-Factor Authentication APIs.
You can learn more about Data Vault and Attribute Buckets on our developer portal 🤓
Before implementing the <Storage /> component, let’s make development with SlashID a little easier. <SlashIDProvider /> stores the User token in memory by default. This means you lose the information about the authenticated user every time the page reloads – not the most convenient development (or user) experience. You can override this setting using the tokenStorage prop on the provider.
import React from "react";
import ReactDOM from "react-dom/client";
import { SlashIDProvider, ConfigurationProvider } from "@slashid/react";
import { Factor } from "@slashid/slashid";
import App from "./App";
import "./index.css";

const factors: Factor[] = [{ method: "email_link" }];

ReactDOM.createRoot(document.getElementById("root") as HTMLElement).render(
  <React.StrictMode>
    <SlashIDProvider
       oid="ORGANIZATION_ID"
       tokenStorage="localStorage"
    >
      <ConfigurationProvider factors={factors}>
        <App />
      </ConfigurationProvider>
    </SlashIDProvider>
  </React.StrictMode>
);
In this way, the user token obtained from a successful authentication will be persisted in Local Storage, and you no longer need to authenticate after each full page reload. Sweet!
Let’s build our <Storage /> component with simple storage capabilities:
import { useSlashID } from "@slashid/react";
import { useEffect, useState, SyntheticEvent } from "react";

function Storage() {
  // User object reference - only available after successful authentication
  const { user } = useSlashID();
  // React state for rendering our attributes stored in Data Vault
  const [attributes, setAttributes] = useState<Record<string, string>>({});
  // Simple form state to enable storing new attributes
  const [newAttrName, setNewAttrName] = useState<string>("");
  const [newAttrValue, setNewAttrValue] = useState<string>("");

  // after authentication, fetch the attributes from Data Vault
  useEffect(() => {
    async function fetchUserAttributes() {
      // getBucket takes in an optional `bucketName | string` argument
      // if not present, it will return the default Read/Write bucket
      const bucket = user?.getBucket();
      // calling bucket.get() with no arguments will return all attributes stored in this bucket
      const attrs = await bucket?.get<Record<string, string>>();

      setAttributes(attrs!);
    }

    fetchUserAttributes();
  }, [user]);

  const addNewAttribute = async () => {
    // store new attribute
    const bucket = user?.getBucket();
    await bucket?.set({ [newAttrName]: newAttrValue });

    // simple refetch logic to re-render updated attributes list
    const attrs = await bucket?.get<Record<string, string>>();
    setAttributes(attrs!);

    // reset the form
    setNewAttrName("");
    setNewAttrValue("");
  };

  const handleSubmit = (e: SyntheticEvent) => {
    e.preventDefault();

    addNewAttribute();
  };

  return (
    <div>
      <main className="storage">
        <h2>Stored attributes</h2>
        {Object.keys(attributes).length === 0 ? (
          <p>Looks like there's nothing in here!</p>
        ) : null}
        <ul>
          {/* display attributes from Data Vault as list items */}
          {Object.entries(attributes).map(([key, value]) => (
            <li key={key}>
              {key}: {value}
            </li>
          ))}
        </ul>
        {/* minimal form for storing new attributes */}
        <form method="post" onSubmit={handleSubmit}>
          <input
            value={newAttrName}
            placeholder="Attribute name"
            onChange={(e) => setNewAttrName(e.target.value)}
          />
          <input
            value={newAttrValue}
            placeholder="Attribute value"
            onChange={(e) => setNewAttrValue(e.target.value)}
          />
          <button type="submit">Add attribute</button>
        </form>
      </main>
    </div>
  );
}

export default Storage;
To ensure that only the data of authenticated users is stored in Data Vault (and to make sure you have access to the user property), you can put the <Storage /> component inside the <LoggedIn> wrapper:
import { LoggedIn, LoggedOut, Form } from "@slashid/react"
import Storage from "./Storage"

import "@slashid/react/style.css"

function App() {
  return (
    <div>
      <LoggedOut>
        <div className="formWrapper">
          <Form />
        </div>
      </LoggedOut>
      <LoggedIn>
        <Storage />
      </LoggedIn>
    </div>
  )
}

export default App
Make sure that you can add new attributes to the default bucket with the <User /> component!
Congratulations! You just built your first React application with the SlashID React SDK! Make sure to see the Docs page for a more detailed overview of the core concepts, as well as some in-depth guides. Also, check out our blog for more interesting, security-related stuff. We hope you love SlashID!