Guide: Configure SSO with Azure AD
In order to use Microsoft/Azure AD for SSO, you need to create client credentials that can be used to identify and authenticate your application during OAuth2 and OIDC flows. This guide will take you through the steps for creating those credentials.
For a full walkthrough on using SlashID for SSO, please check the dedicated guide.
We use sandbox endpoints in this guide, but the same procedure works for the production environment.
Before You Start
To create the OAuth2 credentials you will need to use the Azure Console. If you are new to Azure, you may want to check Microsoft's documentation on getting started. Your organization may have Azure applications already set up that you should use for client credentials.
Create an application
First, log in to the Azure Console, and create an Active Directory tenant. Once the tenant has been created, follow these steps to create an Enterprise Application:
- Go to Azure Active Directory > Enterprise applications.
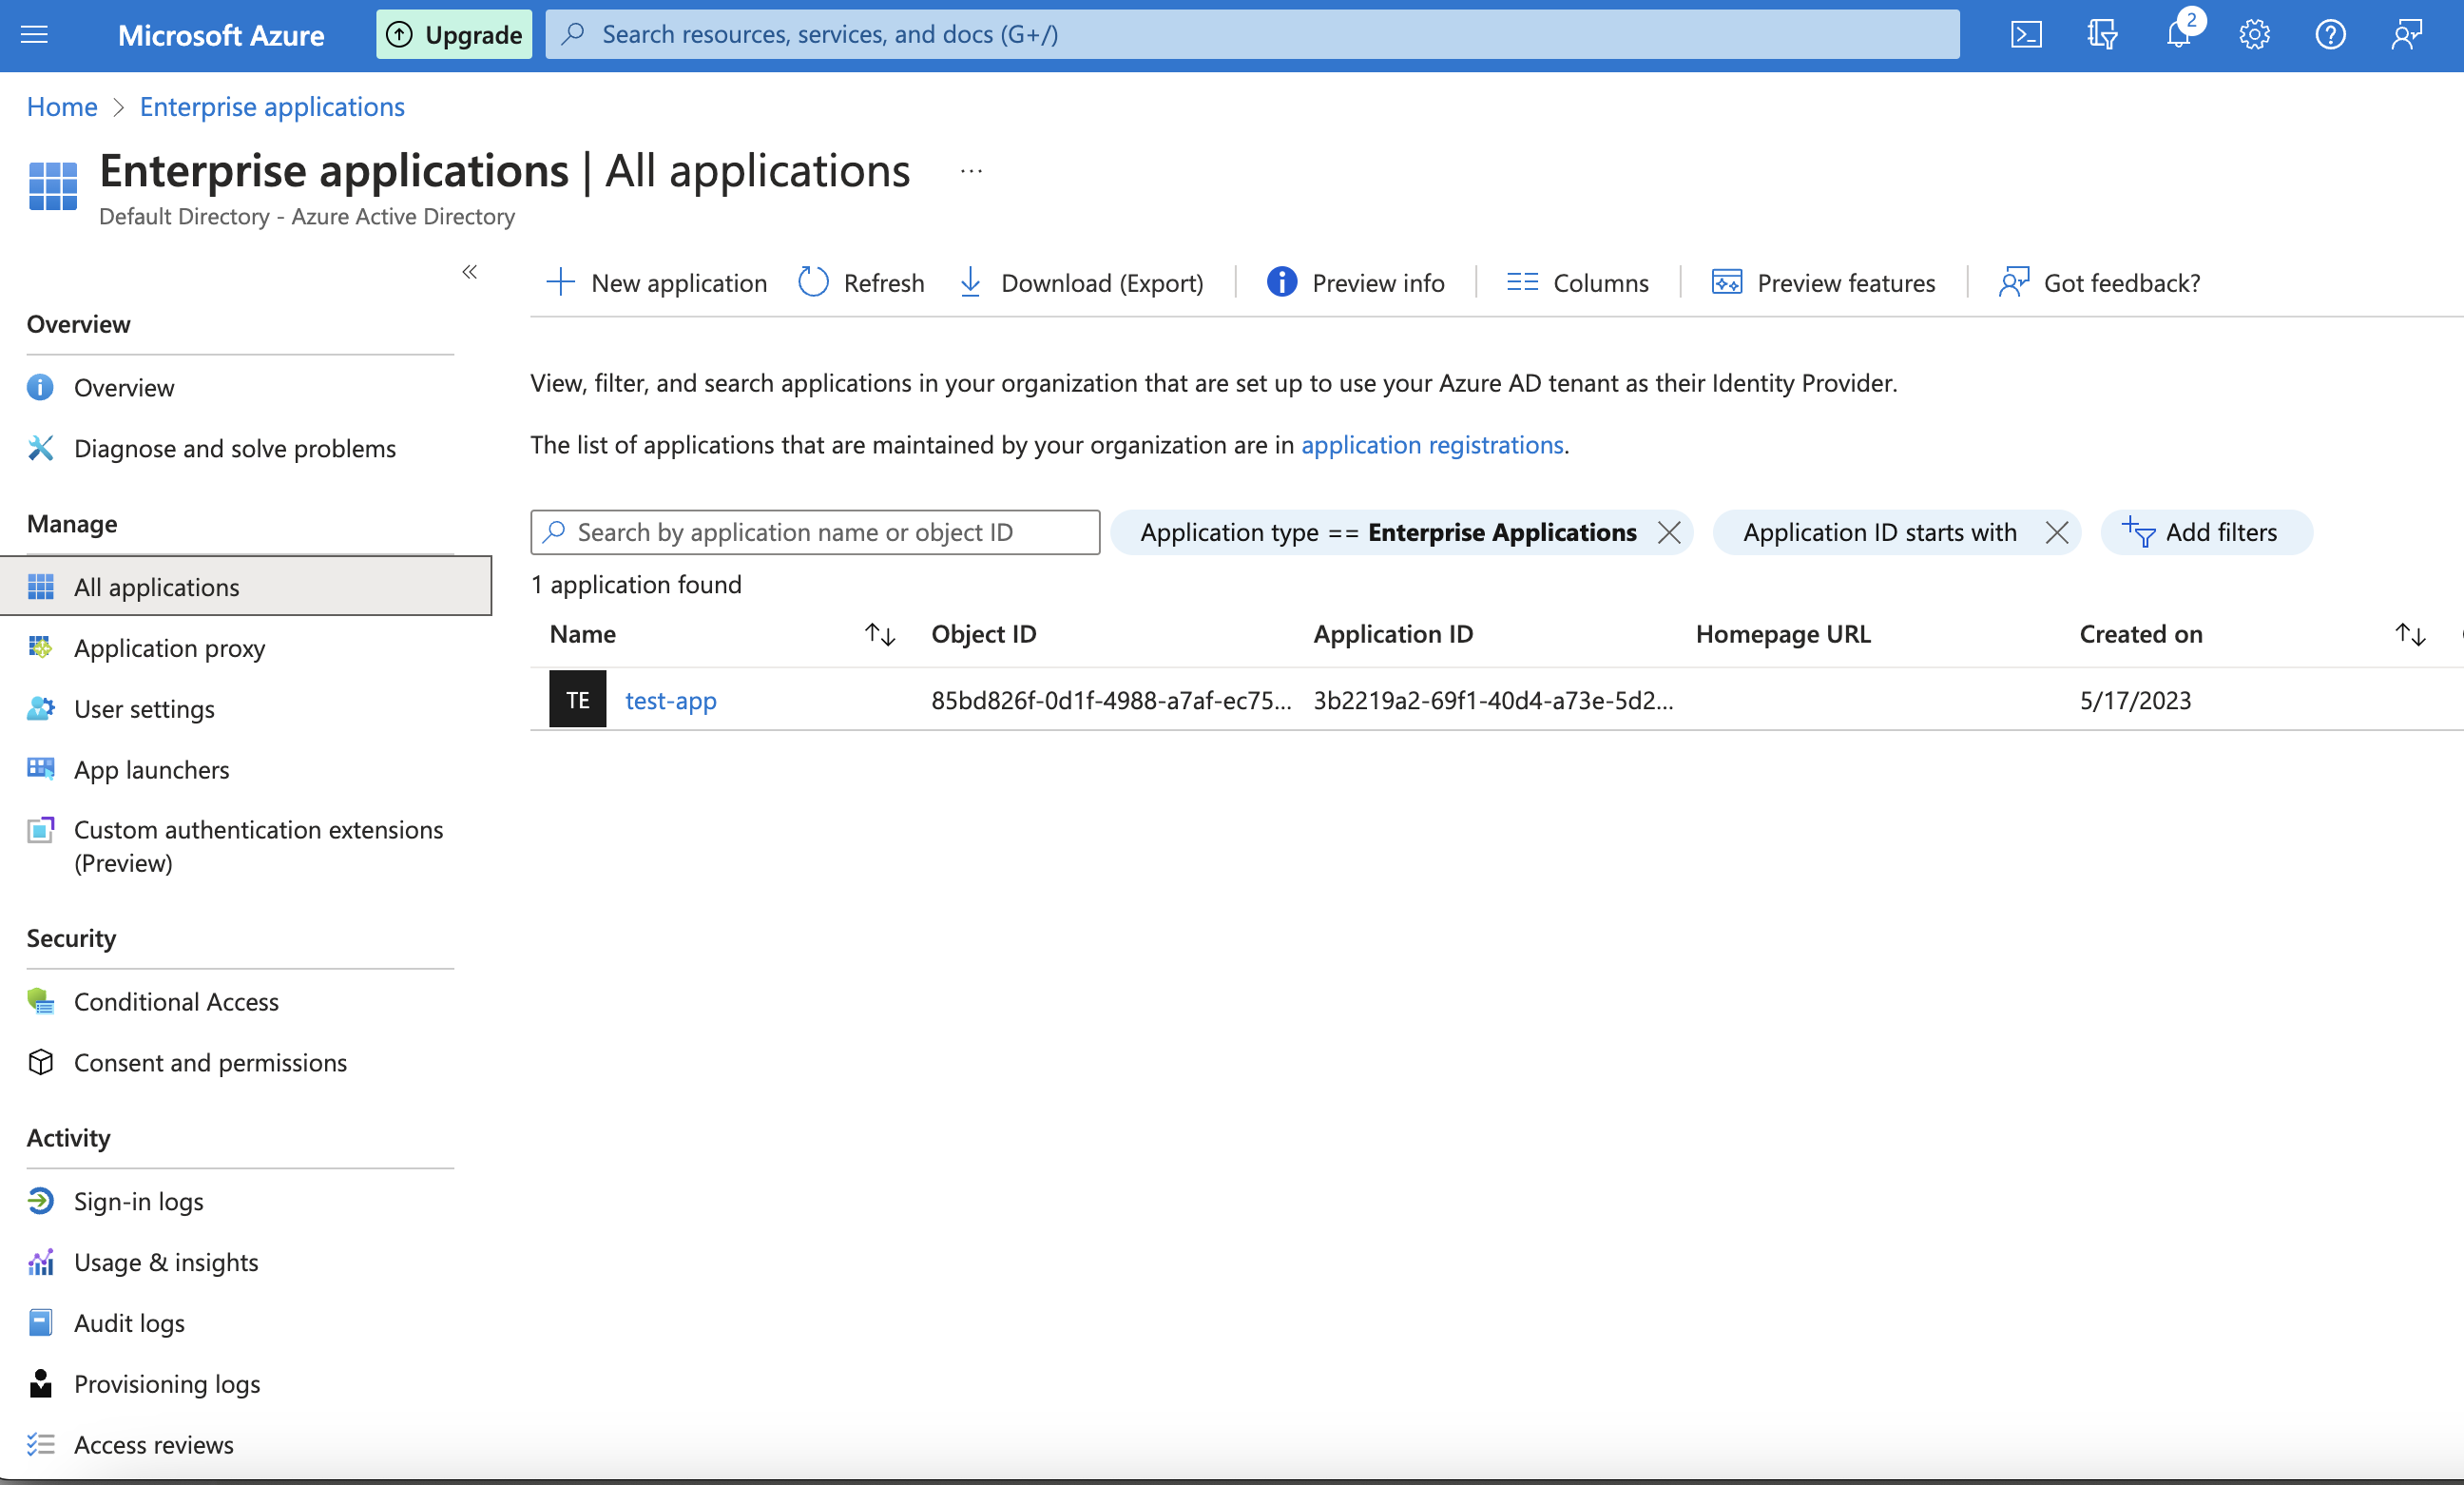
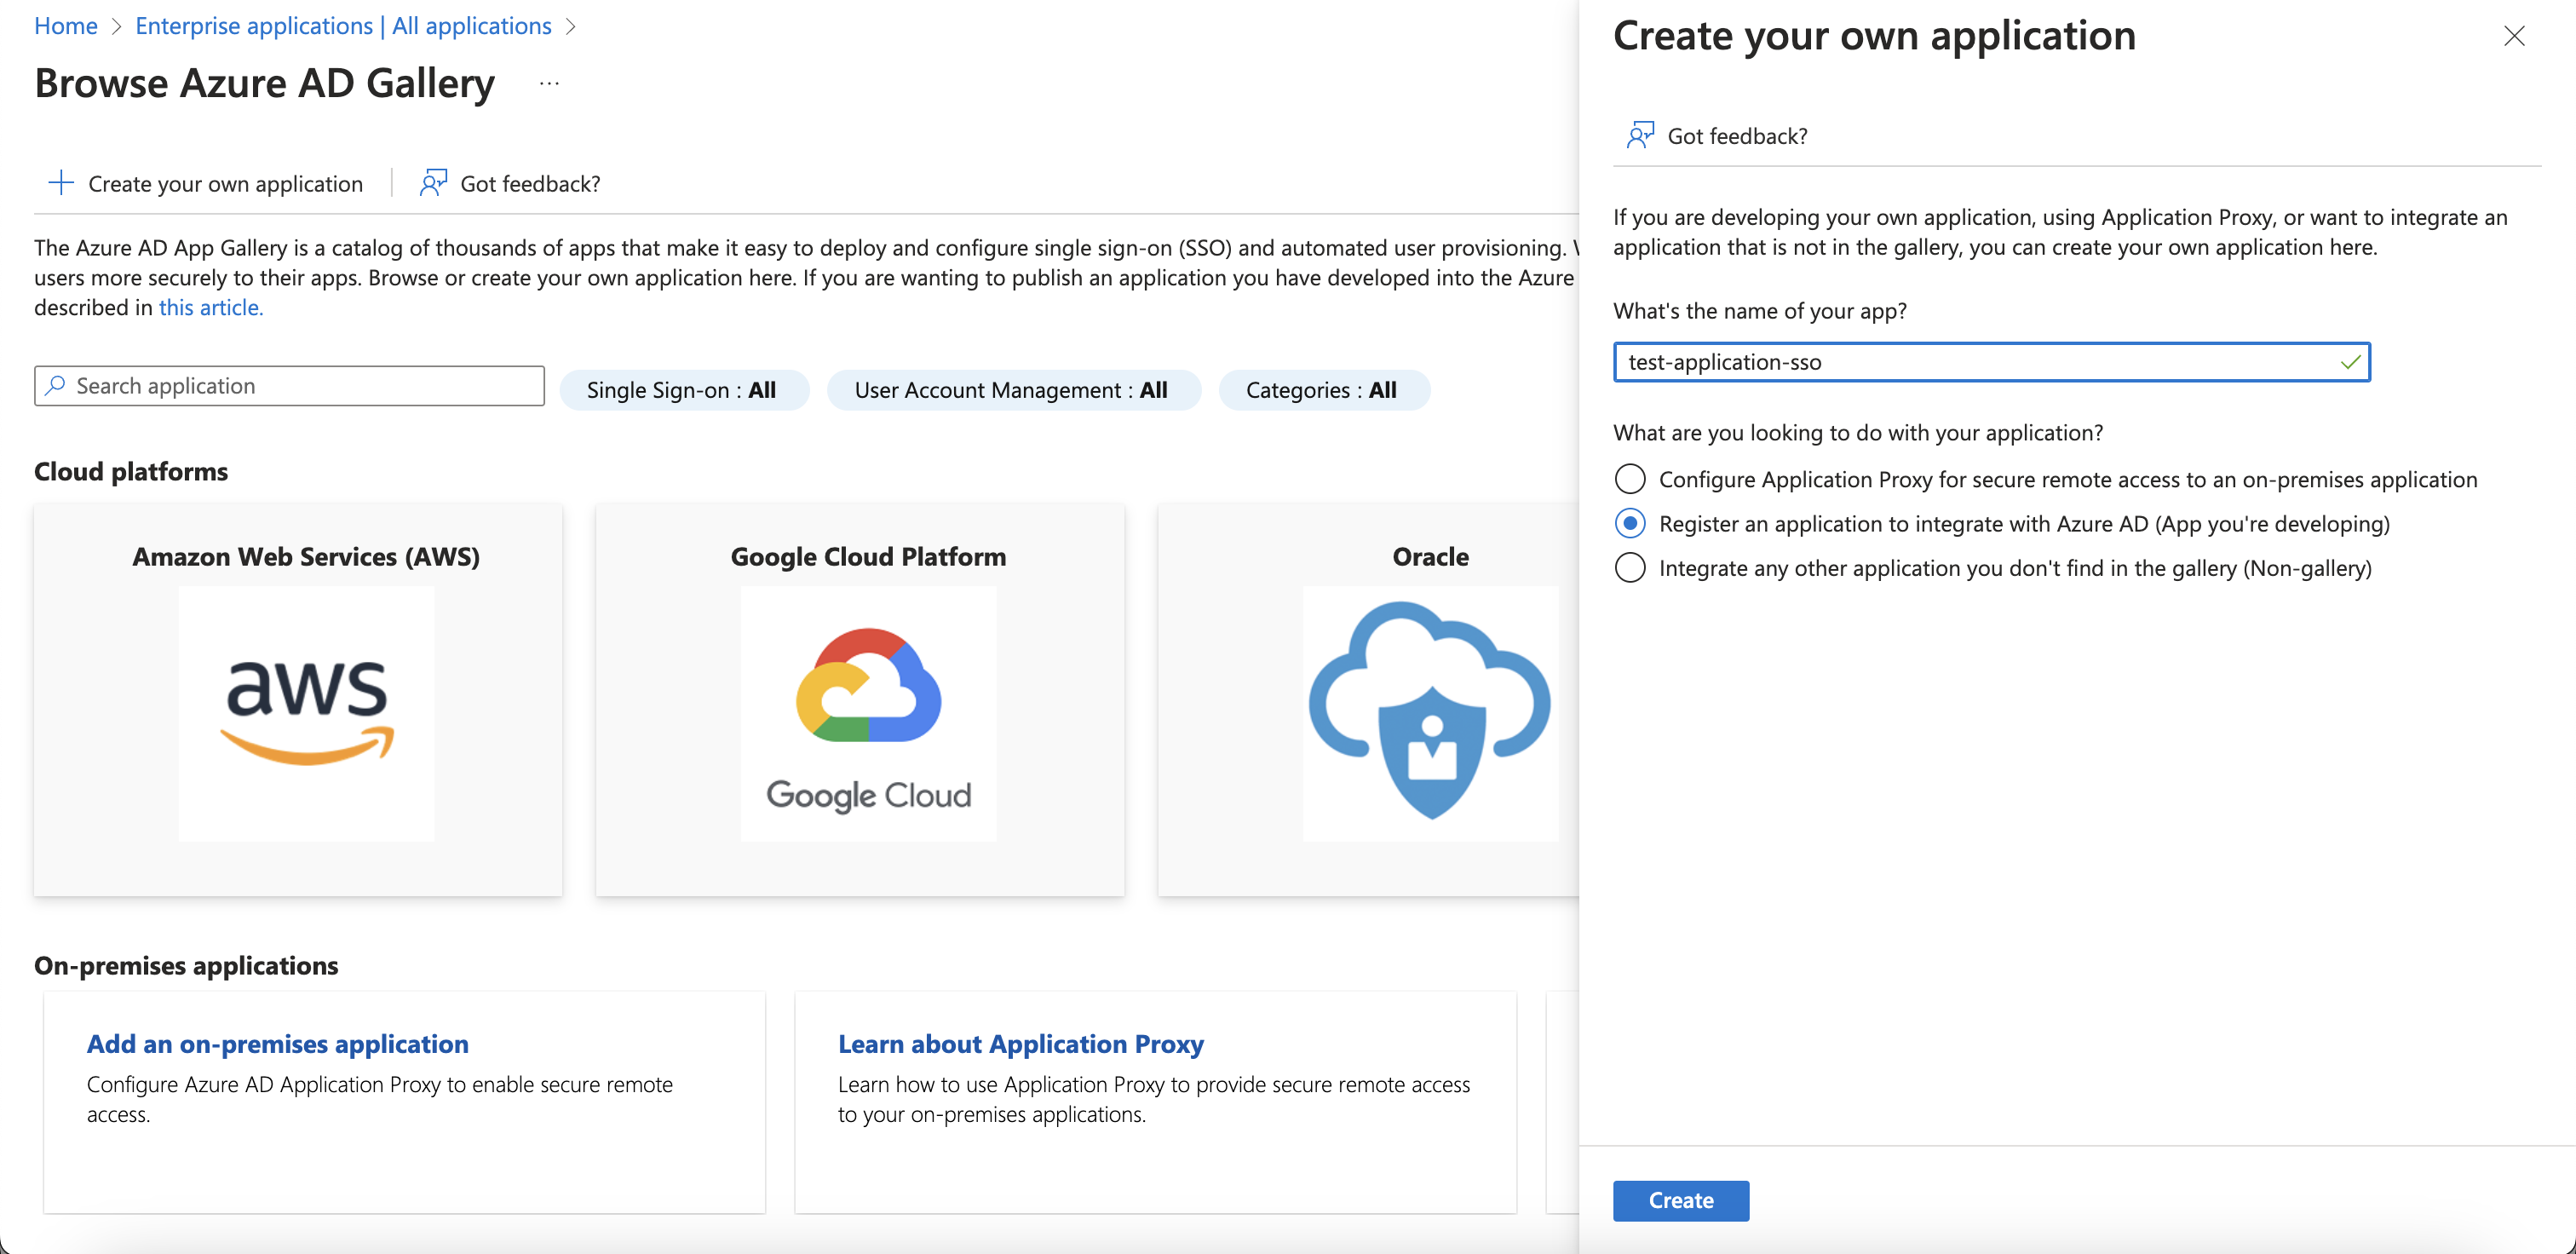
- In Enterprise applications, select New application > + Create your own application.
- Add a name and select Register an application to integrate with Azure AD (App you're developing) from the modal window.
Registering an application
Once the tenant and the app are in place, register a new application.
Follow these steps to create the app registration:
If you have access to multiple tenants, use the Directories + subscriptions filter in the top menu to switch to the tenant in which you want to register the application.
Search for and select Azure Active Directory.
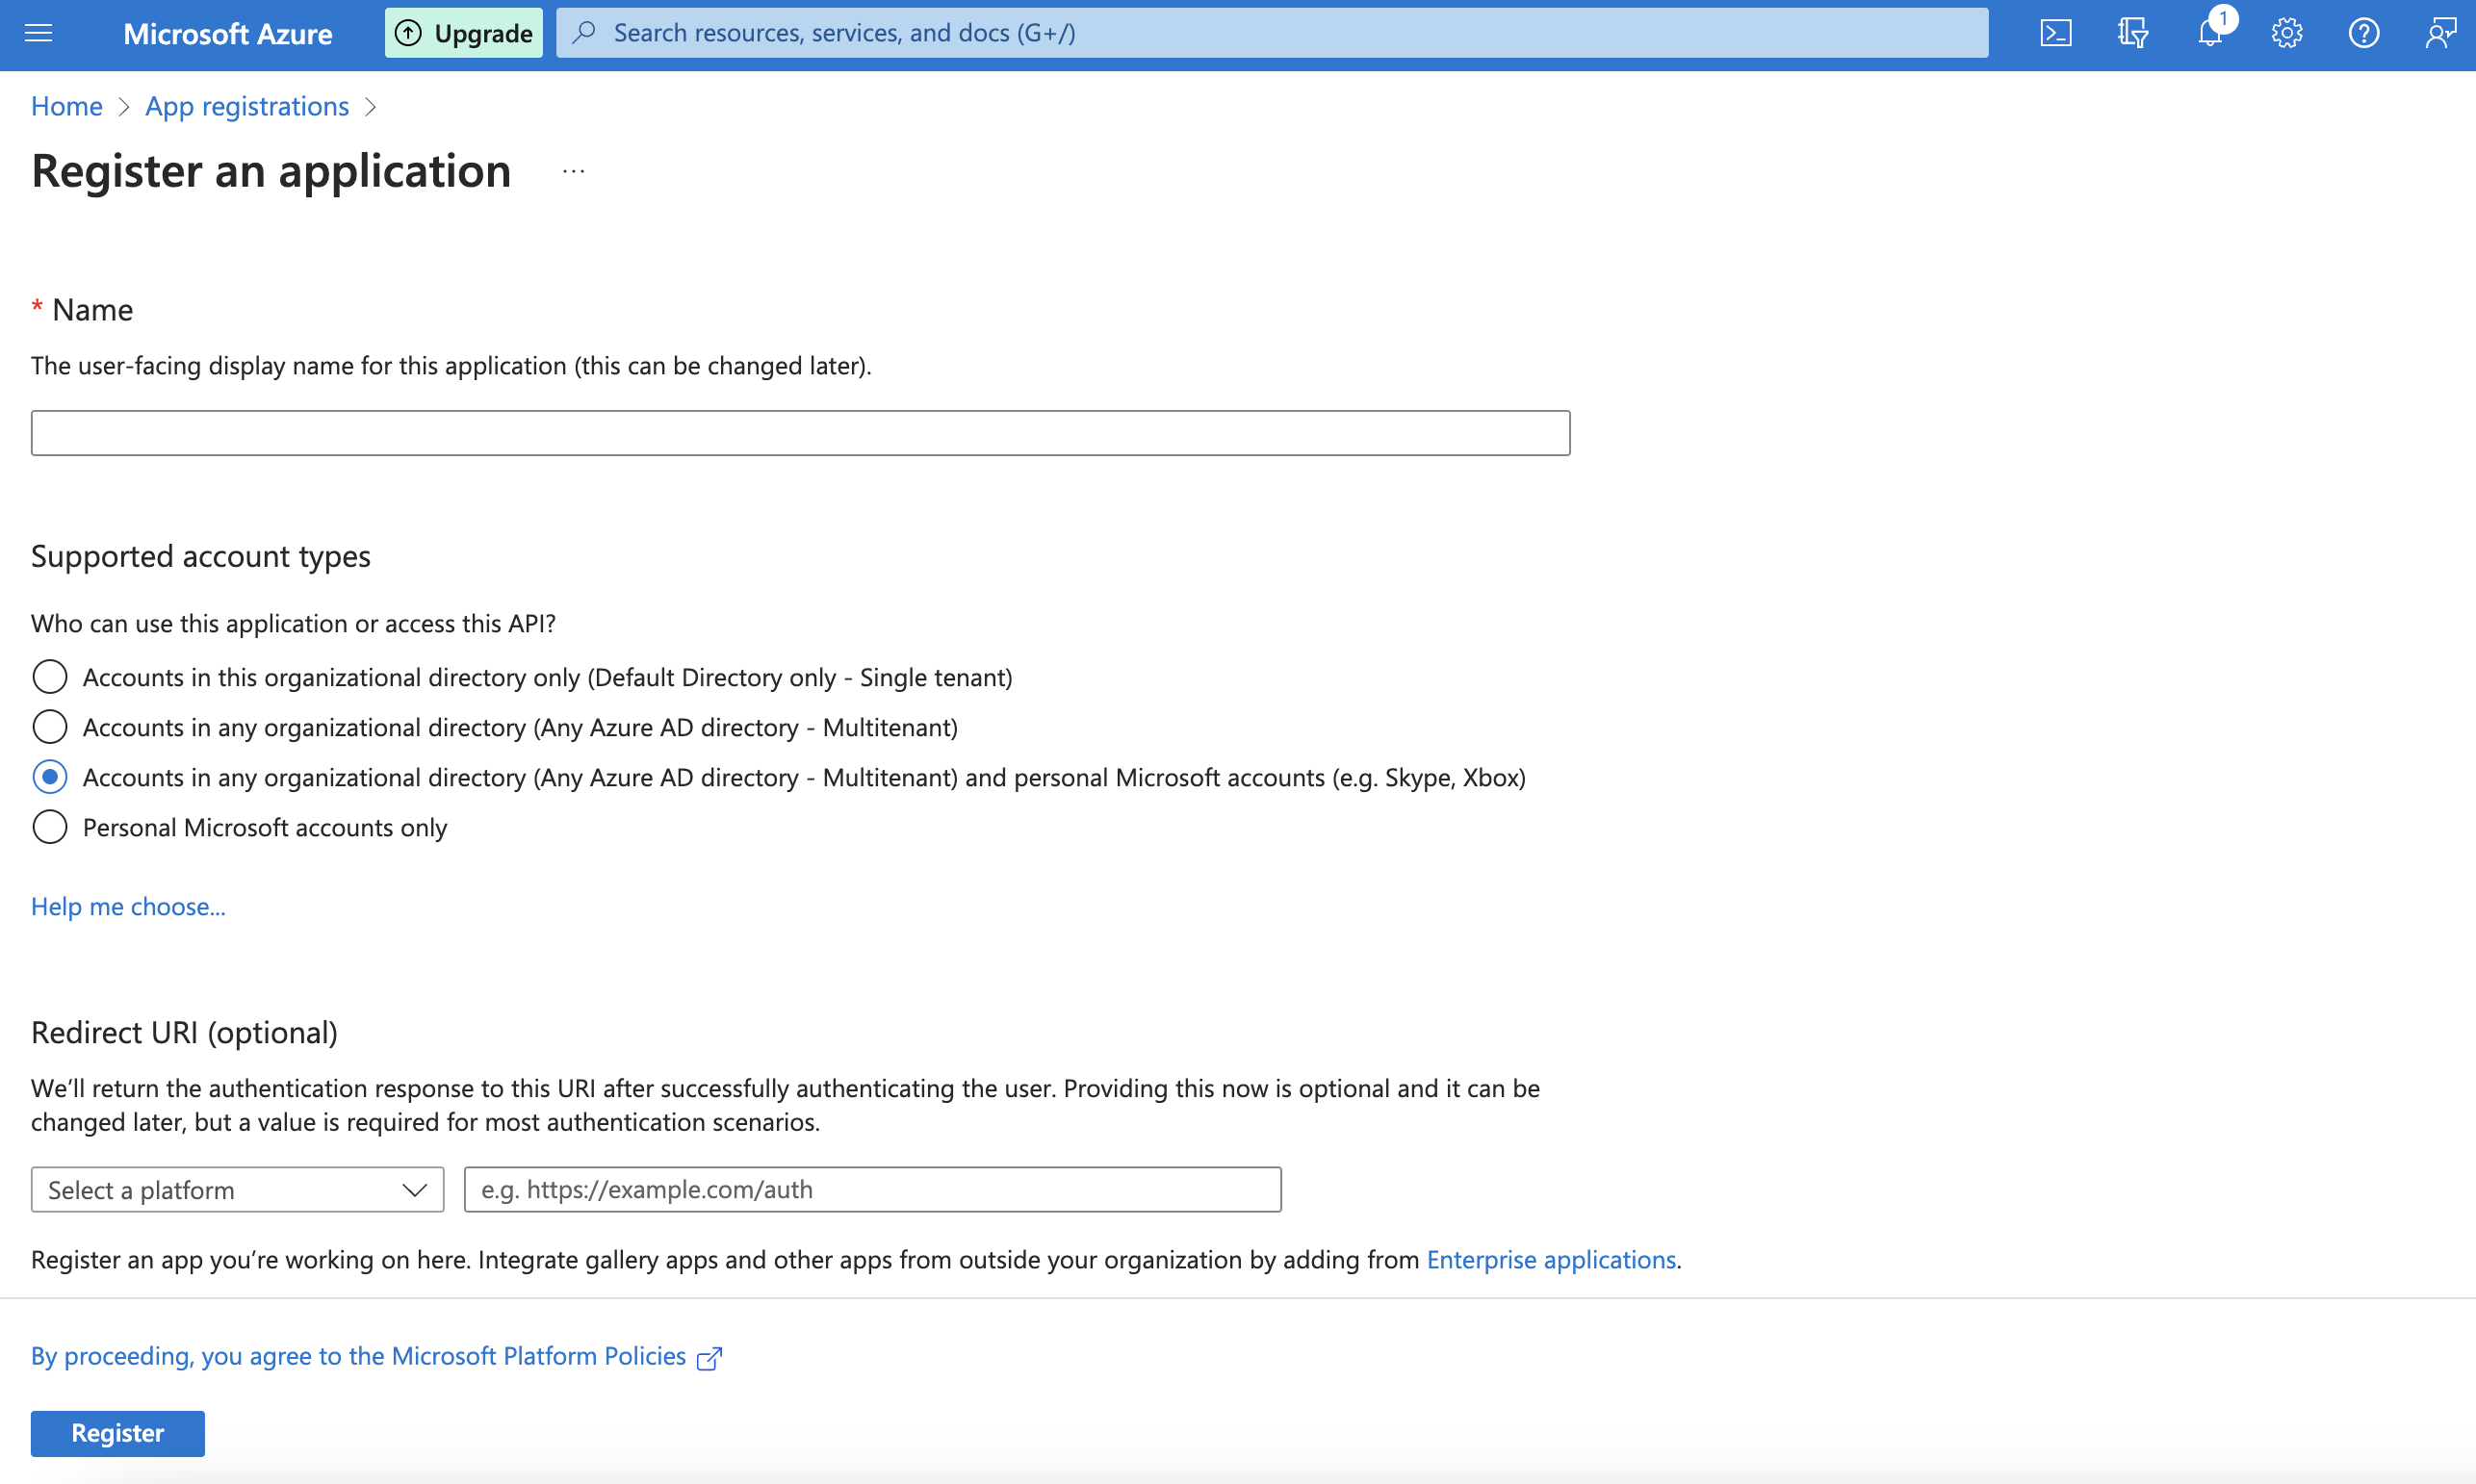
Under Manage, select App registrations > New registration.
Enter a display Name for your application. Users of your application might see the display name when they use the app, for example during sign-in. You can change the display name at any time and multiple app registrations can share the same name. The app registration's automatically generated Application (client) ID, not its display name, uniquely identifies your app within the identity platform.
Specify who can use the application. If you require the application to support both active directory and personal microsoft accounts select Accounts in any organizational directory and personal Microsoft accounts
Enter the Redirect URI
https://api.slashid.com/oauth/callbackSelect Register to complete the initial app registration.
Enable the app, in the Azure portal navigate to Azure Active Directory > Enterprise applications and select the app. Then on the Properties page toggle Visible to users? to Yes.
Create client credentials
Now that the app has been registered, you will see the following information in App Registration

The Application (client) ID is the OIDC client credential; we now need to create a client secret.
In the Azure portal, in App registrations, select your application.
Select Certificates & secrets > Client secrets > New client secret.
Add a description for your client secret.
Select an expiration for the secret or specify a custom lifetime.
- Client secret lifetime is limited to two years (24 months) or less. You can't specify a custom lifetime longer than 24 months.
- Microsoft generally recommends setting an expiration value of less than 12 months.
Select Add.
Record the secret's value for use in your client application code. This secret value is never displayed again after you leave this page.
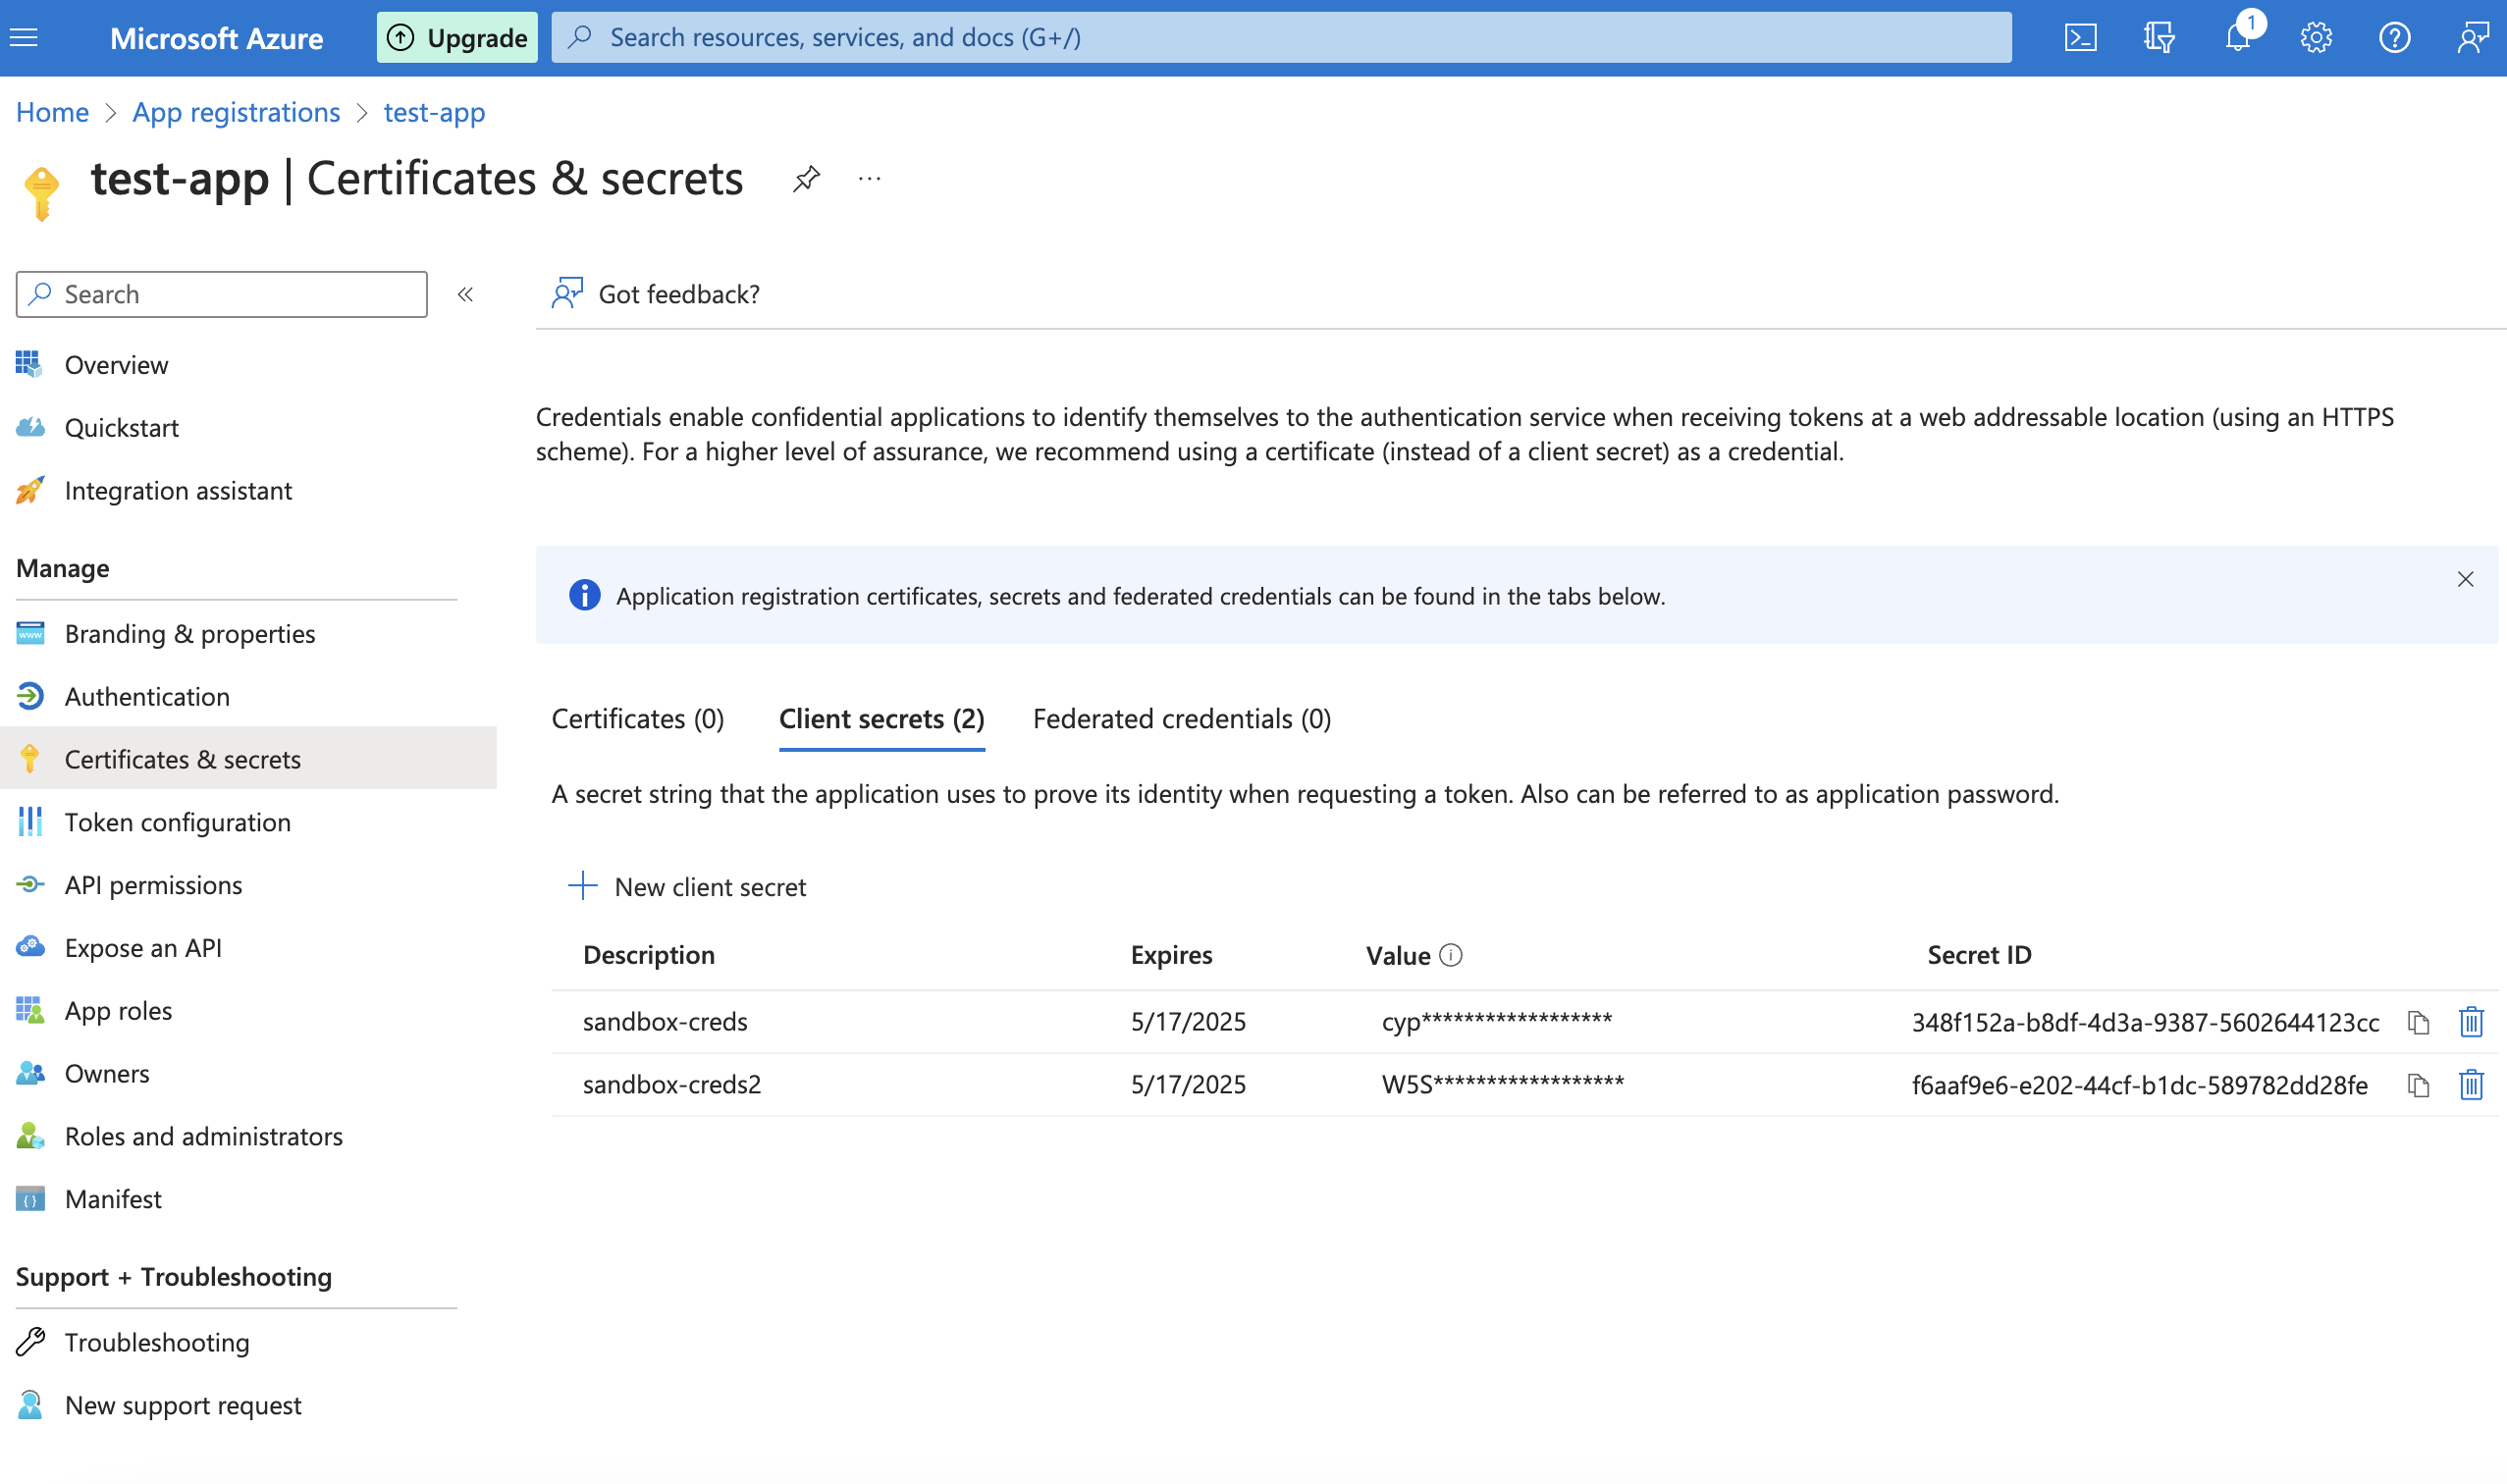
The secret value (NB: the value, not the Secret ID) is the client secret needed for OIDC.
Grant the app the right permissions
Before you can use OIDC, you need to add the required scopes to the app registration.
- In the Azure portal, in App registrations, select your application.
- Navigate to API permissions
- Select + Add a permission > Microsoft Graph > Delegated Permissions > OpenId permissions and tick
email,openid,profile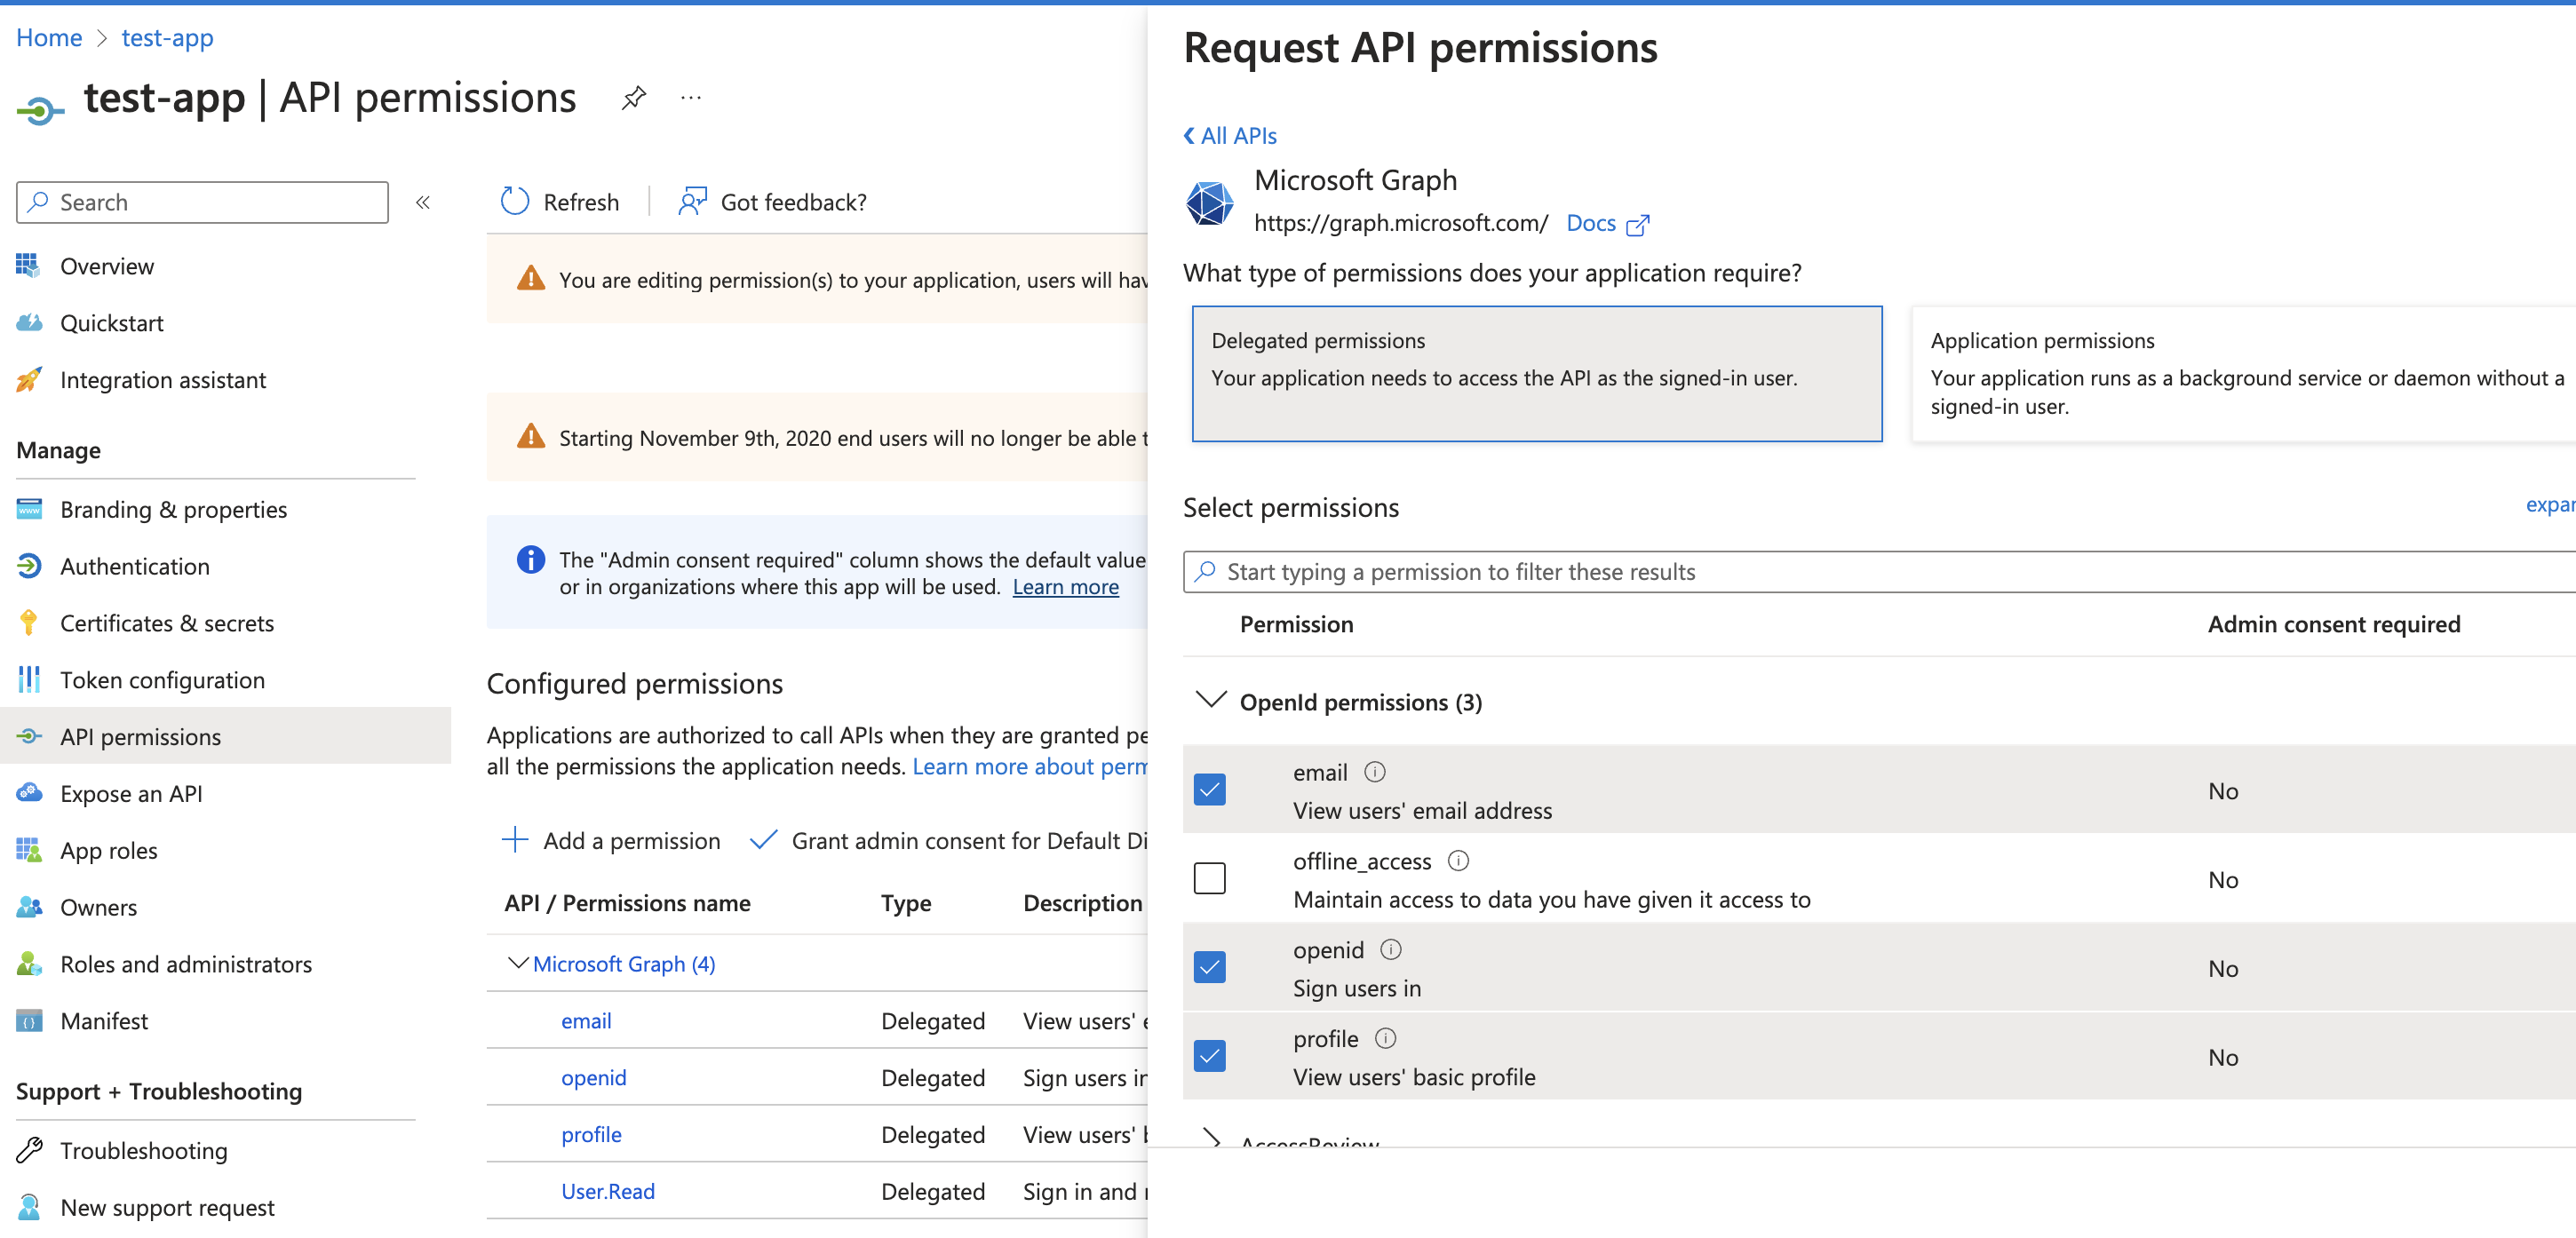
- Select + Add a permission > Microsoft Graph > Delegated Permissions > User and tick
User.Read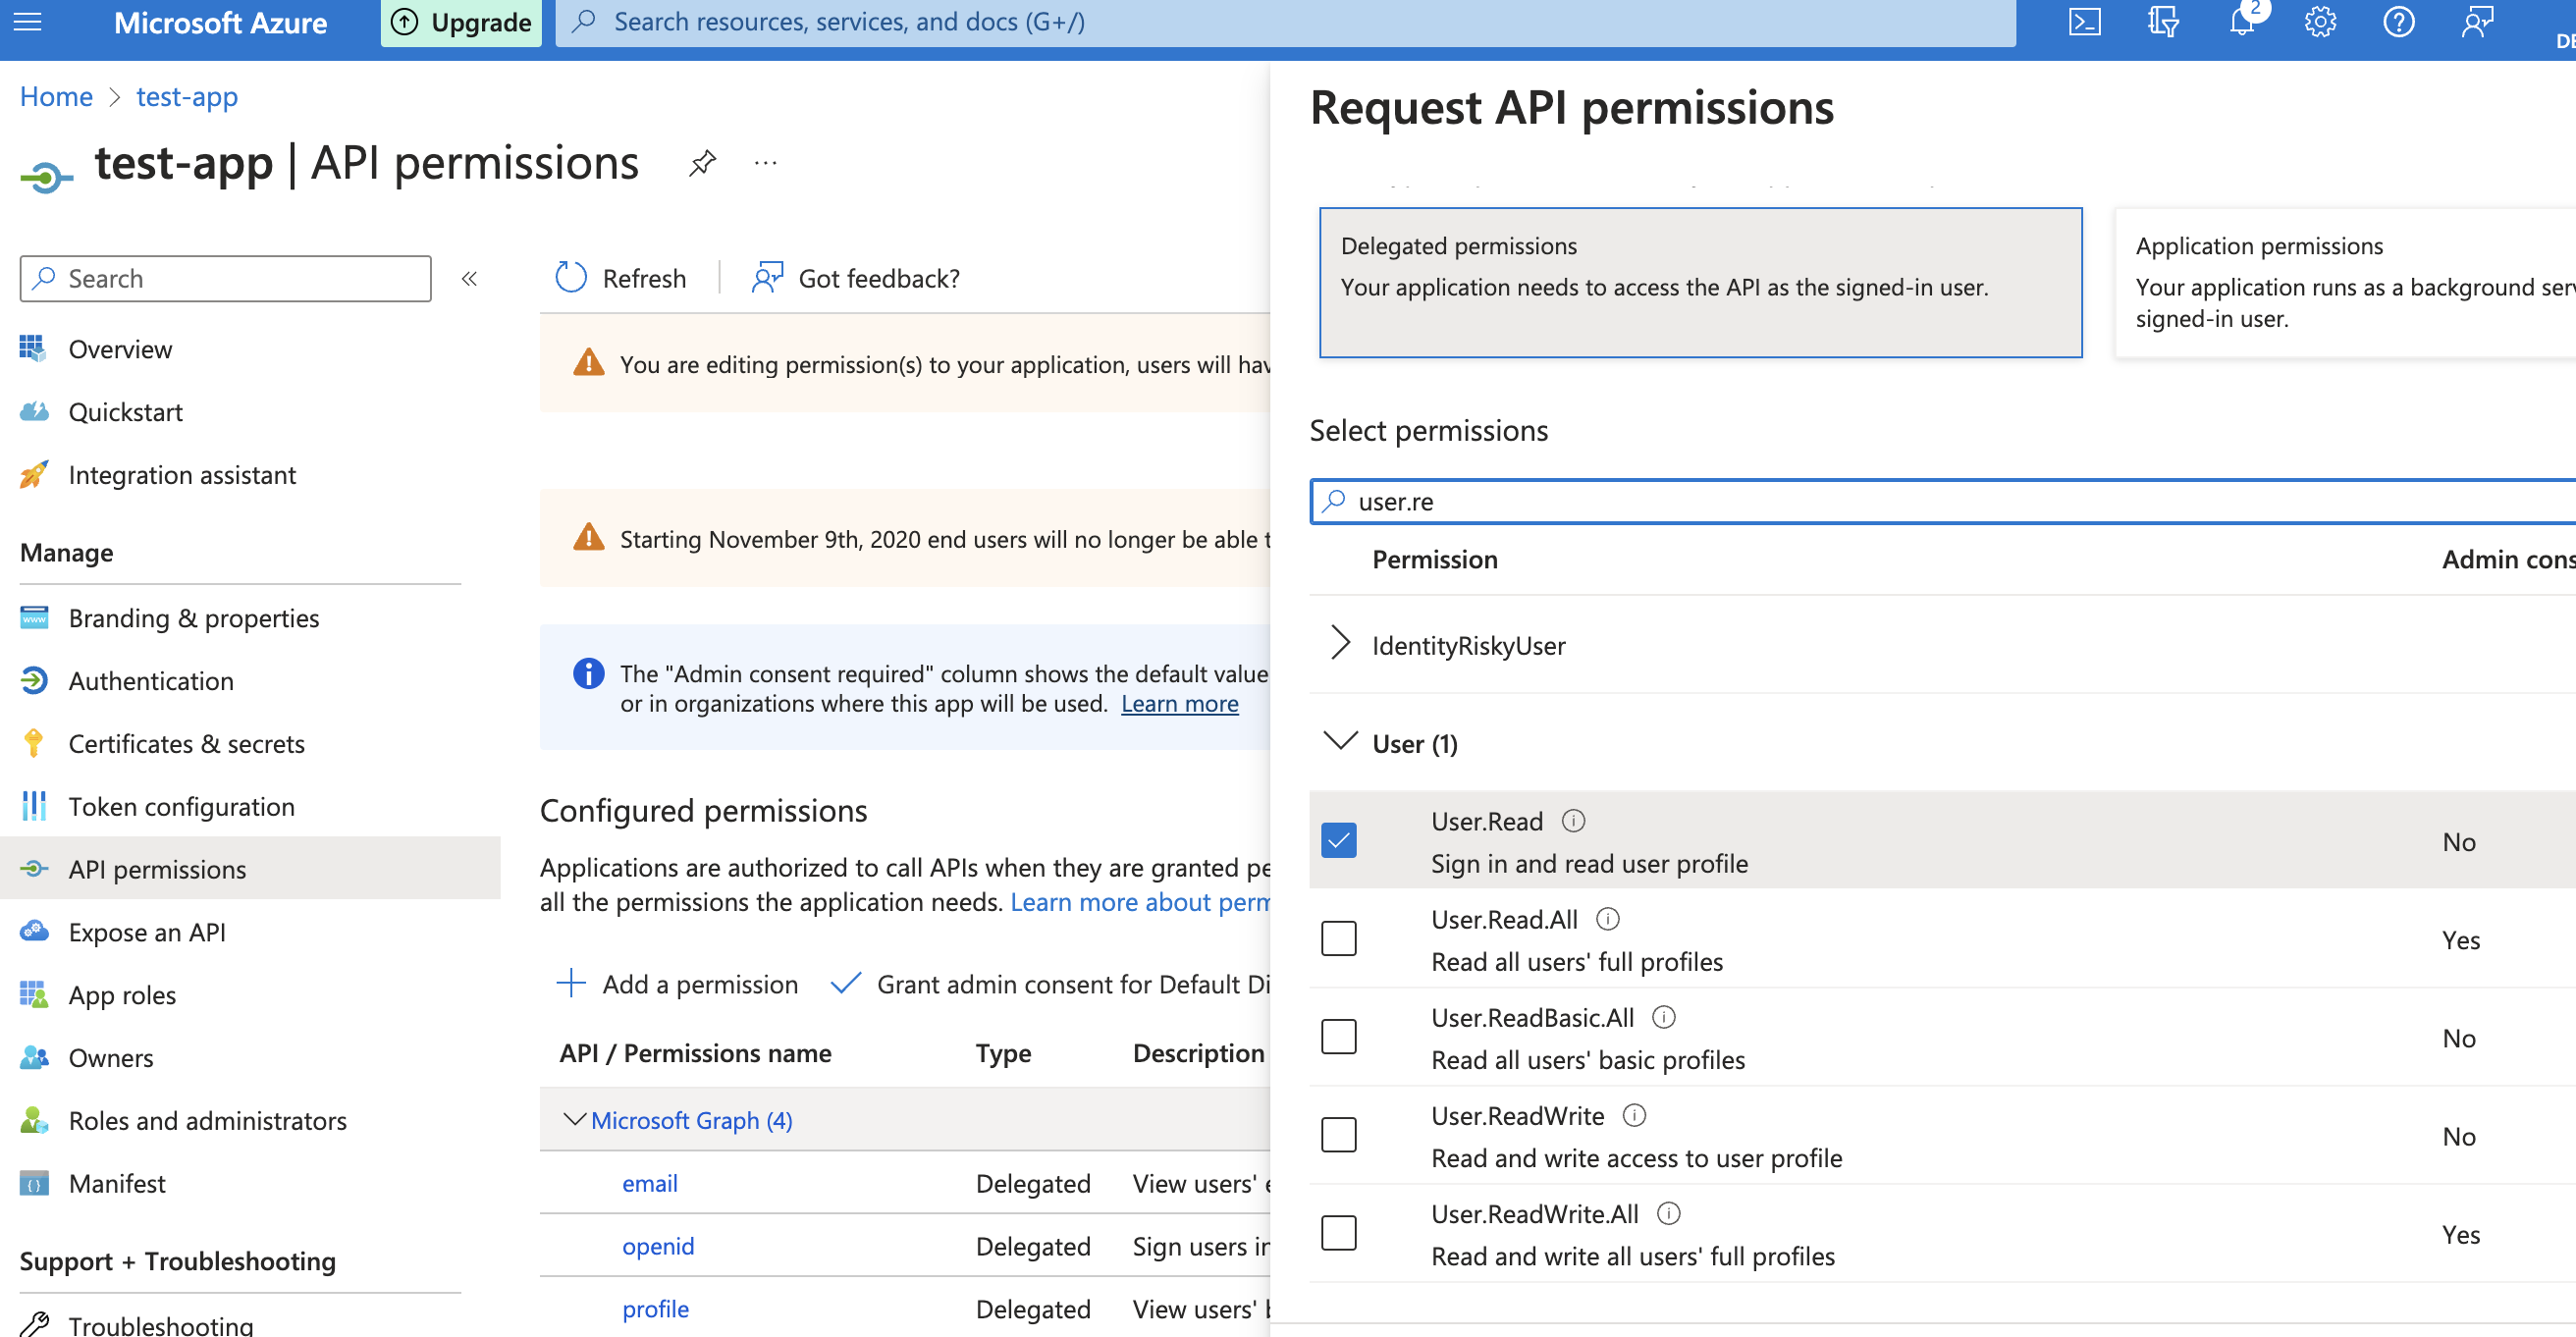
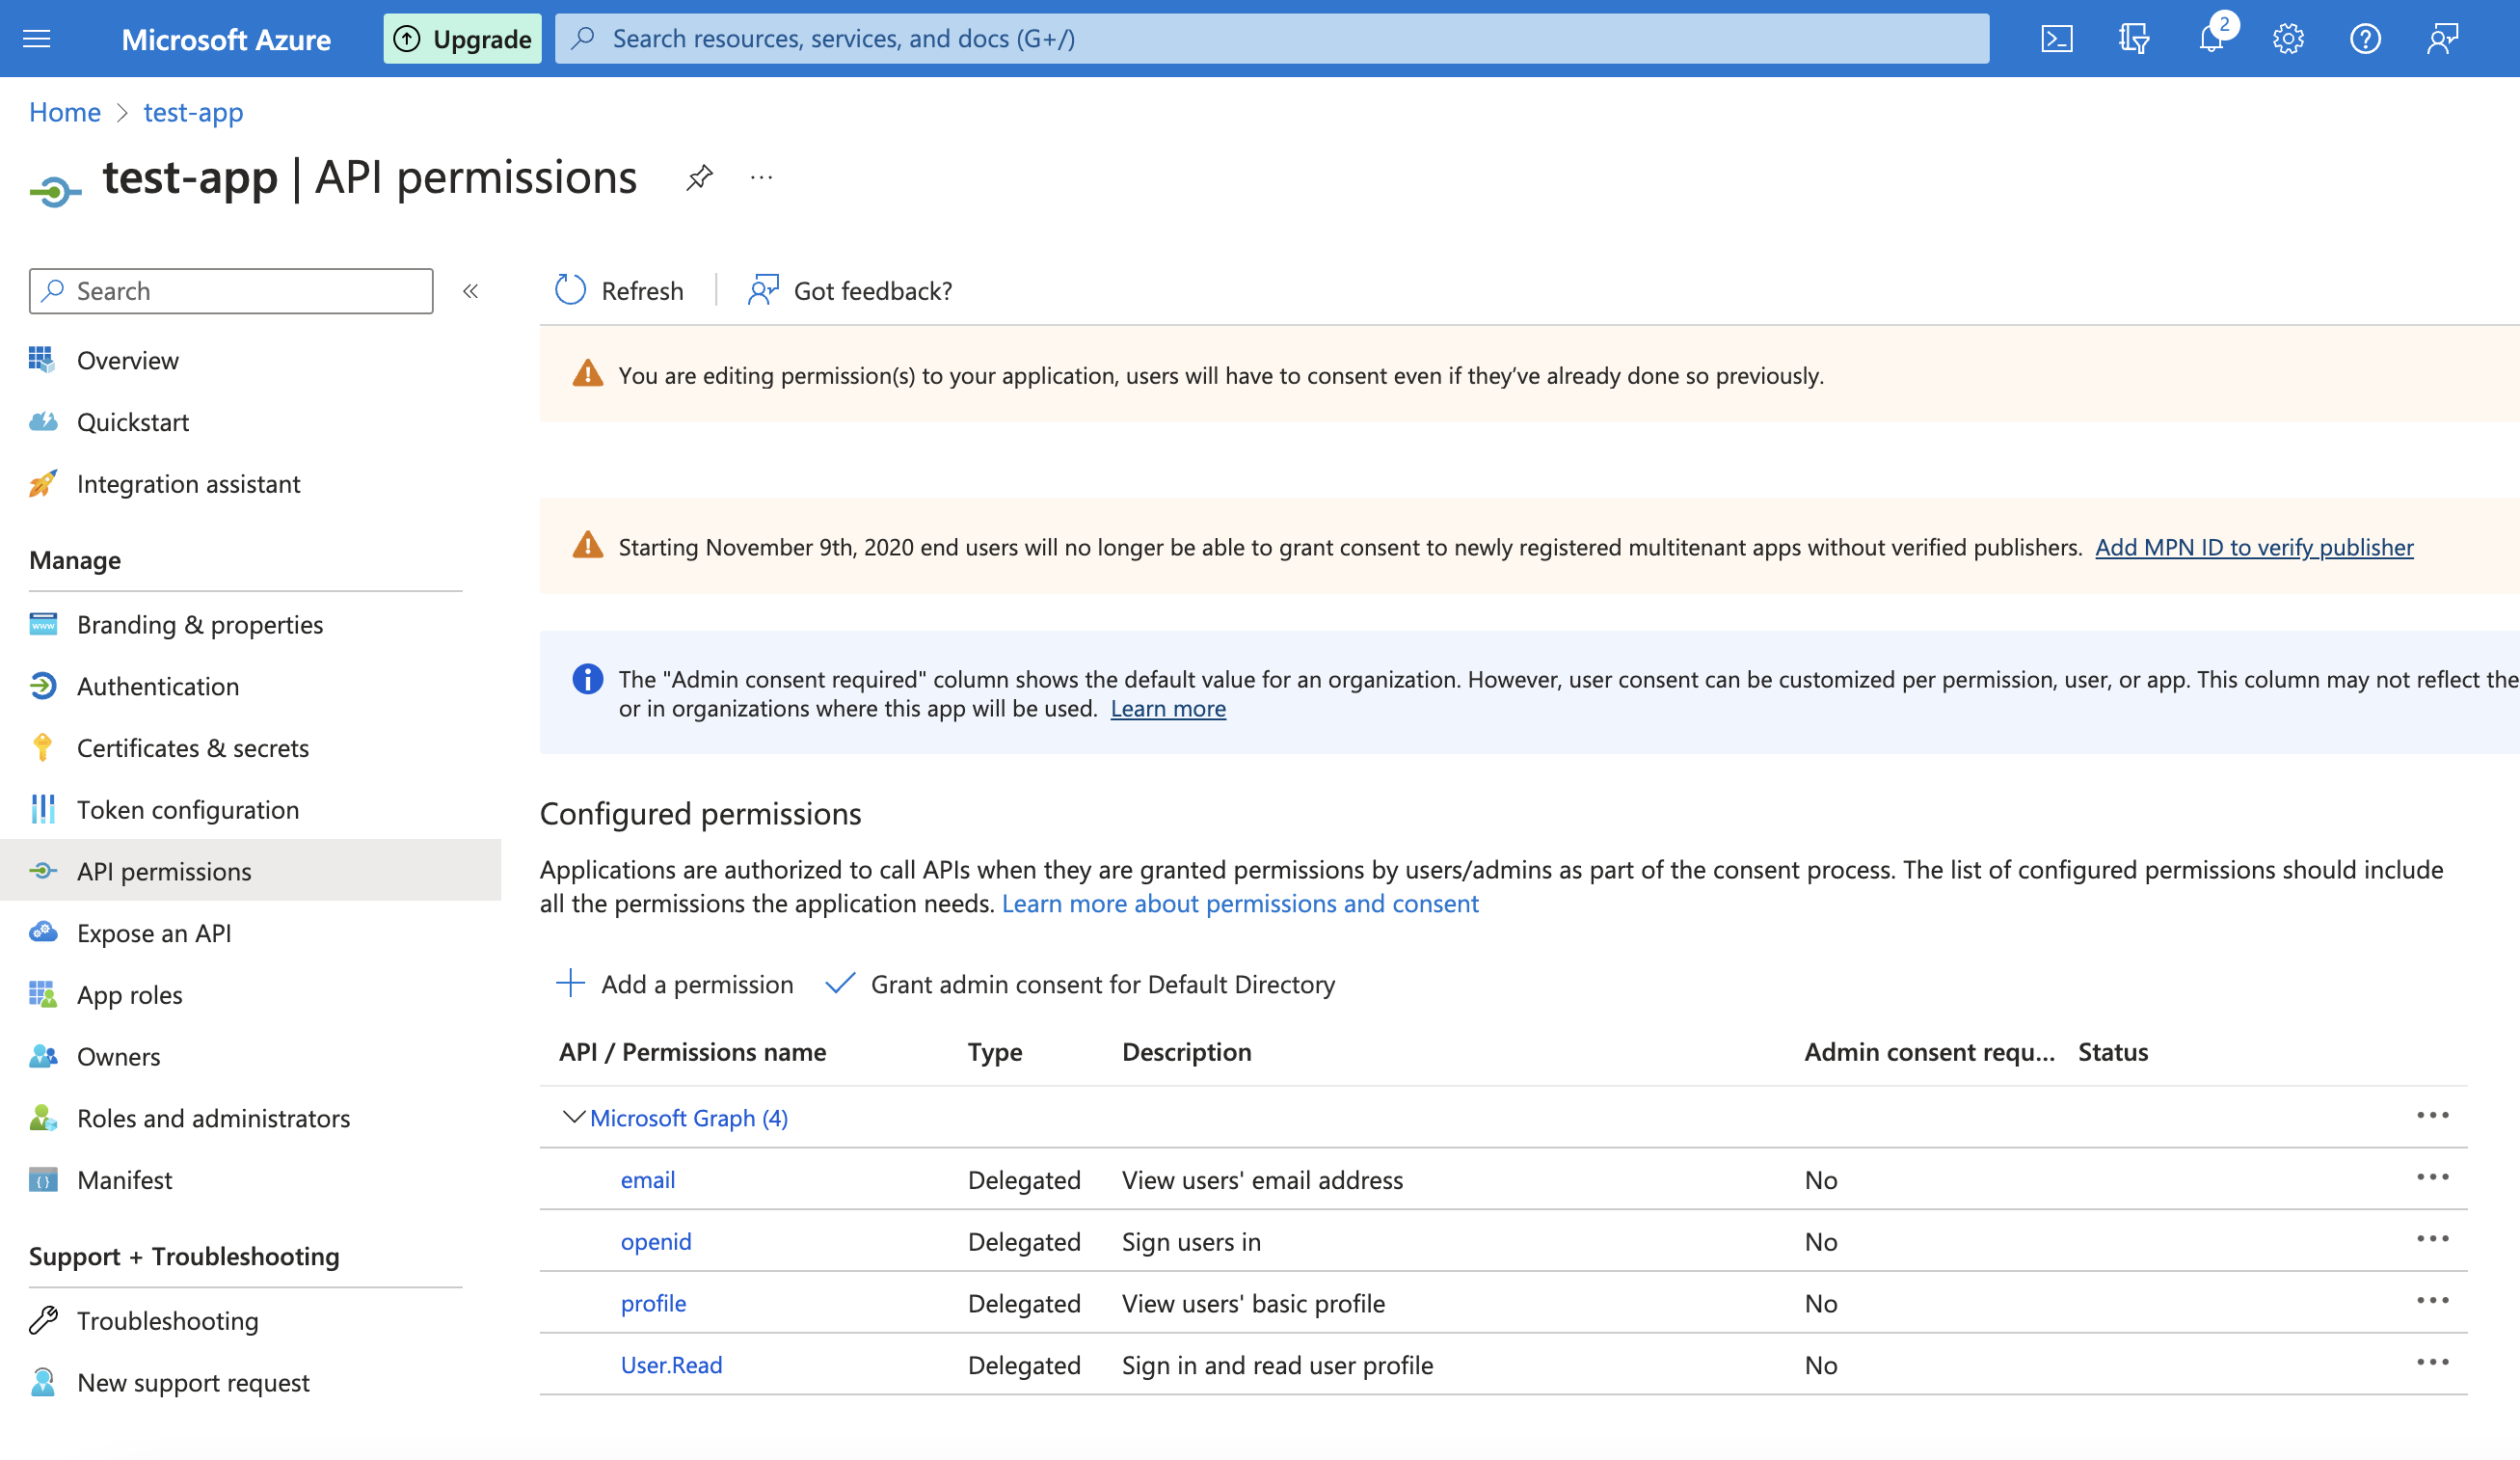
The end result is the following set of permissions:
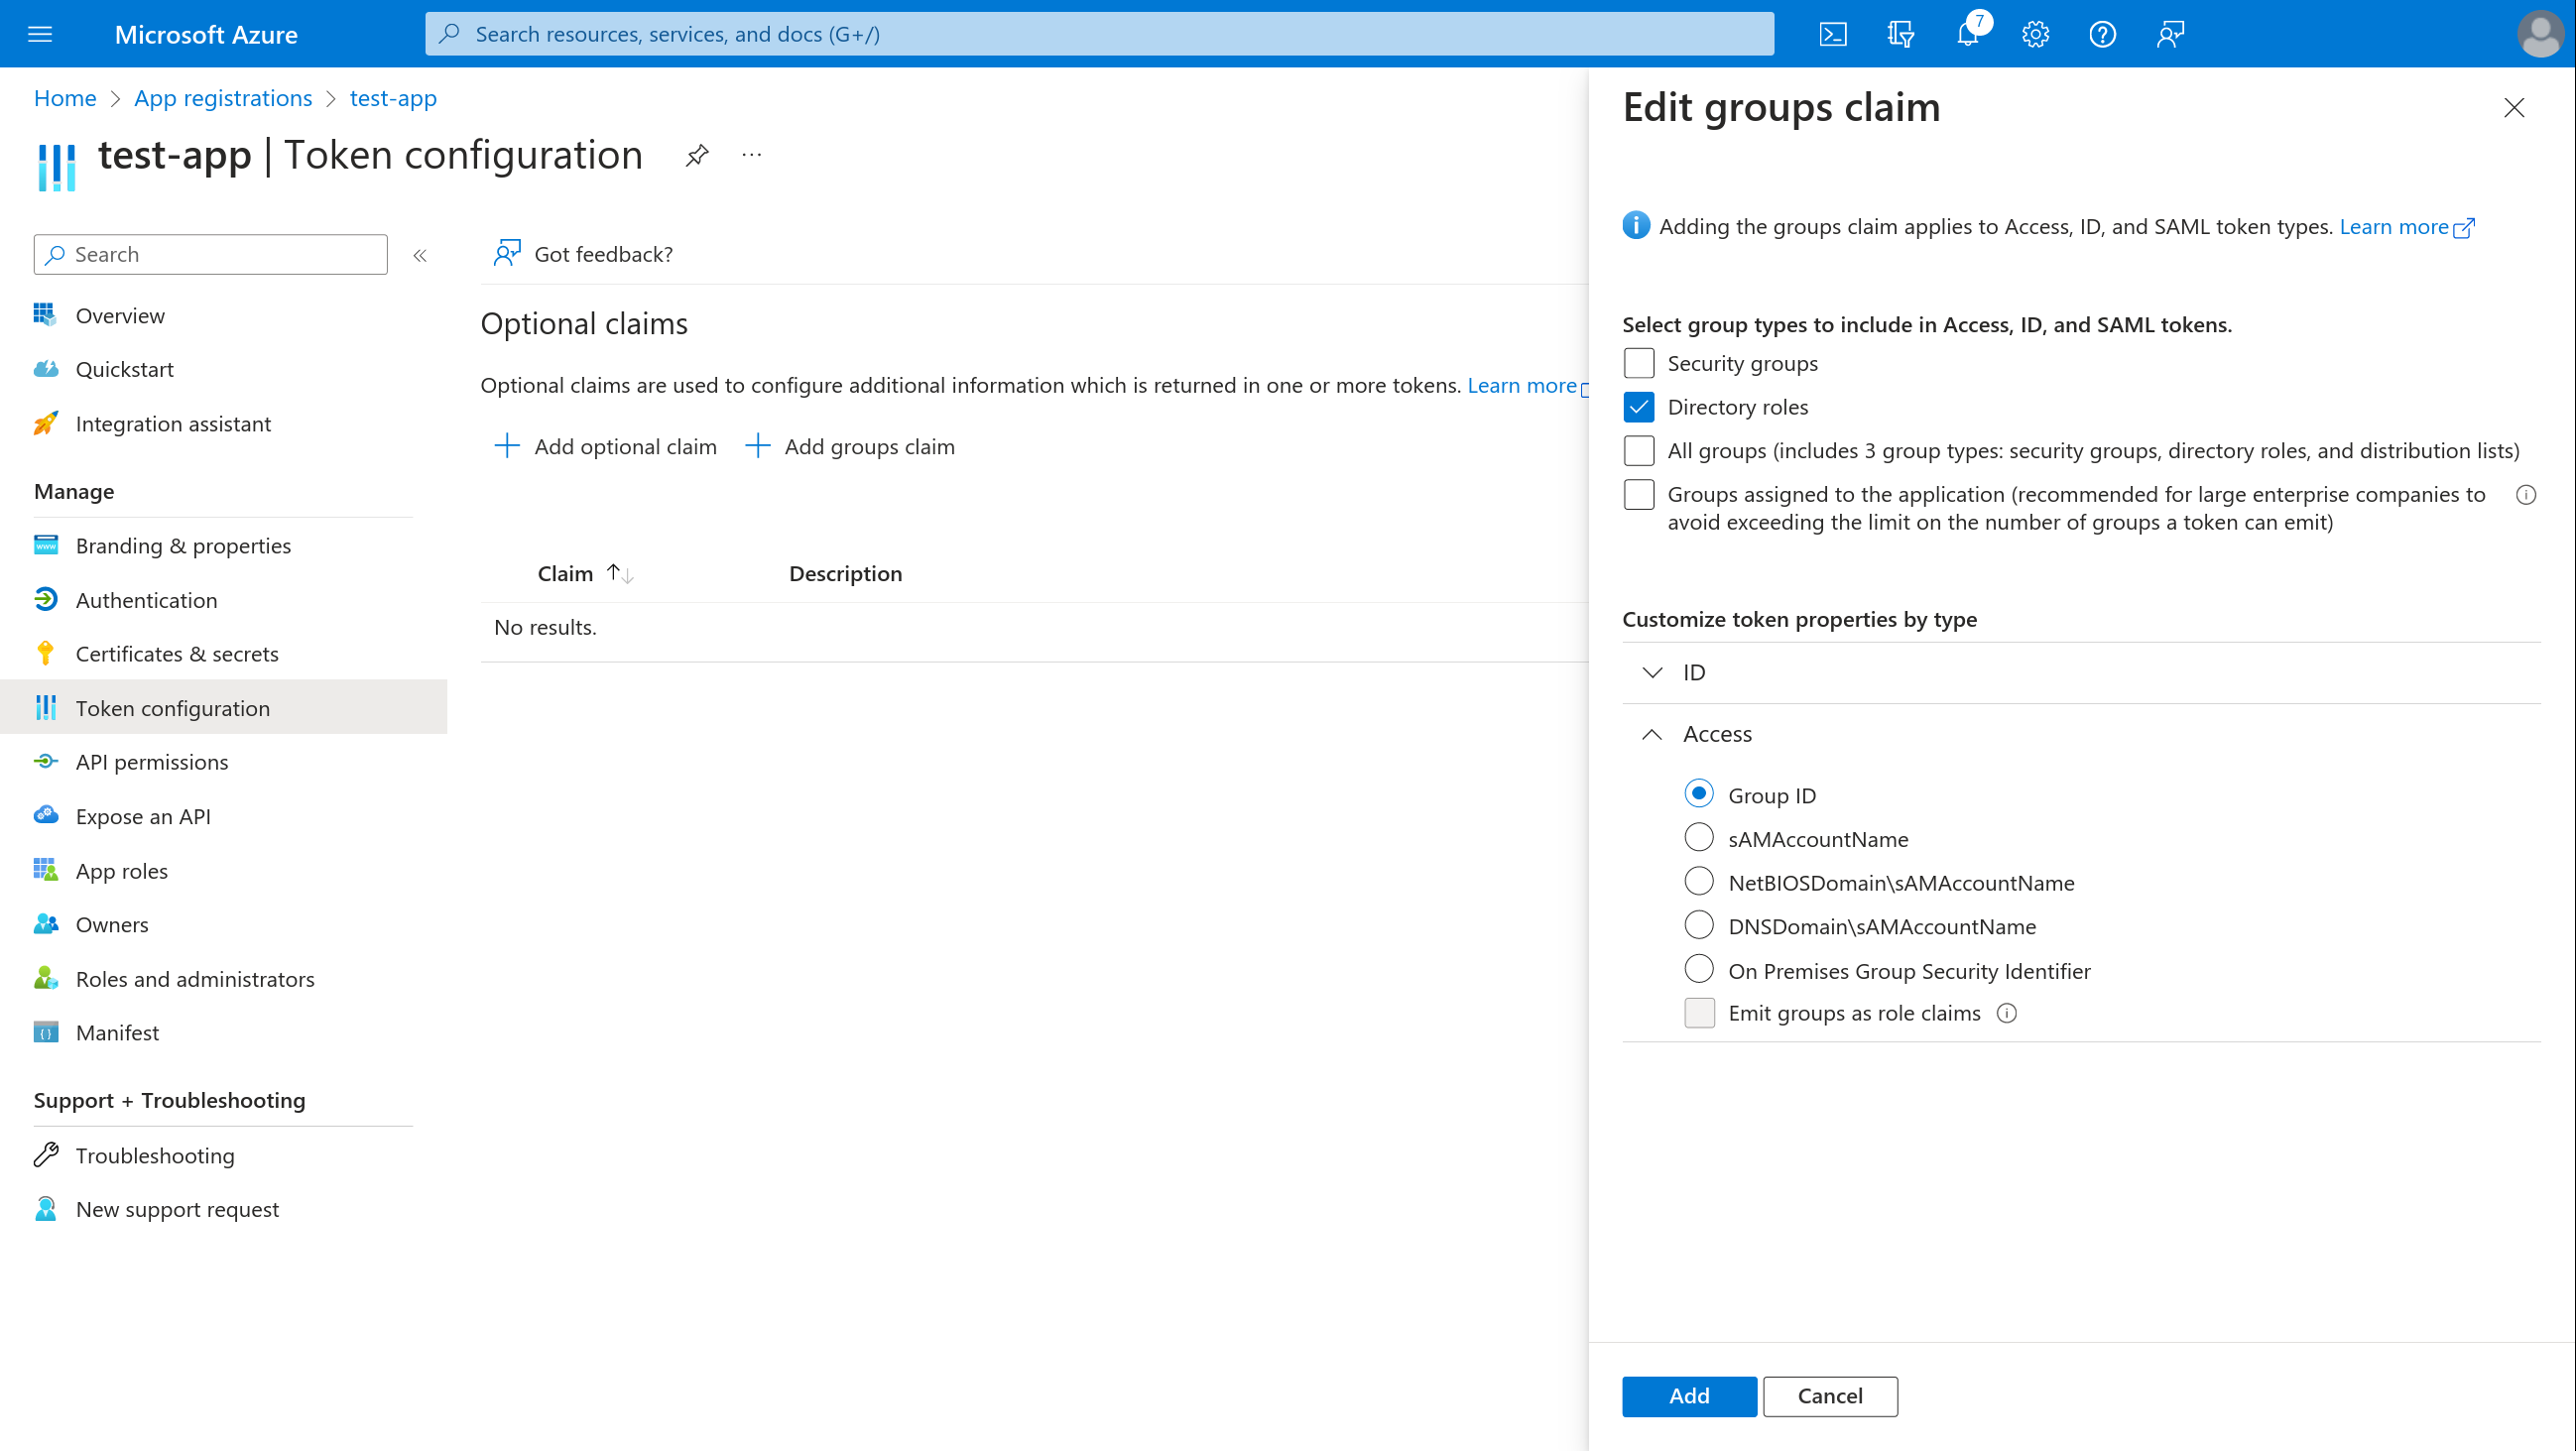
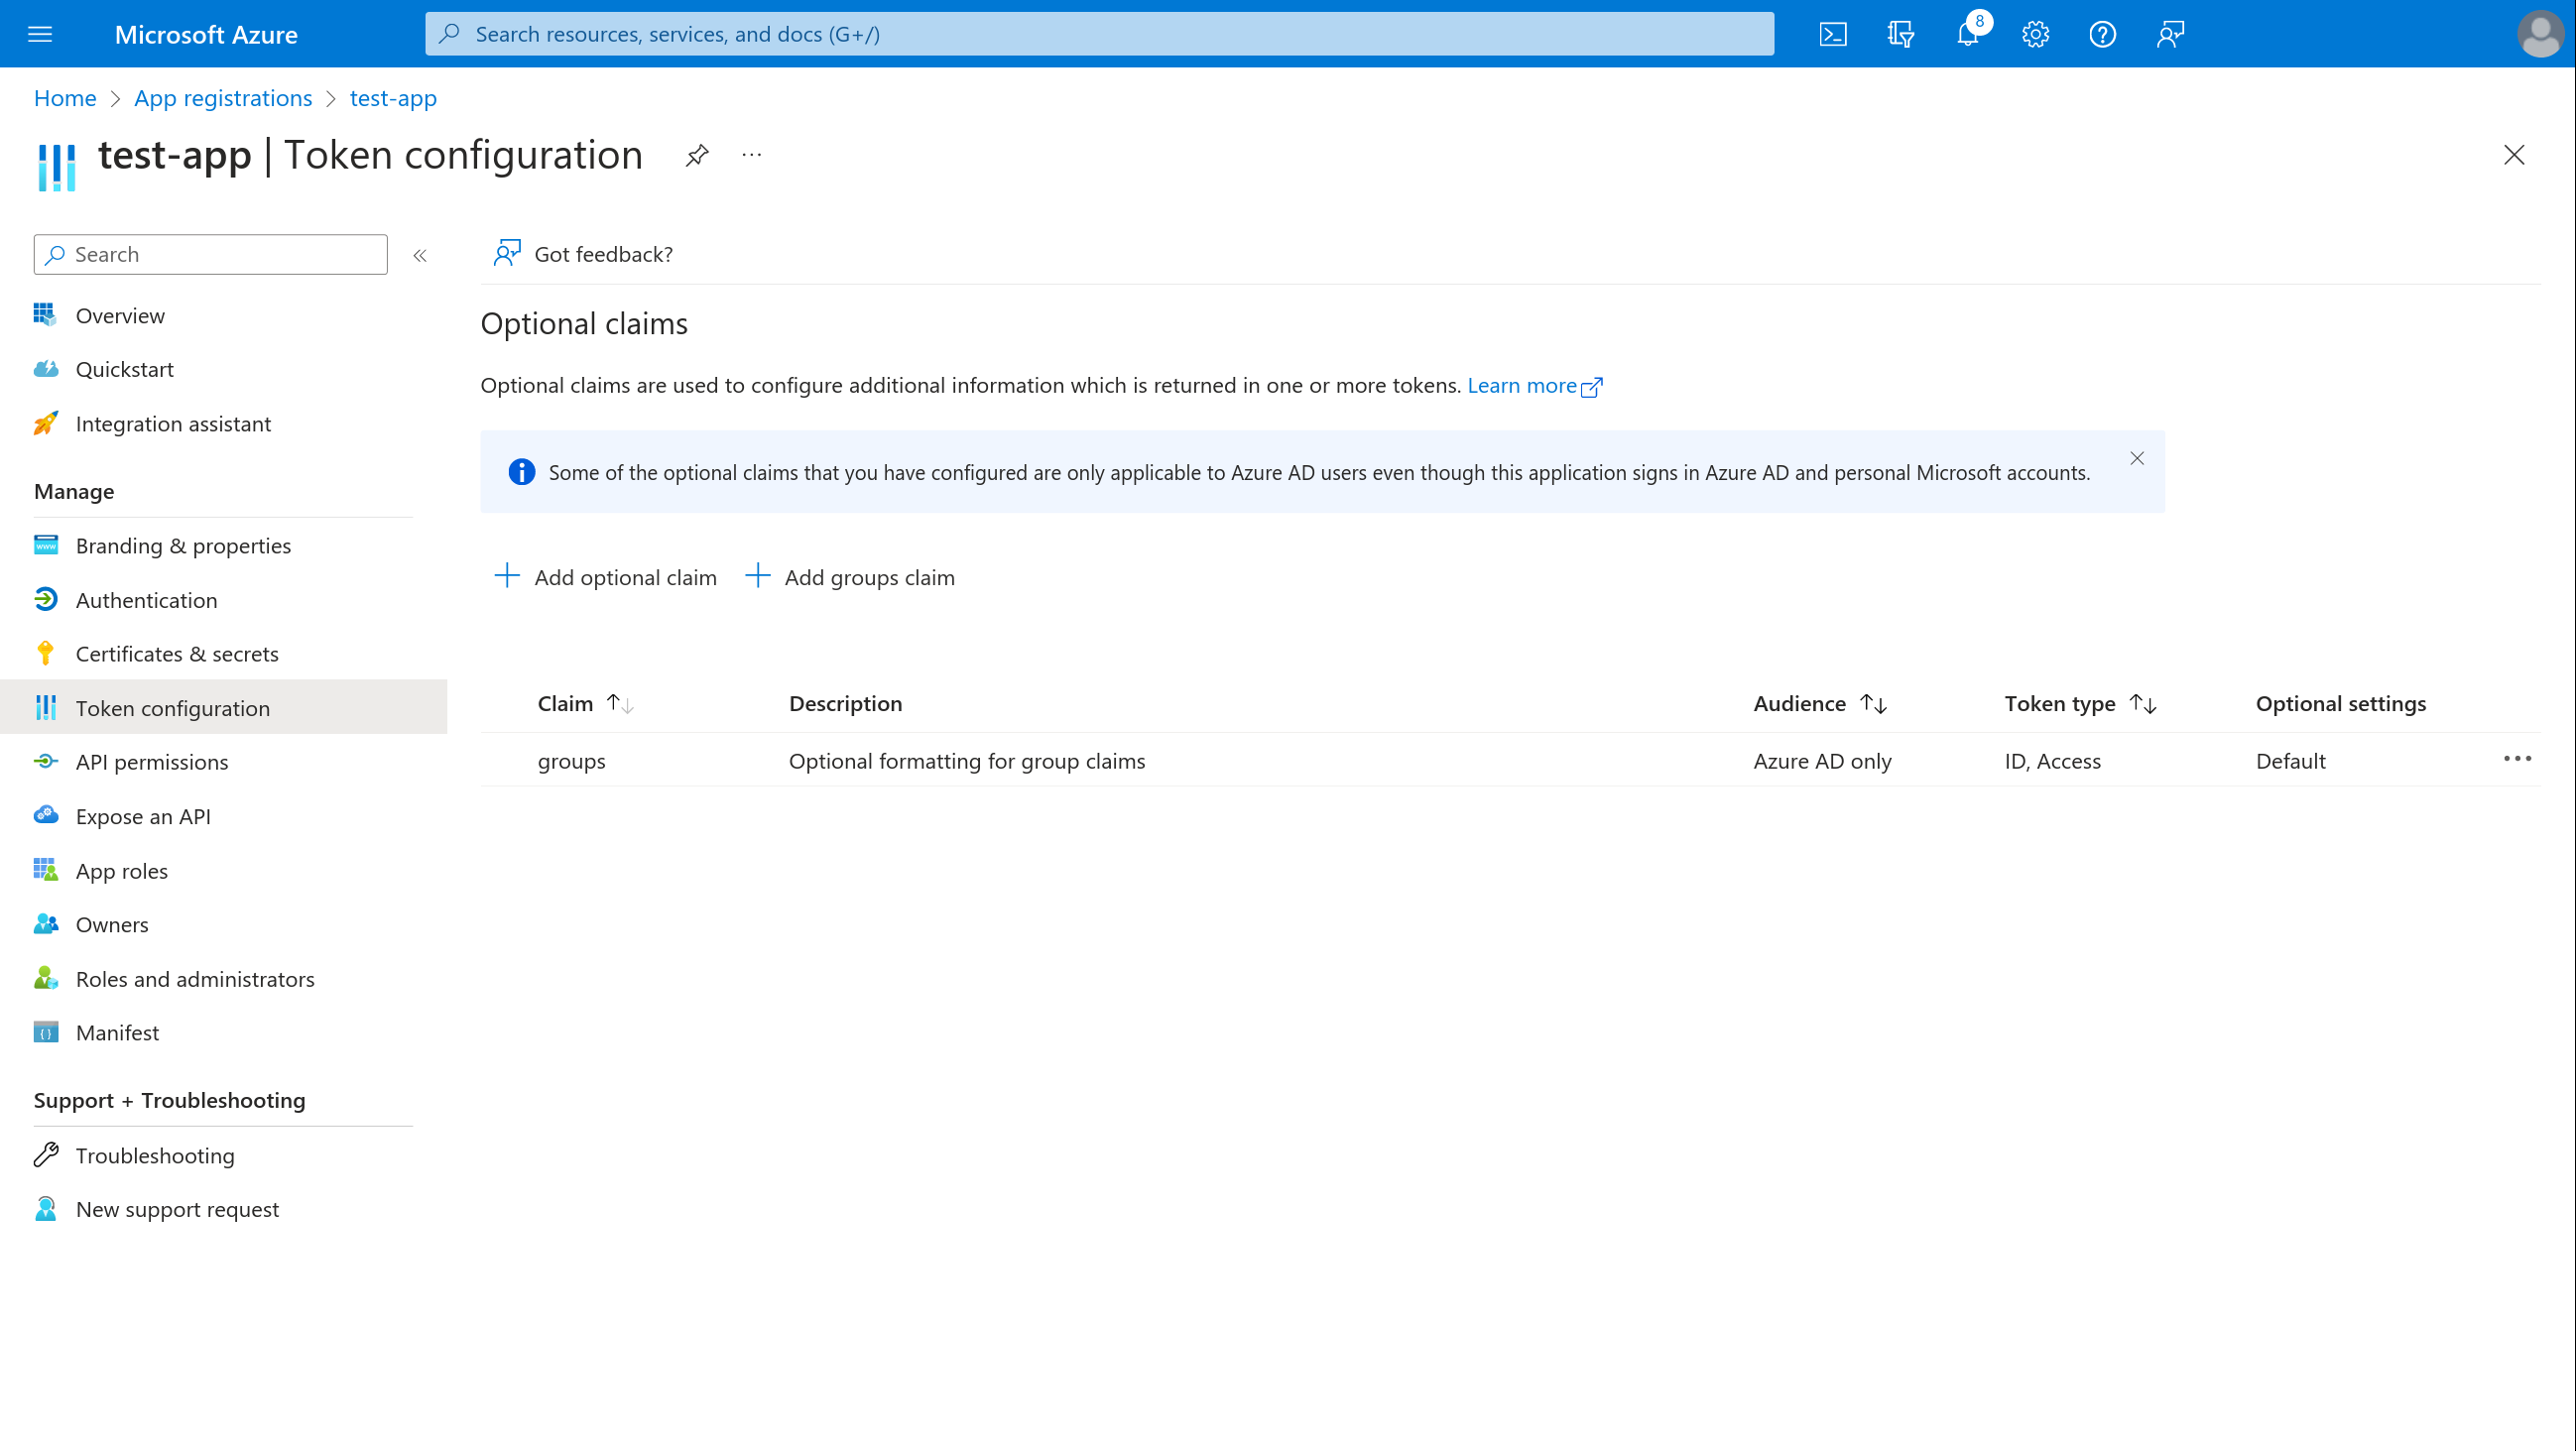
Include groups in SlashID tokens
If you want your Azure AD groups in your users' SlashID token containers, you must add custom claim groups to Azure AD's tokens.
- In the Azure portal, in App registrations, select your application.
- Navigate to Token configuration
- Select + Add groups claim and tick the group types you want to include
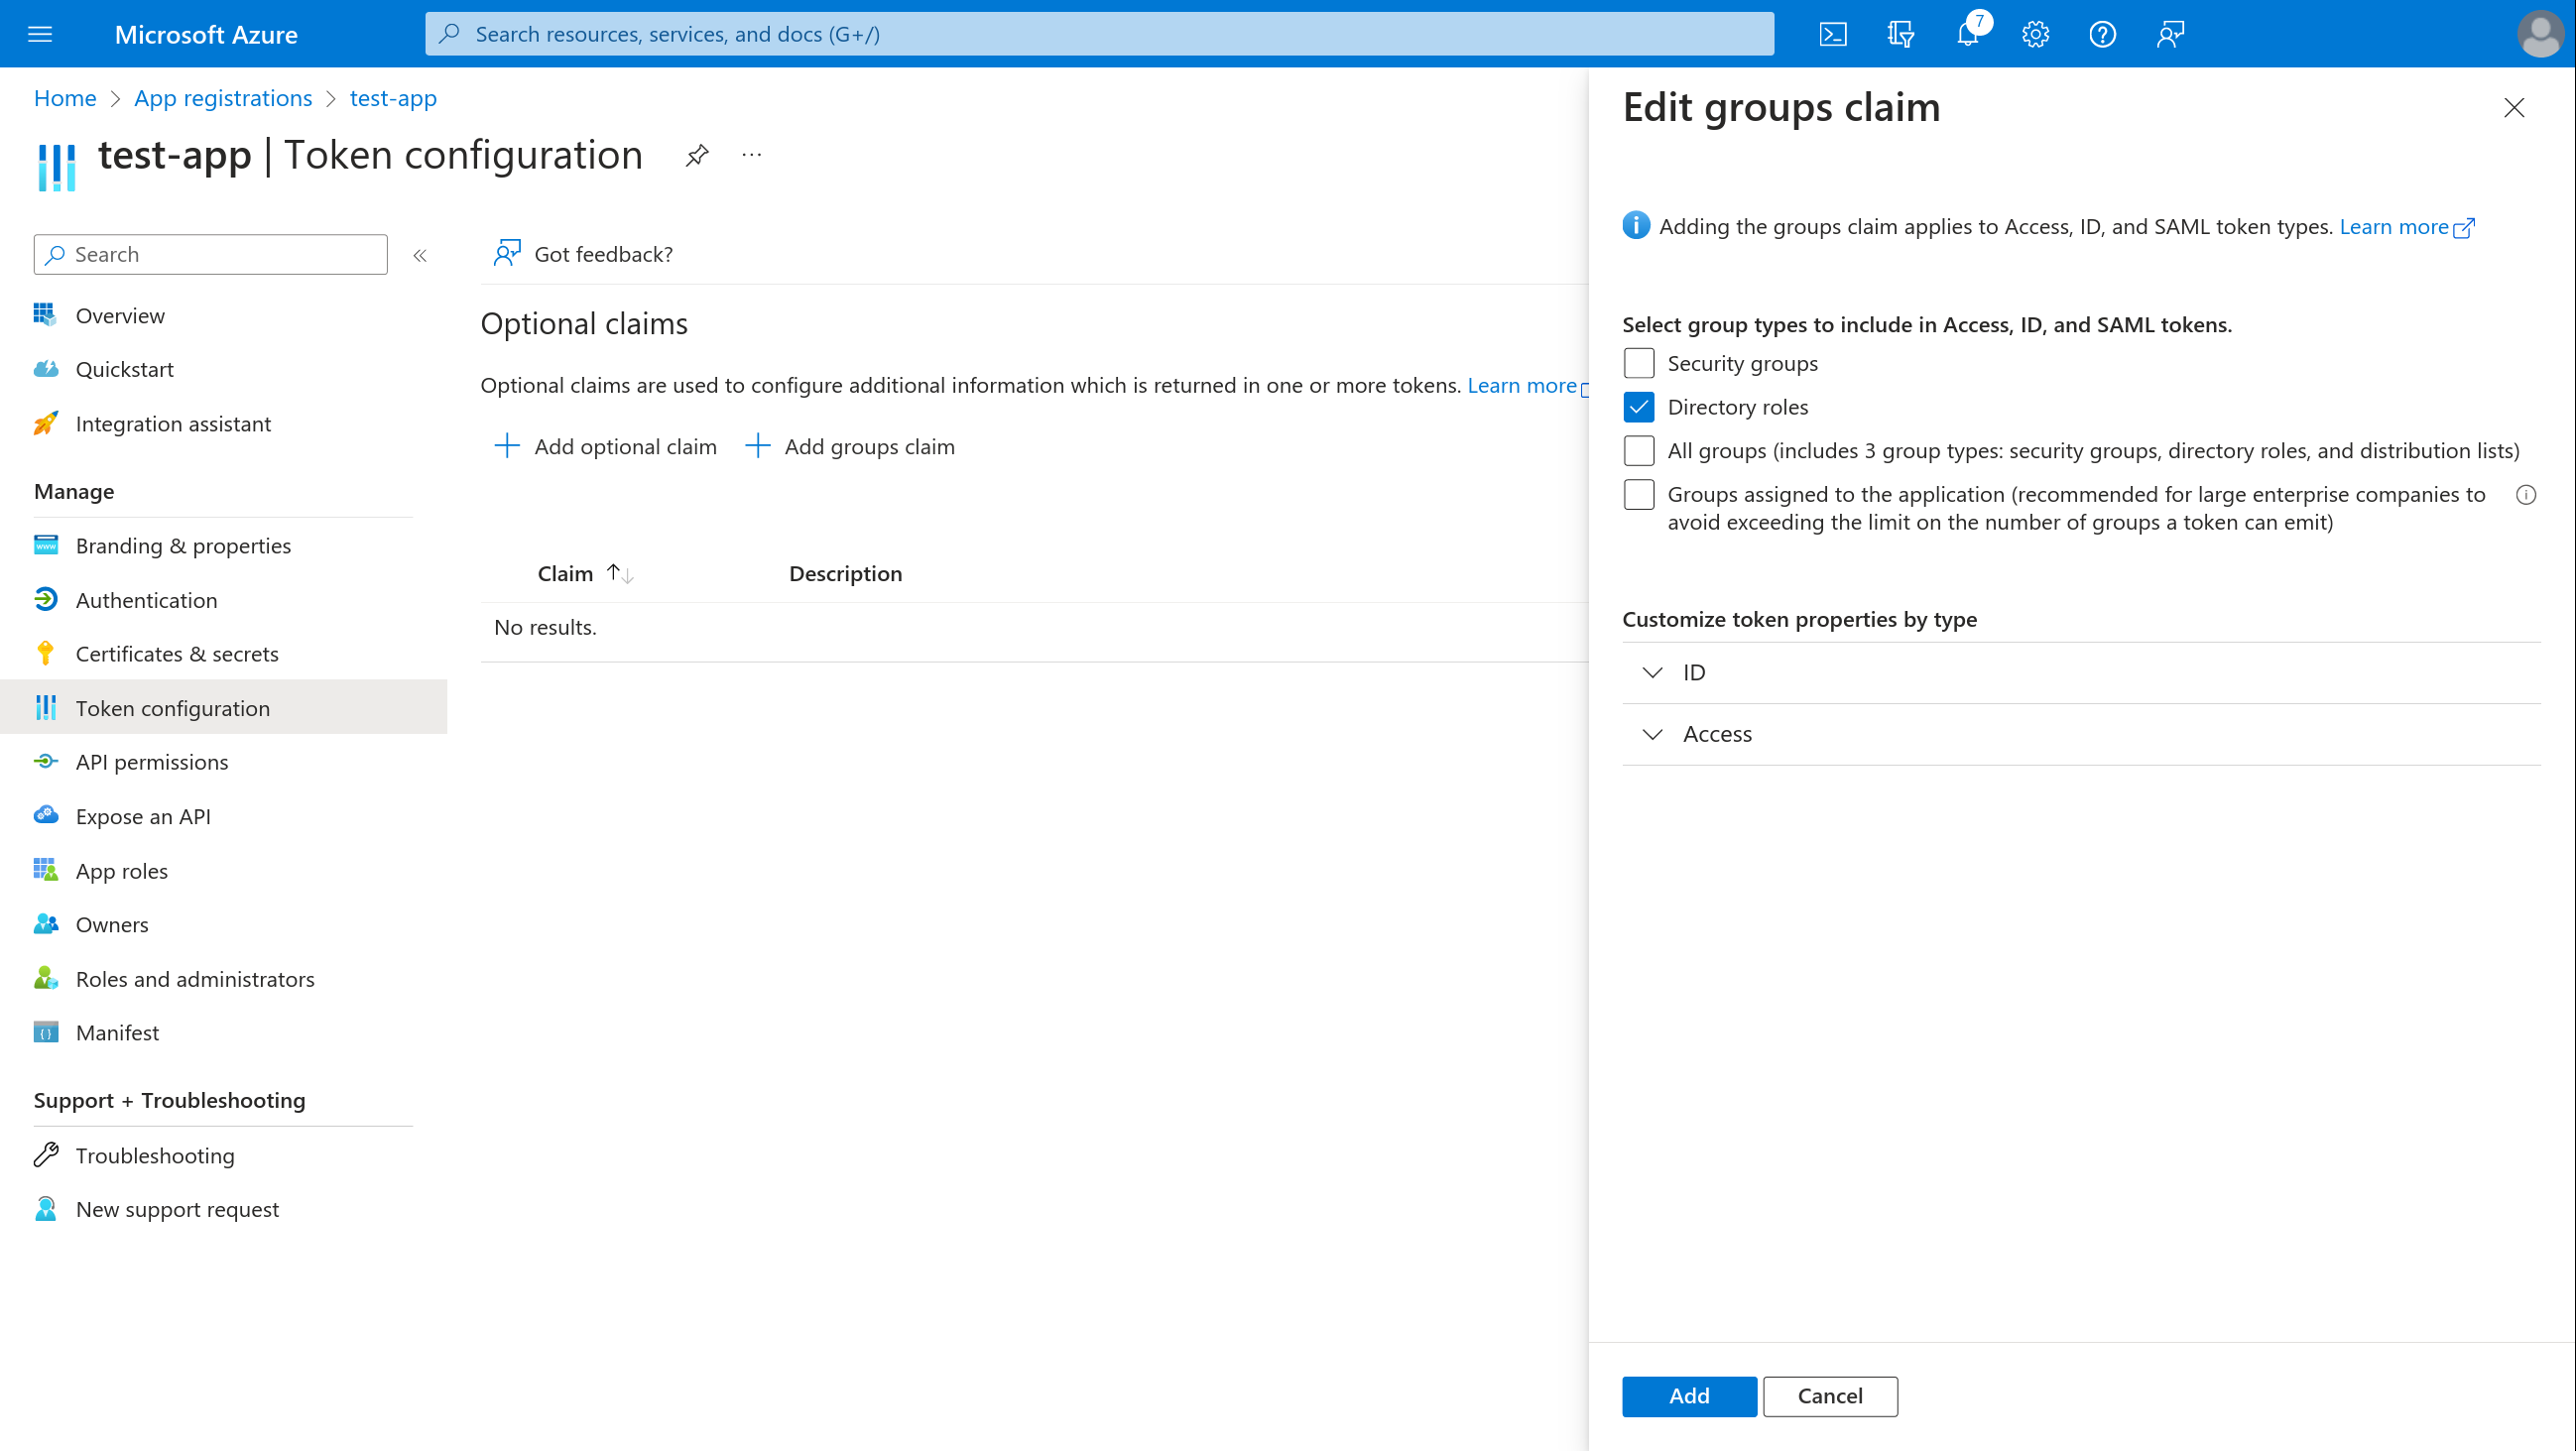
- Select + Customize token properties by type > ID and tick Group ID
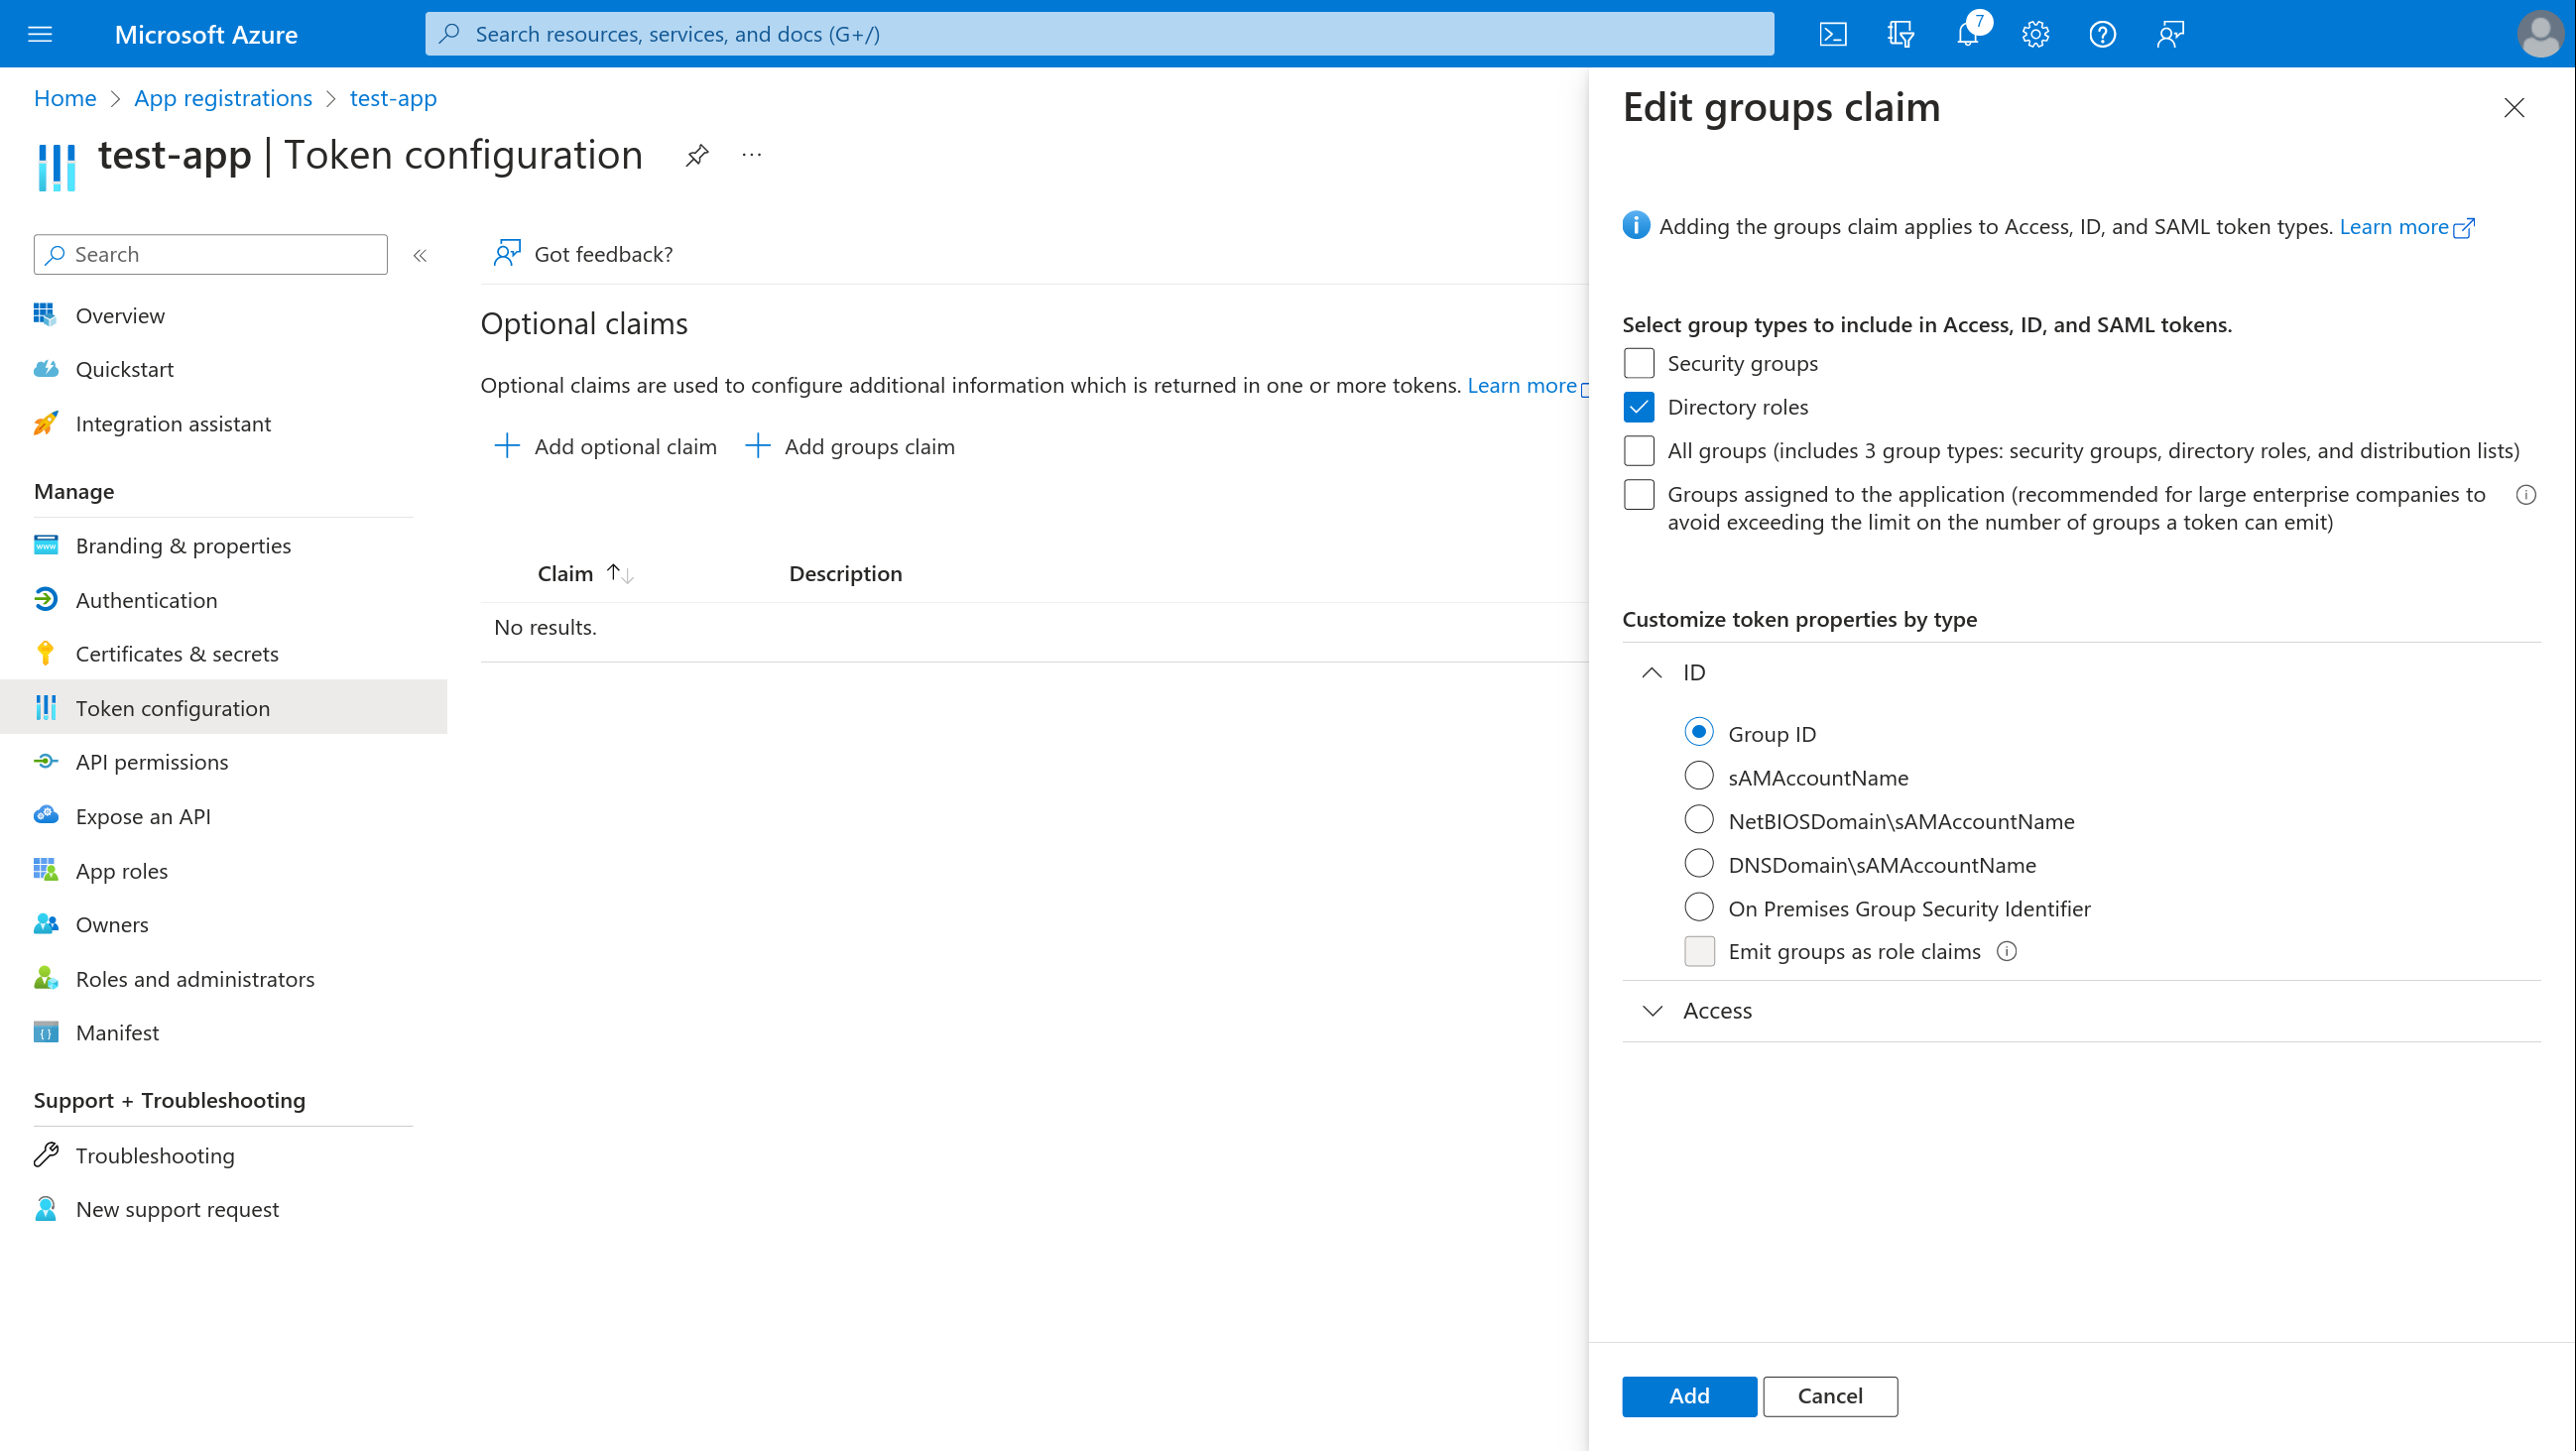
- Select + Customize token properties by type > Access and tick Group ID
The end result is the following:
Token containers will only include groups that belong to your Azure AD organizational directory. Therefore, don't forget to include your tenant ID/name when registering credentials with SlashID.
Now that we have the necessary pieces in place, you can use the
requires_groups parameter in your authentication requests. For example:
let user = await sid.id(oid, null, {
  method: "oidc",
  options: {
    client_id: clientId,
    provider: provider,
    ux_mode: uxMode,
    requires_groups: "true",
  },
})
Register the credentials
You can register the credentials with SlashID using the following API call:
curl --location --request POST 'https://api.slashid.com/organizations/sso/oidc/provider-credentials' \
--header 'SlashID-OrgID: <YOUR ORG ID>' \
--header 'SlashID-API-Key: <YOUR API KEY>' \
--header 'Content-Type: application/json' \
--data-raw '{
    "client_id": "<CLIENT ID>",
    "client_secret": "<CLIENT SECRET>",
    "provider": "azuread",
    "label": "A label for this set of credentials",
    "options": {
        "azuread": {
            "tenant": "<TENANT>",
            "authorize_scopes": ["<CUSTOM SCOPE>"]
        }
    }
}
'
You are now ready to start using SlashID for SSO with Azure AD and Microsoft accounts.