Integrate with Snowflake
Follow this step by step guide to allow SlashID to monitor and protect your Snowflake instance.
First, you will create a Snowflake service account, grant it the required permissions to read your data and generate a RSA key pair which allows SlashID to interact with Snowflake on your behalf. Second, you will use the details of your new service account to configure the integration in the SlashID Console.
If your endpoint or tenant restricts traffic by source IP, allow connections from SlashID's egress IPs published at https://cdn.slashid.com/egress.json. The list is global and stable; the syncToken field changes whenever the IPs change, so you can use it to detect drift.
The file follows the JAFAR draft format (A JSON-Based Format for Publishing IP Ranges of Automated HTTP Clients), the same convention major cloud providers use to publish their IP ranges.
Step 1: Create RSA key pair
- Open a terminal window and create an unecrypted RSA private key using
openssl:
openssl genrsa 2048 | openssl pkcs8 -topk8 -inform PEM -out rsa_key.p8 -nocrypt
The command generates a file containing a RSA private key formatted in PEM format:
-----BEGIN PRIVATE KEY-----
MIIE6T...
-----END PRIVATE KEY-----
Keep the private key safe, you will need to enter it in the SlashID Console later.
- From the command line, create a RSA public key using
openssl:
openssl rsa -in rsa_key.p8 -pubout -out rsa_key.pub
The command generates a file containing a RSA public key formatted in PEM format:
-----BEGIN PUBLIC KEY-----
MIIBIj...
-----END PUBLIC KEY-----
Step 2: Create Snowflake service account
Log in to your Snowflake account.
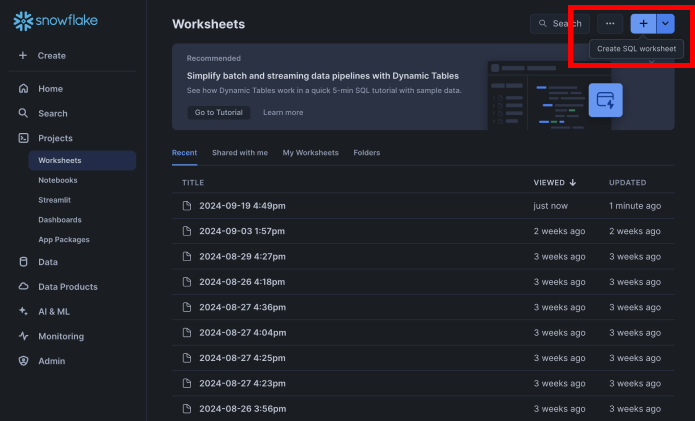
From the menu on the left, select 'Projects' > 'Worksheets'.
Using the '+' button on the top right corner, create a new 'SQL Worksheet'.
- Copy and paste your RSA public key in the command below and run it in the SQL Worksheet in Snowflake:
CREATE USER SLASHID_IDENTITY_PROTECTION
RSA_PUBLIC_KEY = '[YOUR_RSA_PUBLIC_KEY]'
Click on the button with the play symbol in the top right corner to run the query and
create a service account user without a password.
If successful, you should see the message: User SLASHID_IDENTITY_PROTECTION successfully created.
Step 3: Assign a default Warehouse
An existing warehouse should be set as default for the user. The warehouse is not altered, but it is needed to establish the connection.
ALTER USER SLASHID_IDENTITY_PROTECTION SET DEFAULT_WAREHOUSE = [AN_ACTIVE_WAREHOUSE];
Step 4: Grant permissions
SlashID requires specific permissions to monitor your Snowflake environment. You have two options:
Option 1: Grant ACCOUNTADMIN or SECURITYADMIN role
This will grant the account high privileges.
The simplest approach is to grant either the ACCOUNTADMIN or SECURITYADMIN role, which provides all necessary permissions:
GRANT ROLE ACCOUNTADMIN TO USER SLASHID_IDENTITY_PROTECTION;
Or for more restricted access:
GRANT ROLE SECURITYADMIN TO USER SLASHID_IDENTITY_PROTECTION;
If successful, you should see the message: Statement executed successfully.
Option 2: Grant specific permissions (Fine-grained access control)
If you prefer not to grant admin roles, you can create a custom role with the minimum required permissions:
-- Create a custom role for SlashID
CREATE ROLE SLASHID_MONITORING_ROLE;

-- Grant the custom role to the service account
GRANT ROLE SLASHID_MONITORING_ROLE TO USER SLASHID_IDENTITY_PROTECTION;

-- Set the custom role as default
ALTER USER SLASHID_IDENTITY_PROTECTION SET DEFAULT_ROLE = SLASHID_MONITORING_ROLE;

-- Grant MANAGE GRANTS privilege (required to view role grants)
GRANT MANAGE GRANTS ON ACCOUNT TO ROLE SLASHID_MONITORING_ROLE;

-- Grant IMPORTED PRIVILEGES on SNOWFLAKE database (required to access account_usage views)
GRANT IMPORTED PRIVILEGES ON DATABASE SNOWFLAKE TO ROLE SLASHID_MONITORING_ROLE;

-- Grant MONITOR USAGE privilege (required to view usage data)
GRANT MONITOR USAGE ON ACCOUNT TO ROLE SLASHID_MONITORING_ROLE;

GRANT USAGE   ON WAREHOUSE <AN_ACTIVE_WAREHOUSE> TO ROLE SLASHID_MONITORING_ROLE;
GRANT OPERATE ON WAREHOUSE <AN_ACTIVE_WAREHOUSE> TO ROLE SLASHID_MONITORING_ROLE;

DECLARE
  v_name STRING;
BEGIN
  -- 1) Capture all integrations visible to the executing role
  SHOW INTEGRATIONS;

  -- 2) Define a cursor over the SHOW output
  LET c1 CURSOR FOR
    SELECT "name"  -- keep the original column name from SHOW; no alias
    FROM TABLE(RESULT_SCAN(LAST_QUERY_ID()));

  -- 3) Iterate and grant
  FOR rec IN c1 DO
    v_name := rec."name";  -- quoted because the column name is lowercased by SHOW
    EXECUTE IMMEDIATE
      'GRANT USAGE ON INTEGRATION "' || v_name || '" TO ROLE SLASHID_MONITORING_ROLE';
  END FOR;
END;
With fine-grained permissions, SlashID will skip operations it doesn't have access to (like fetching RSA keys or user statistics for specific users). For example, SlashID won't be able to see the RSA keys associated with an identity or the service integration details or the full identity metadata for users.
Step 5: Obtain Snowflake account identifier
Go to Snowflake's login page and choose your account but do not log in.
Note the domain in your browser URL bar: it follows the format
{LOCATOR.REGION.PLATFORM}.snowflakecomputing.com. Copy the text that appears before.snowflakecomputing.com, we call this your snowflake account identifier. You will need to enter it in the SlashID Console later.
Step 6: Create your Snowflake<>SlashID Integration
Go to the SlashID Console > 'Identity Protection' > 'Configuration' > 'Integrations'. Click on 'Add integration' on the right.
Select 'Snowflake' from the list of providers in the horizontal menu.
Paste your Snowflake account identifier, your service account name (if you followed this guide literally this will be
SLASHID_IDENTITY_PROTECTION) and RSA private key in the boxes provided. Click on the 'Connect' button to complete the integration.

SlashID is now monitoring your Snowflake environment for potential security issues. It may take a couple of minutes for the initial data sync, after which you can start exploring security events in the 'Identity Protection Dashboard' section of the SlashID Console.
(Optional) Learn about event streaming
To learn more about how SlashID monitors your Snowflake environment in real-time, see these steps.