Integrate with Azure
Follow this step by step guide to allow SlashID to monitor and protect your Microsoft Azure cloud environment. First, you will create an Azure App Registration, grant it the required permissions and generate a client secret which allows SlashID to interact with Azure on your behalf. Second, you will use the details of your new App Registration to configure the integration in the SlashID Console.
Step 1: Create Azure App Registration
Log in to Microsoft Azure Portal.
Search for or select Microsoft Entra ID (previously: Azure Active Directory) from the list of resources on the side menu.
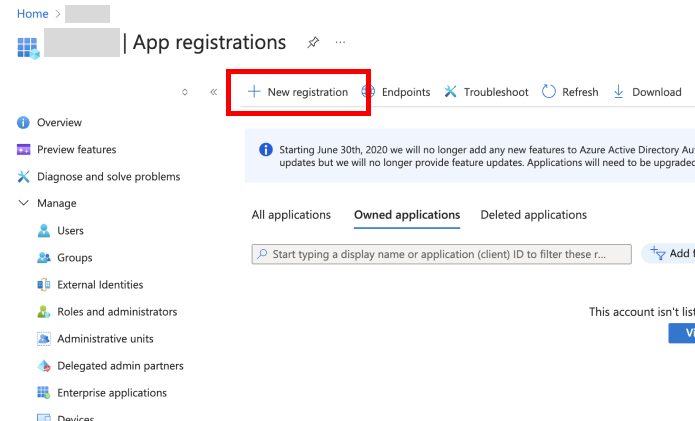
From the menu on the left, select 'Manage' > 'App registrations'.
From the horizontal menu at the top of the page, choose 'New registration'.
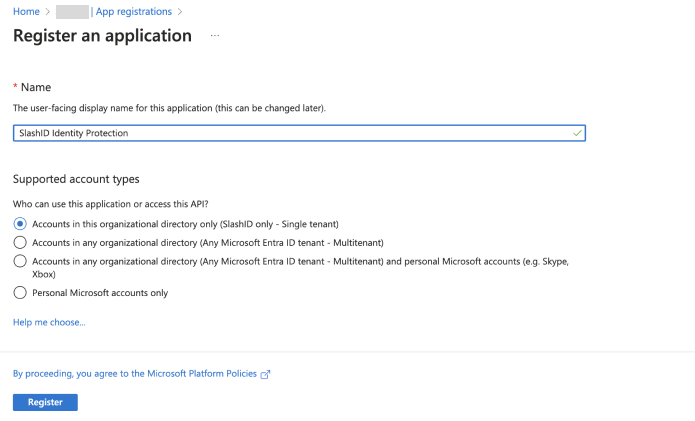
- Enter a name for this app registration, select the appropriate account type, then press 'Register' to confirm. Going forward, we'll call this your SlashID App Registration.
Step 2: Grant permissions
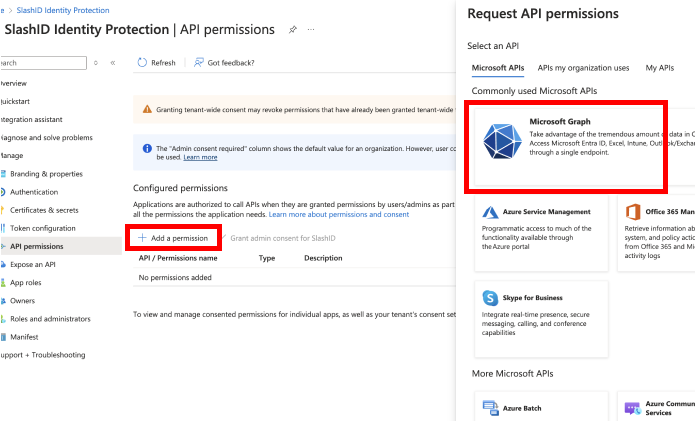
In your SlashID App Registration page, select 'Manage' > 'API permissions' from the side menu.
Choose 'Add a permission' and then select 'Microsoft Graph' from the list of Microsoft APIs available.
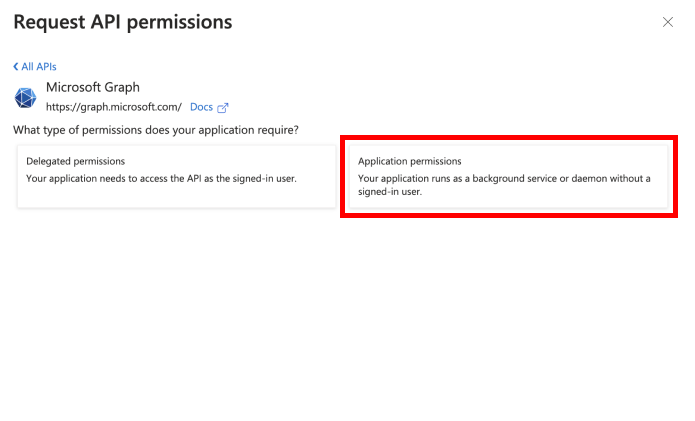
- Choose 'Application permissions' for the permission type.
- Search for and select the following permissions:
Required permissions:
AuditLog.Read.AllDirectory.Read.AllIdentityProvider.Read.AllIdentityRiskyUser.Read.AllUser.Read.All
Optional permissions (recommended for extended features):
Files.Read.All- For OneDrive and SharePoint file monitoringFiles.ReadWrite.All- For comprehensive file analysisGroup.Read.All- For detailed group membership informationPolicy.Read.All- For Conditional Access Policy monitoringSharePointTenantSettings.Read.All- For SharePoint tenant configurationSites.Read.All- For SharePoint site access monitoring
For event streaming of Exchange, SharePoint, and DLP events, you'll also need to grant permissions from the Office 365 Management APIs (a separate API from Microsoft Graph). See the Event Streaming guide for details.
Conditional Access permissions (for Conditional Access Policy visibility):
Policy.Read.All- Read all Conditional Access policies and configurations
Privileged Identity Management (PIM) permissions (for PIM visibility):
RoleManagement.Read.Directory- Read Azure AD role definitions, assignments, and policiesRoleManagement.Read.All- Read all role management settingsPrivilegedAccess.Read.AzureAD- Read PIM for Azure AD roles (eligible assignments, activation requests)PrivilegedAccess.Read.AzureADGroup- Read PIM for GroupsPrivilegedEligibilitySchedule.Read.AzureADGroup- Read eligible assignment schedules for groupsPrivilegedAssignmentSchedule.Read.AzureADGroup- Read active assignment schedules for groupsRoleAssignmentSchedule.Read.Directory- Read scheduled role assignmentsRoleEligibilitySchedule.Read.Directory- Read role eligibility schedules
The optional permissions enable monitoring of SharePoint, OneDrive, and Conditional Access Policies. The PIM permissions enable visibility into Privileged Identity Management configurations, including eligible role assignments, activation requests, and scheduled assignments. Without these permissions, SlashID will still monitor your core Azure identities, roles, and applications, but will not have visibility into file access, SharePoint sites, Conditional Access configurations, or PIM settings.
Click the 'Add permissions' button to confirm.
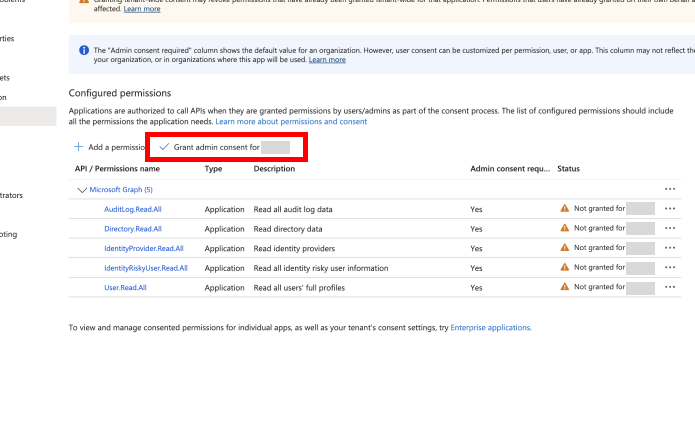
- In your 'SlashID App Registration | API permissions' page, click on the 'Grant admin consent for [Your Organization Name]' and confirm the permission grant.
Step 2b: Grant Azure RBAC permissions (for automatic log streaming)
SlashID can automatically provision the Azure infrastructure needed for real-time event streaming. This eliminates the need for manual setup of Event Hub, Logic App, Event Grid, and Diagnostic Settings.
To enable automatic provisioning, the service principal needs Azure RBAC permissions at the subscription level.
Go to your Azure subscription in the Azure Portal.
Navigate to 'Access control (IAM)' > 'Add role assignment'.
Assign the following role to your SlashID App Registration:
| Role | Scope | Purpose |
|---|---|---|
| Contributor | Subscription | Create and manage Event Hub, Event Grid, Logic App, and Resource Groups |
Alternatively, for more granular control, you can create a custom role with these specific permissions:
Required resource provider permissions:
Microsoft.Resources/subscriptions/resourceGroups/*- Create and manage resource groupsMicrosoft.EventHub/namespaces/*- Create and manage Event Hub namespaces and hubsMicrosoft.EventGrid/topics/*- Create and manage Event Grid topicsMicrosoft.EventGrid/eventSubscriptions/*- Create and manage Event Grid subscriptionsMicrosoft.Logic/workflows/*- Create and manage Logic AppsMicrosoft.Insights/diagnosticSettings/*- Create and manage diagnostic settingsMicrosoft.Web/connections/*- Create and manage API connections for Logic Apps
If the RBAC permissions are not granted, SlashID will still create your connection successfully, but log streaming infrastructure will not be automatically provisioned. You will need to set up event streaming manually by following the Event Streaming guide.
The SlashID Console will indicate when manual setup is required, and you can complete it at any time after the initial connection is established.
Step 2c: Grant Management Group permissions (for org-level visibility)
To capture role assignments inherited from management groups, SlashID needs read access at the management group level. This enables visibility into permissions granted at higher organizational levels that cascade down to subscriptions and resources.
Go to Management Groups in the Azure Portal.
Select the management group you want to monitor (typically the root or a parent group containing your subscriptions).
Navigate to 'Access control (IAM)' > 'Add role assignment'.
Assign the following role to your SlashID App Registration:
| Role | Scope | Purpose |
|---|---|---|
| Reader | Management Group | Read role assignments at management group level |
Alternatively, for more specific permissions, you can create a custom role with:
Required permissions:
Microsoft.Authorization/roleAssignments/read- Read role assignmentsMicrosoft.Authorization/roleDefinitions/read- Read role definitionsMicrosoft.Management/managementGroups/read- Read management group hierarchy
If management group permissions are not granted, SlashID will still monitor your subscription-level RBAC assignments. However, role assignments made at management group level (which inherit down to all child subscriptions) will not be visible in the identity graph.
For complete visibility into your Azure RBAC hierarchy, we recommend granting read access at the highest management group level that contains your monitored subscriptions.
Step 2d: Grant remediation permissions (optional)
To enable SlashID to take remediation actions (quarantine users, disable service principals, enforce MFA, etc.), grant these additional Application permissions in Microsoft Graph:
Identity management:
Application.ReadWrite.All- Disable, delete, and restore service principalsUser.ReadWrite.All- Disable, delete, and restore users; revoke sign-in sessionsUser.EnableDisableAccount.All- Enable and disable usersUser.RevokeSessions.All- Revoke user sessions
Role management:
RoleManagement.ReadWrite.Directory- Add or remove directory role assignments
Policy management:
Policy.ReadWrite.ConditionalAccess- Create Conditional Access policies for MFA enforcement
Key Vault access (for secret rotation, requires Azure RBAC):
If you want SlashID to rotate or delete secrets in Azure Key Vault, assign the following role to your SlashID App Registration on each Key Vault:
| Role | Scope | Purpose |
|---|---|---|
| Key Vault Secrets Officer | Key Vault | Rotate and delete secrets |
If remediation permissions are not granted, SlashID will still monitor your Azure environment and detect security issues, but automated remediation actions will fail. You can grant these permissions at any time to enable remediation capabilities.
Step 3: Generate client secret
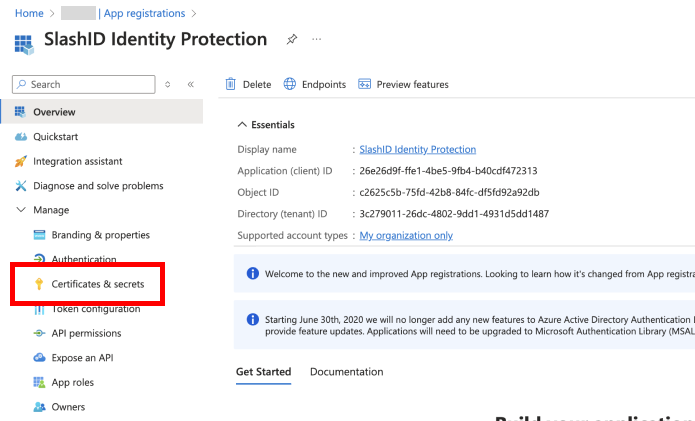
- In your SlashID App Registration page, select 'Manage' > 'Certificates & secrets' from the side menu.
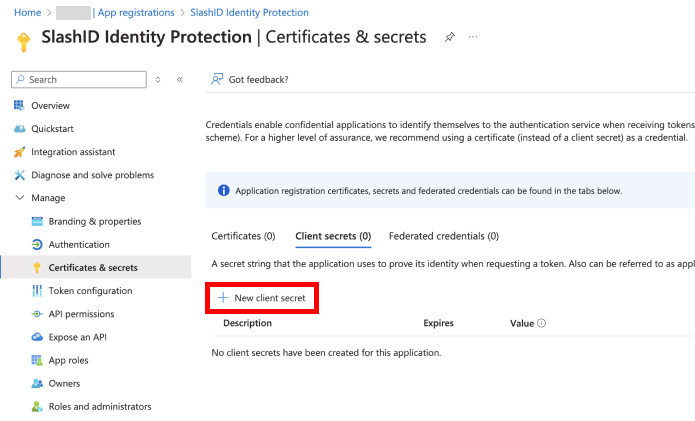
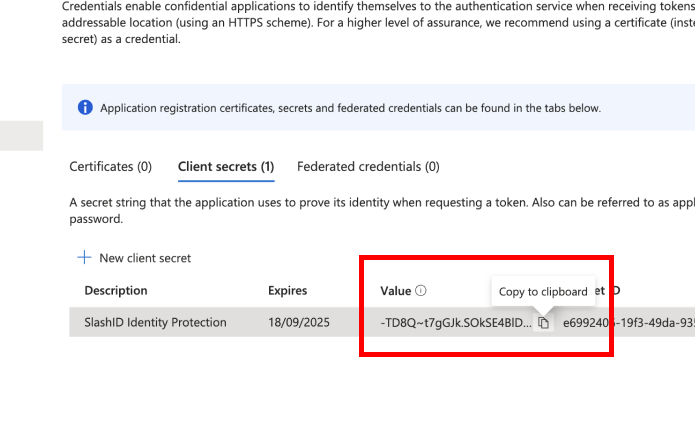
- Under 'Client secrets', choose 'New client secret'
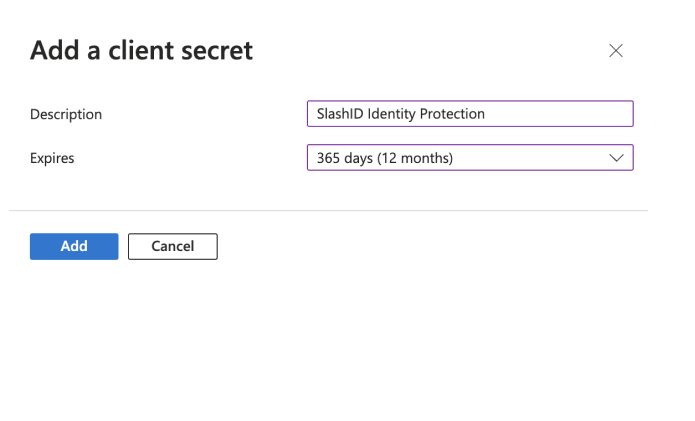
- Enter a description and a duration for the new client secret and press the 'Add' button. We recommend 365 days as the expiry period.
- Copy the secret Value and keep it safe, you will need to enter it in the SlashID Console later.
Step 4: Obtain client and tenant ID
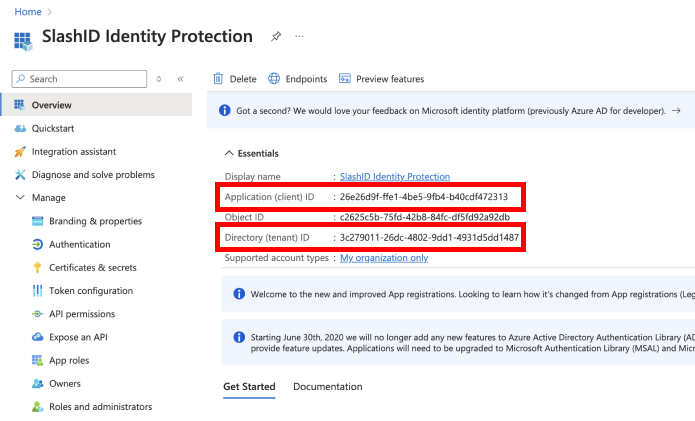
In your SlashID App Registration page, select 'Overview' from the side menu.
Copy the 'Application (client) ID' and the 'Directory (tenant) ID'. You will need to enter them in the SlashID Console later.
Step 5: Generate a certificate
Generate a new certificate for your Azure app following the same process of steps 3 and 4. Copy and store the client certificate and certificate key. You will need to enter them in the SlashID Console later.
Step 6: SlashID Console configuration
Go to the SlashID Console > 'Identity Protection' > 'Configuration' > 'Data sources'. Click on 'Add data source' on the right.
Select 'Azure' from the list of providers in the drop-down menu.
Fill in the connection details:
| SlashID Console field | Description |
|---|---|
| Name of the connection | Arbitrary name you give to this connection |
| Directory (tenant) ID | The tenant ID obtained in step 4 |
| Application (client) ID | The application ID obtained in step 4 |
| Azure subscription ID | Your Azure subscription ID |
| Client secret | The client secret obtained in step 3 |
| Client certificate | The client certificate obtained in step 5 |
| Certificate key | The client certificate key obtained in step 5 |
| Authoritative status | Decide whether Azure identities are the primary (or secondary) source of truth when reconciling identities across providers |
Click on the Connect button.
The initial data sync may take a couple of minutes, after which you can start exploring security events in the 'Identity Protection Dashboard' of the SlashID Console.