Integrate with OneLogin
Follow this step by step guide to allow SlashID to monitor and protect your OneLogin Organization.
First you will create a OneLogin API credential with the required permissions to read your data, which allows SlashID to interact with OneLogin on your behalf. Second, you will use the details of your new API credential to configure the integration in the SlashID Console.
Step 1: Create API credential
Log in to the OneLogin Portal, and then click on the 'Administration' button in the top right corner to access the Admin Console.
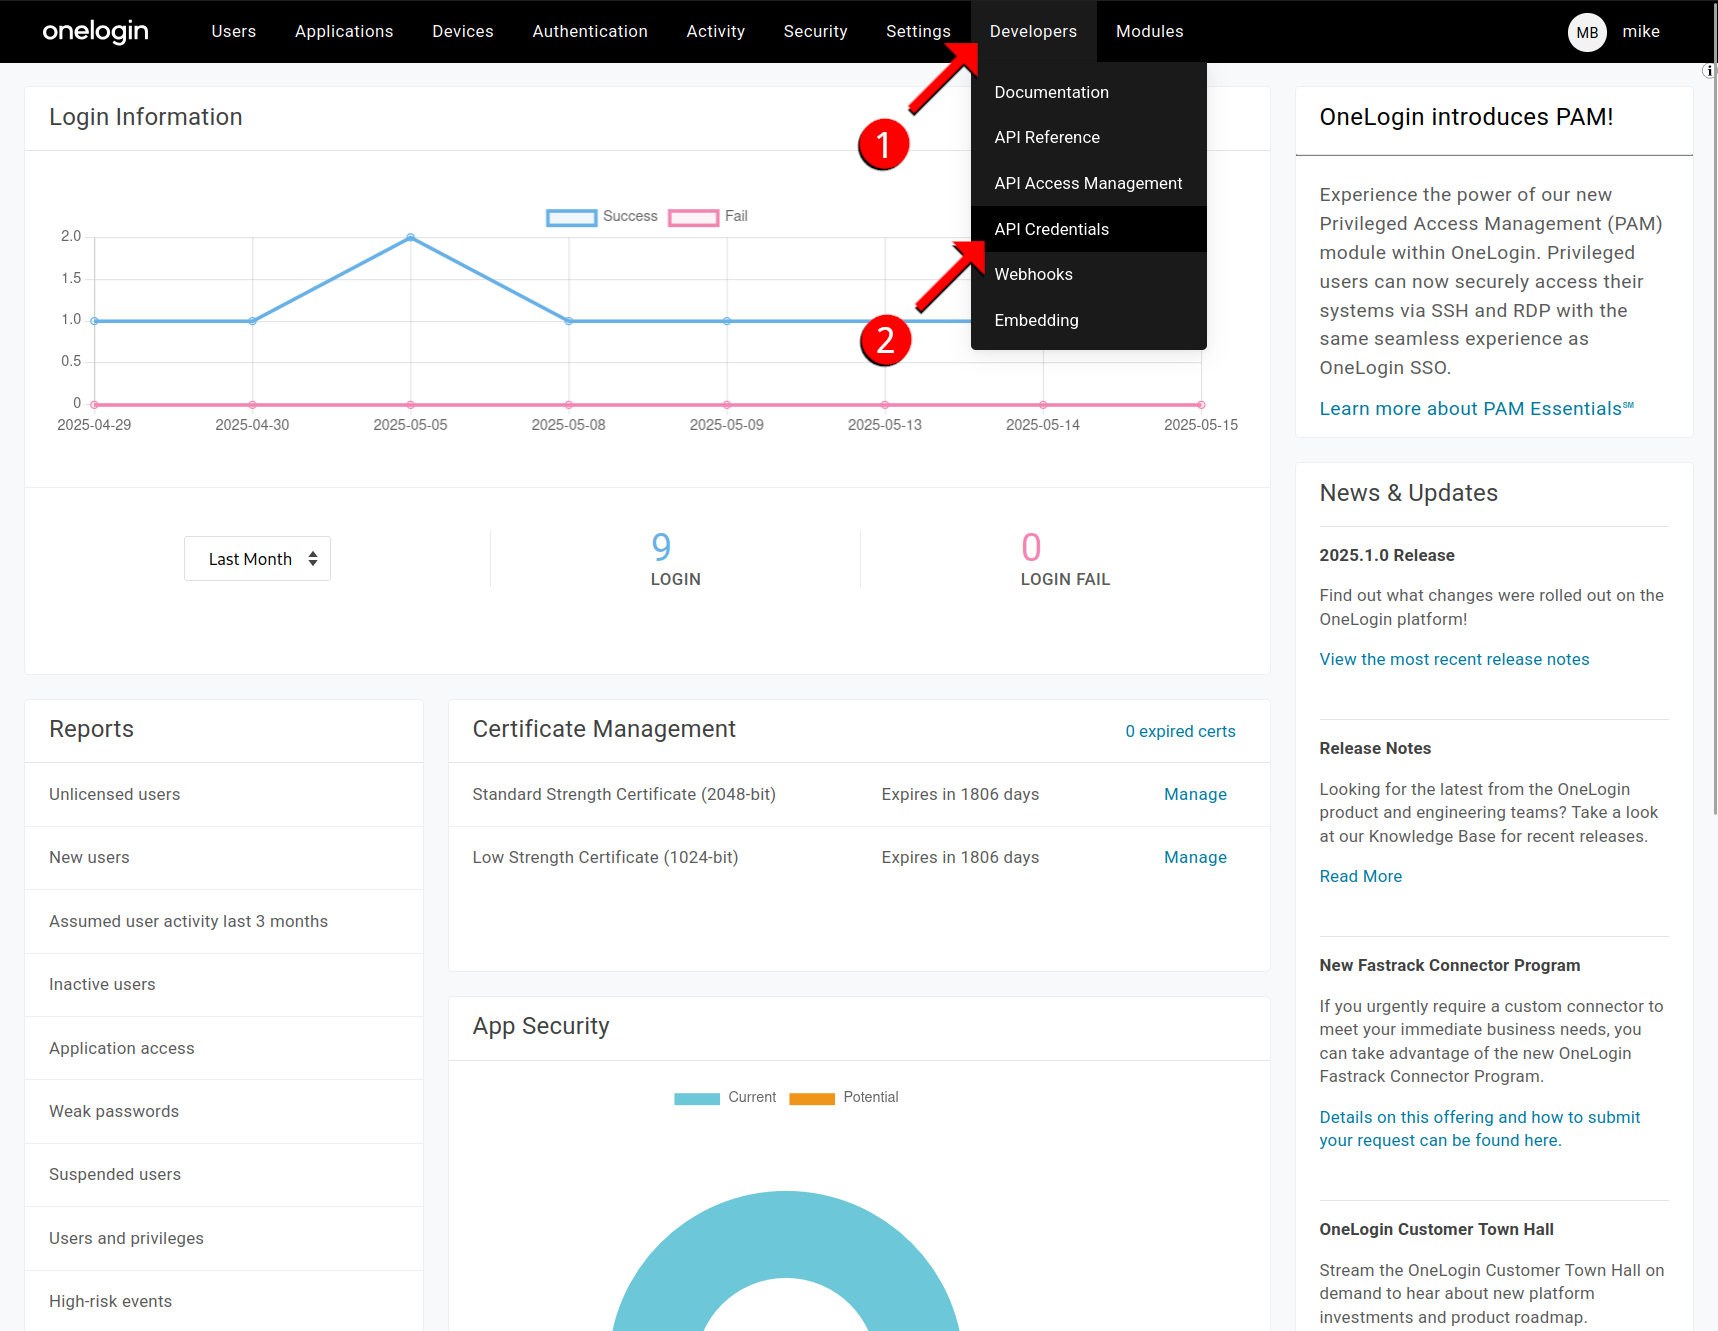
From the menu on the top, select 'Developers' > 'API Credentials'.
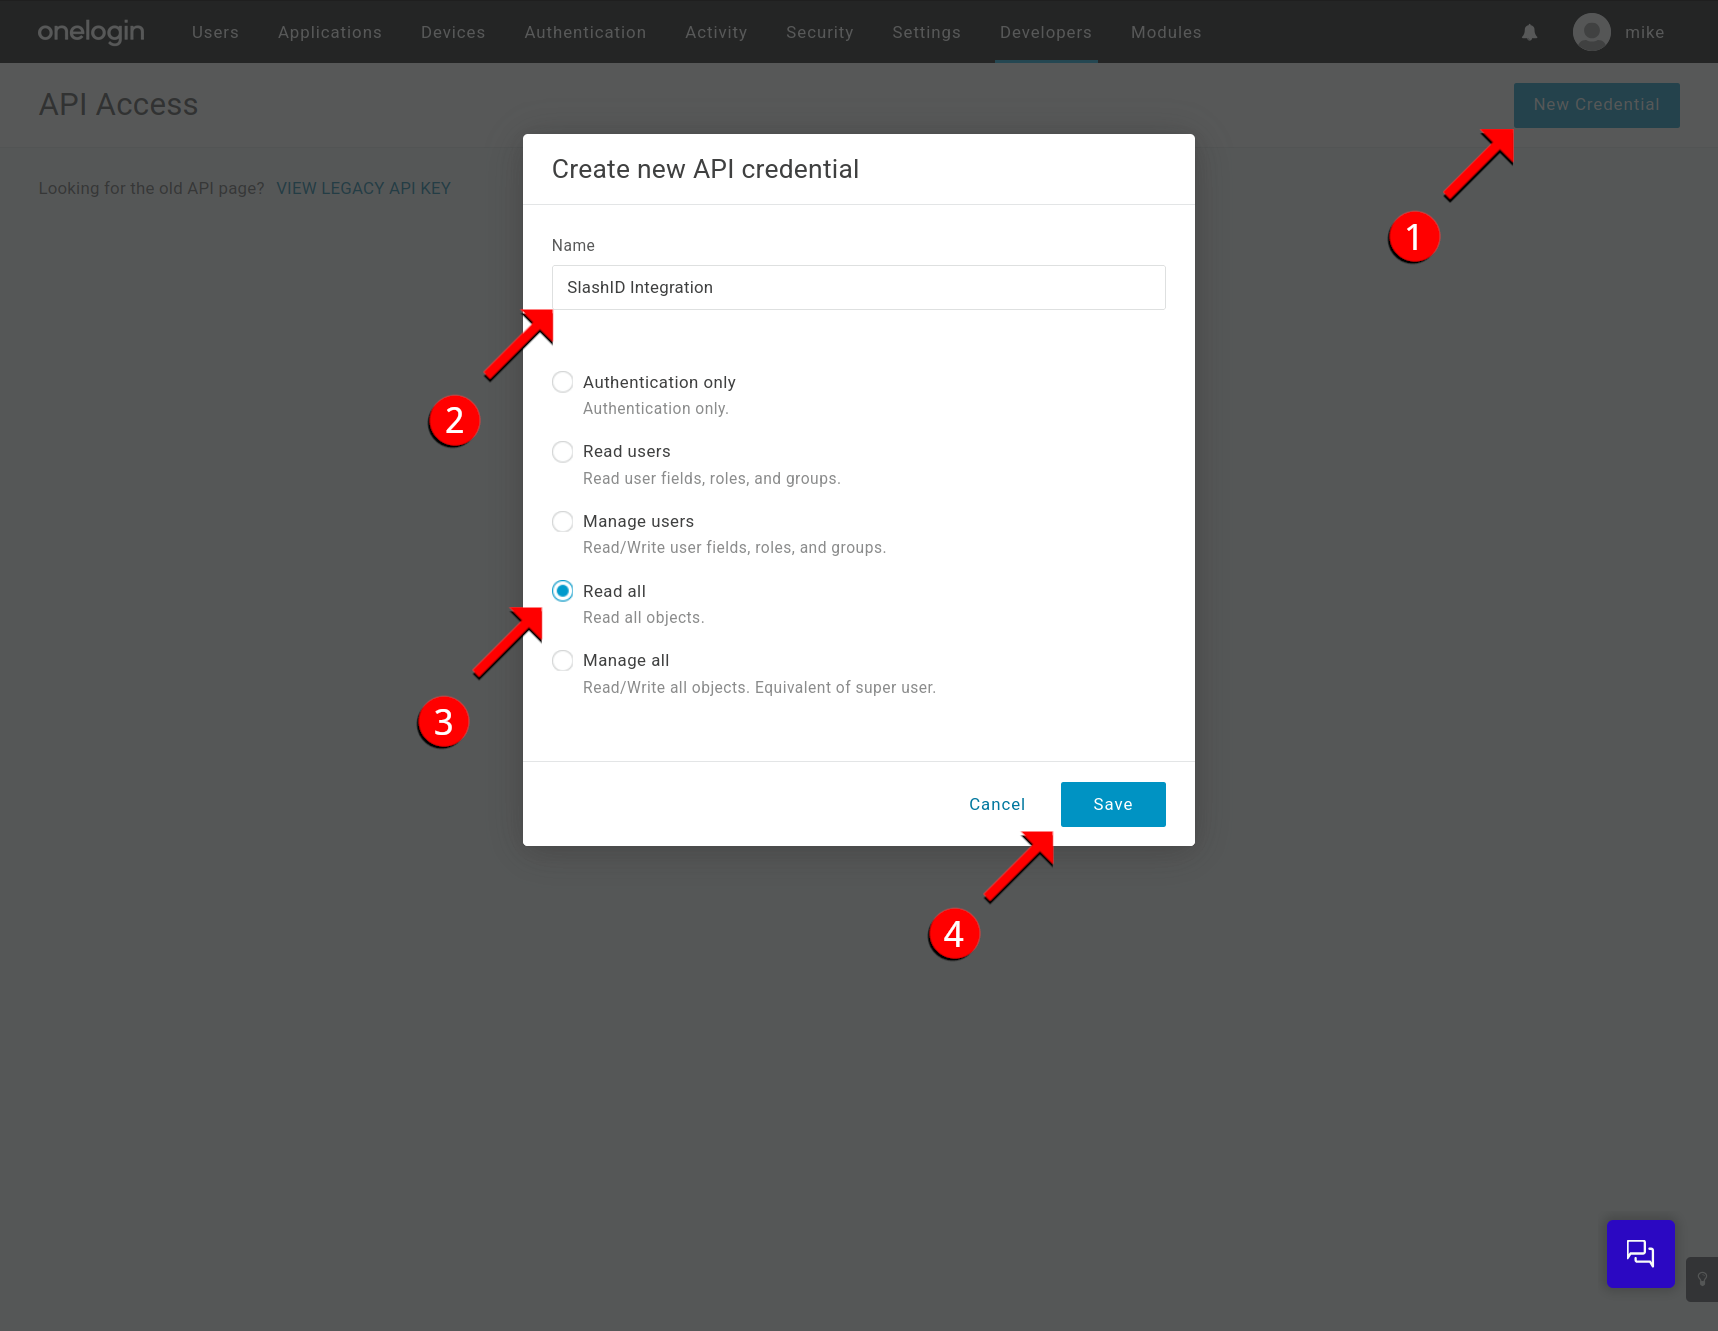
Click on the 'New Credential' button on the top right to open the 'Create new API credential' window.
Enter a name for your credential and choose 'Read all' from the permissions list. Click on the 'Save' button to confirm.
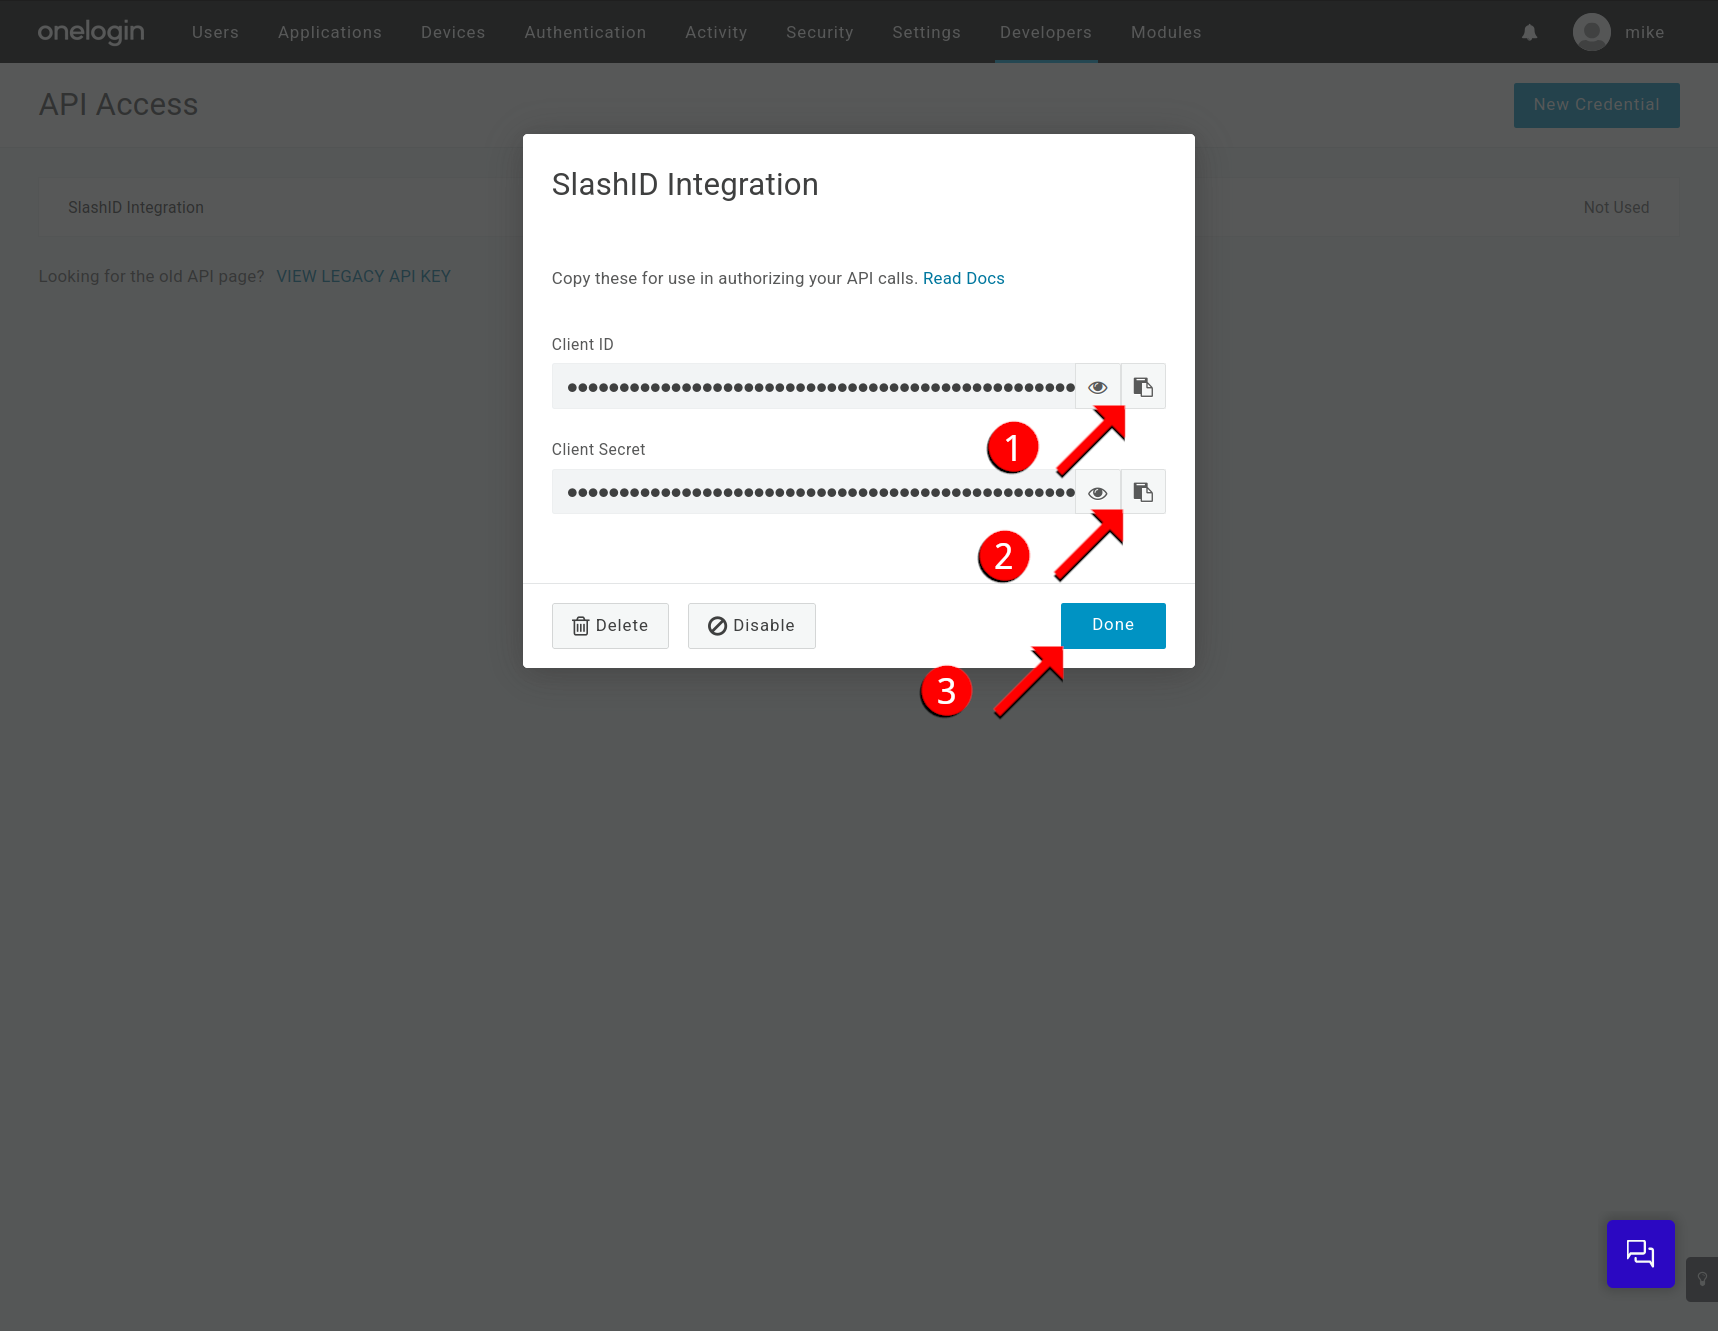
- You should now see a window showing the newly created API credential. Copy the 'Client ID' and the 'Client Secret' displayed and store them safely, you will need to enter them in the SlashID Console later.
Step 2: Obtain OneLogin Organization subdomain
- From any page in the OneLogin portal, copy your subdomain (the part after
https://and before.onelogin.com) and store it for now. You will need to enter it in the SlashID Console later.

Step 3: SlashID Console configuration
Go to the SlashID Console > 'Identity Protection' > 'Configuration' > 'Data sources'. Click on the Add data source button on the right.
In the drop-down menu, select 'OneLogin' from the list of providers.
Fill in the connection details:
| SlashID Console field | Description |
|---|---|
| Name of the connection | Descriptive name you give to this connection |
| OneLogin subdomain | The Organization subdomain obtained in step 2 |
| OneLogin API client ID | The Client ID obtained in step 1 |
| OneLogin API client ID secret | The Client ID secret obtained in step 1 |
| Authoritative status | Decide whether OneLogin identities are the primary (or secondary) source of truth when reconciling identities across providers |
Click on the Connect button.
The initial data sync may take a couple of minutes, after which you can start exploring security events in the 'Identity Protection Dashboard' of the SlashID Console.