Integrate with Auth0
Follow this step by step guide to allow SlashID to monitor and protect your Auth0 Tenant.
First, you will create an Auth0 Application, grant it the required permissions and generate a client secret which allows SlashID to interact with Auth0 on your behalf.
Second, you will use the details of your new Auth0 Application to configure the integration in the SlashID Console.
Step 1: Create an Auth0 Application
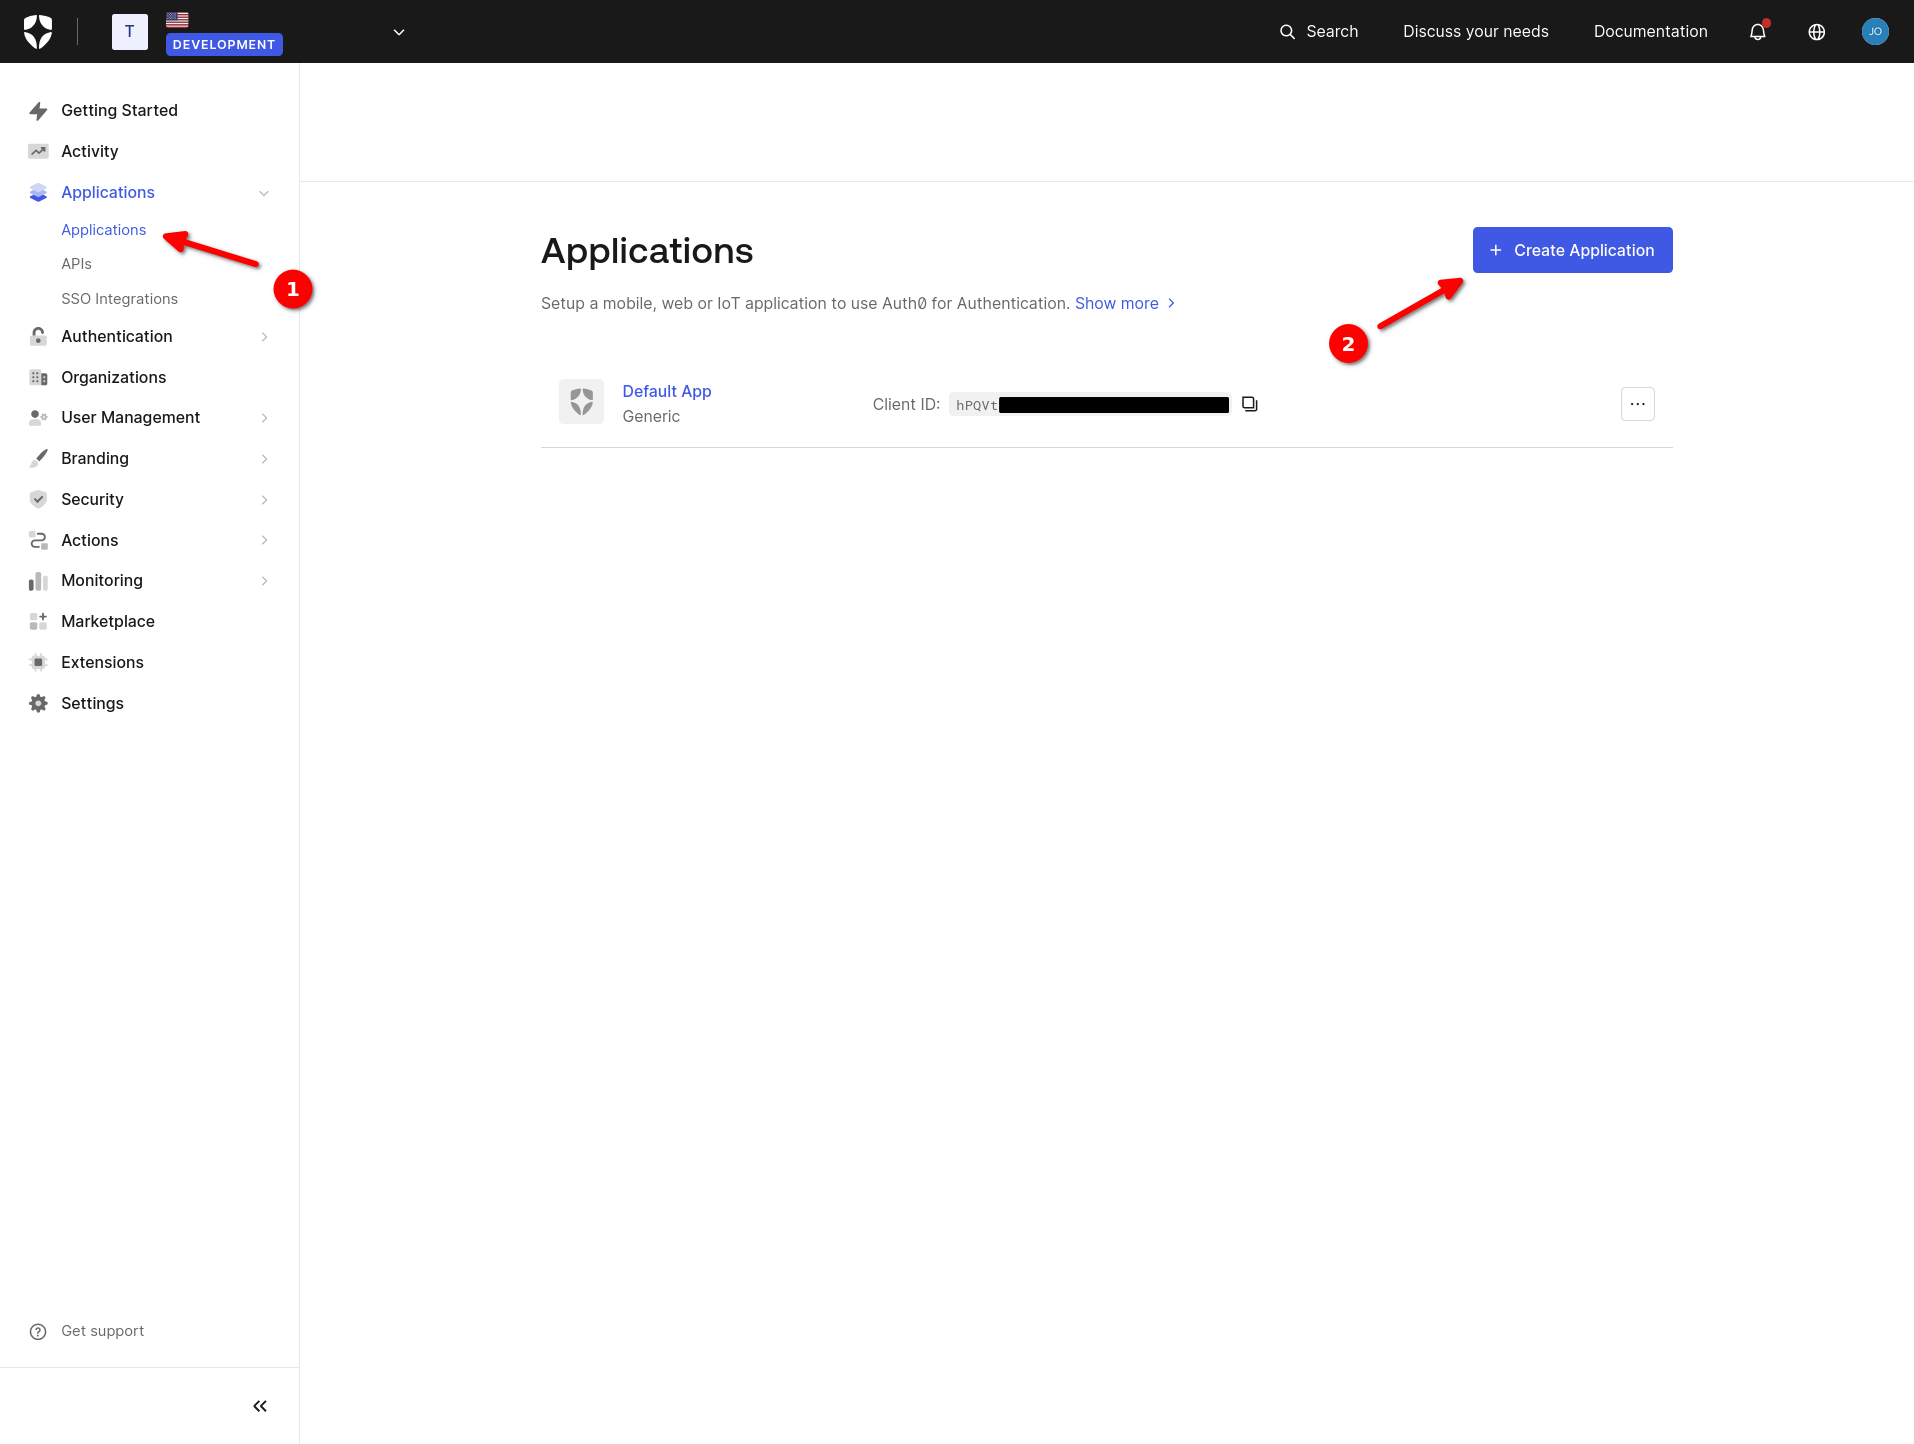
Log in to the Auth0 Dashboard.
Navigate to 'Applications' > 'Applications' and click on '+ Create Application'.
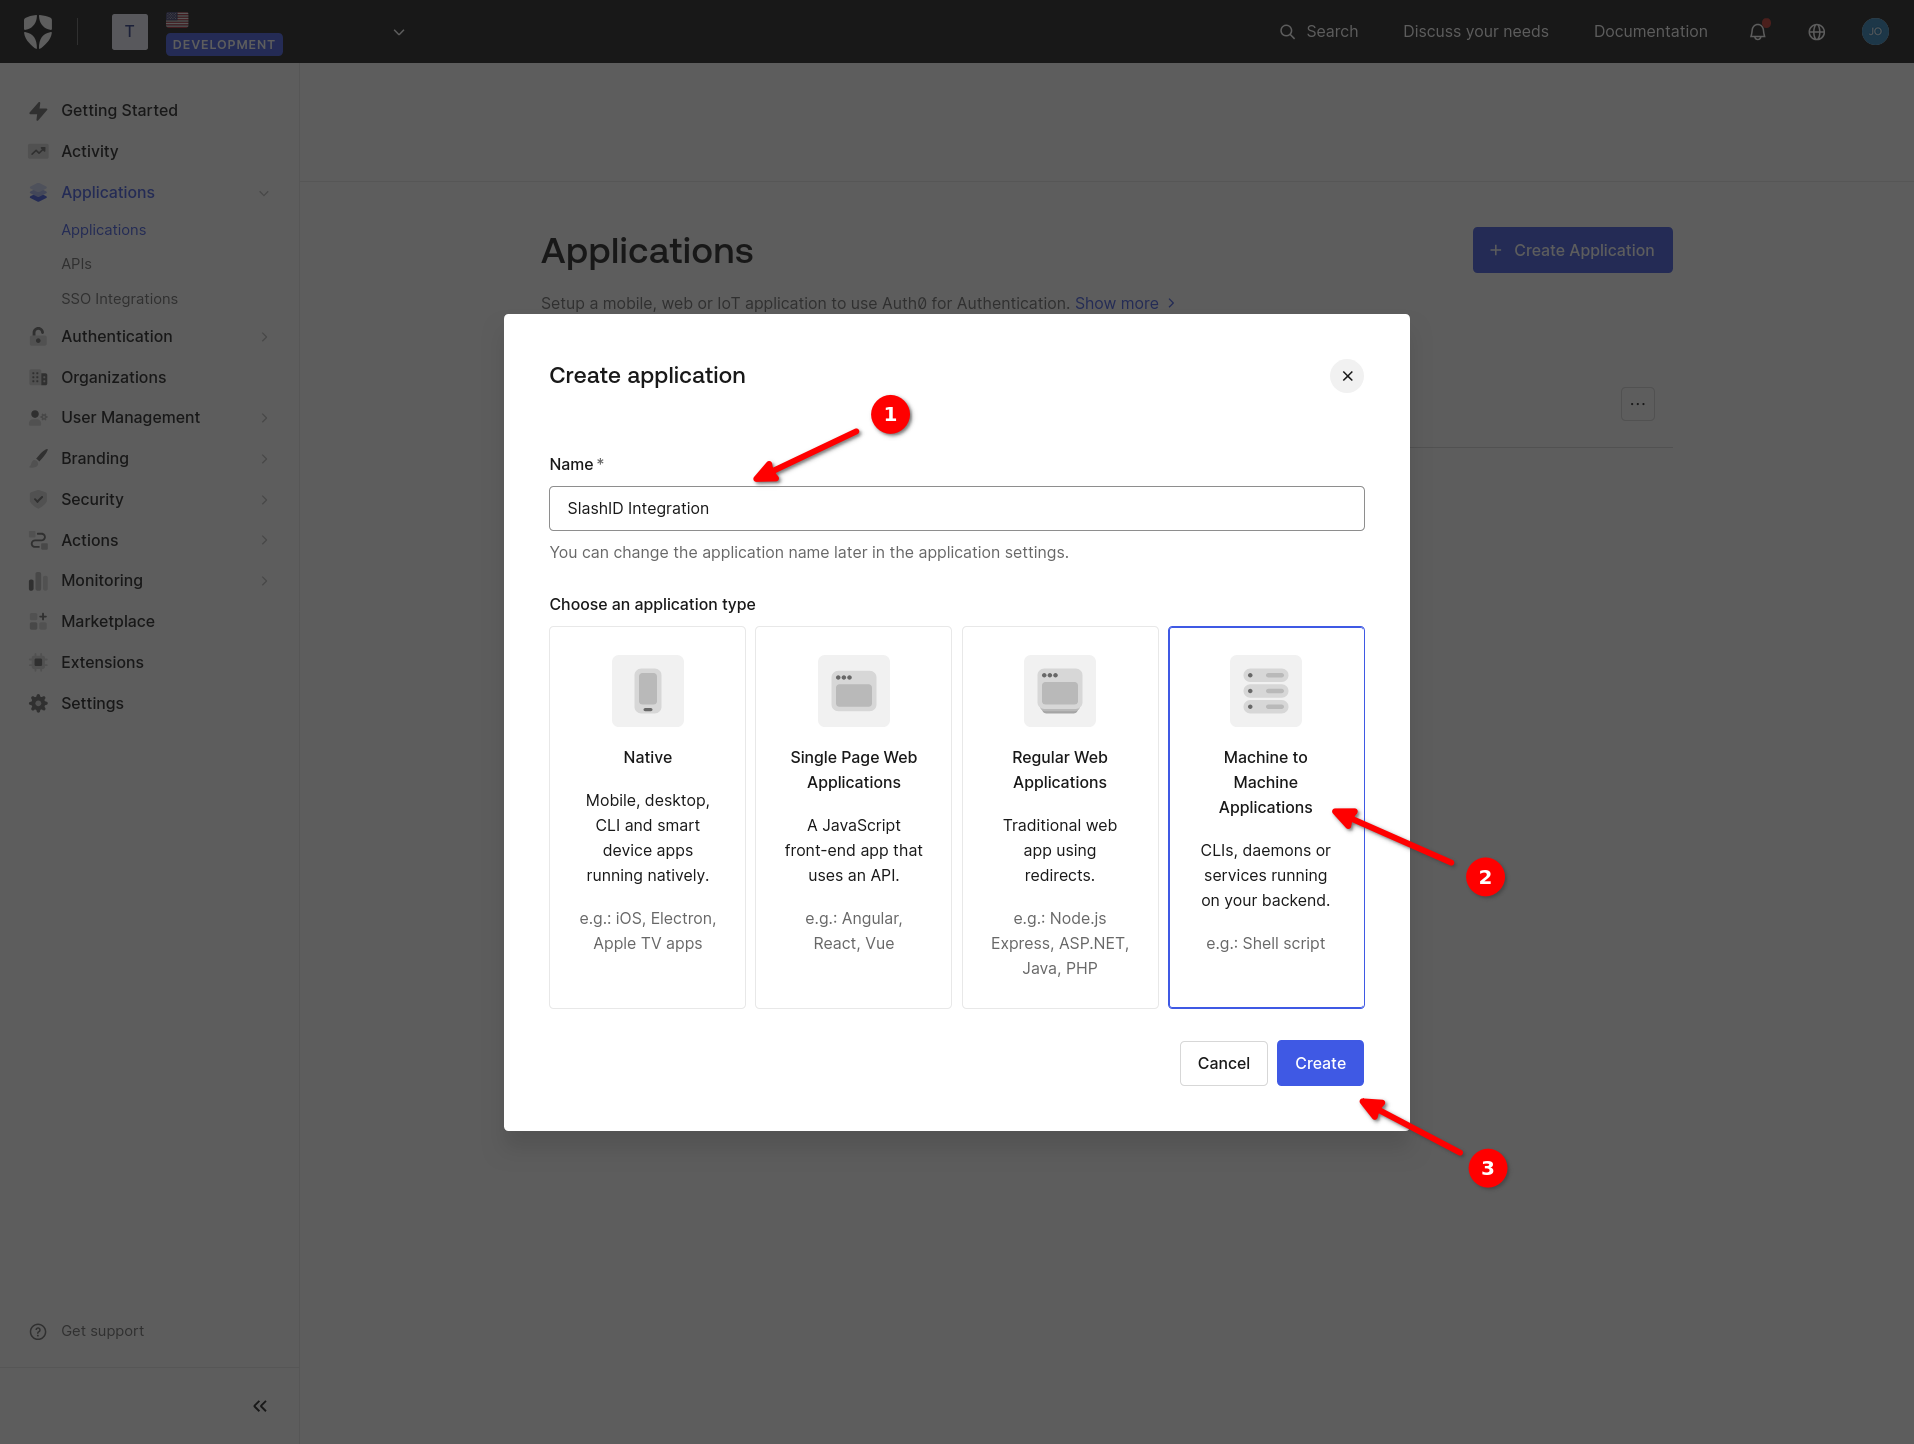
- Choose a name for your new Auth0 Application. Choose type 'Machine to Machine Applications' and click on 'Create'.
Select API 'Auth0 Management API' from the dropdown menu.
Grant all
read:permissions to the application and click on 'Authorize'.

Use the permissions' filter to quickly select all read: permissions.
Step 2: Gather the application's credentials
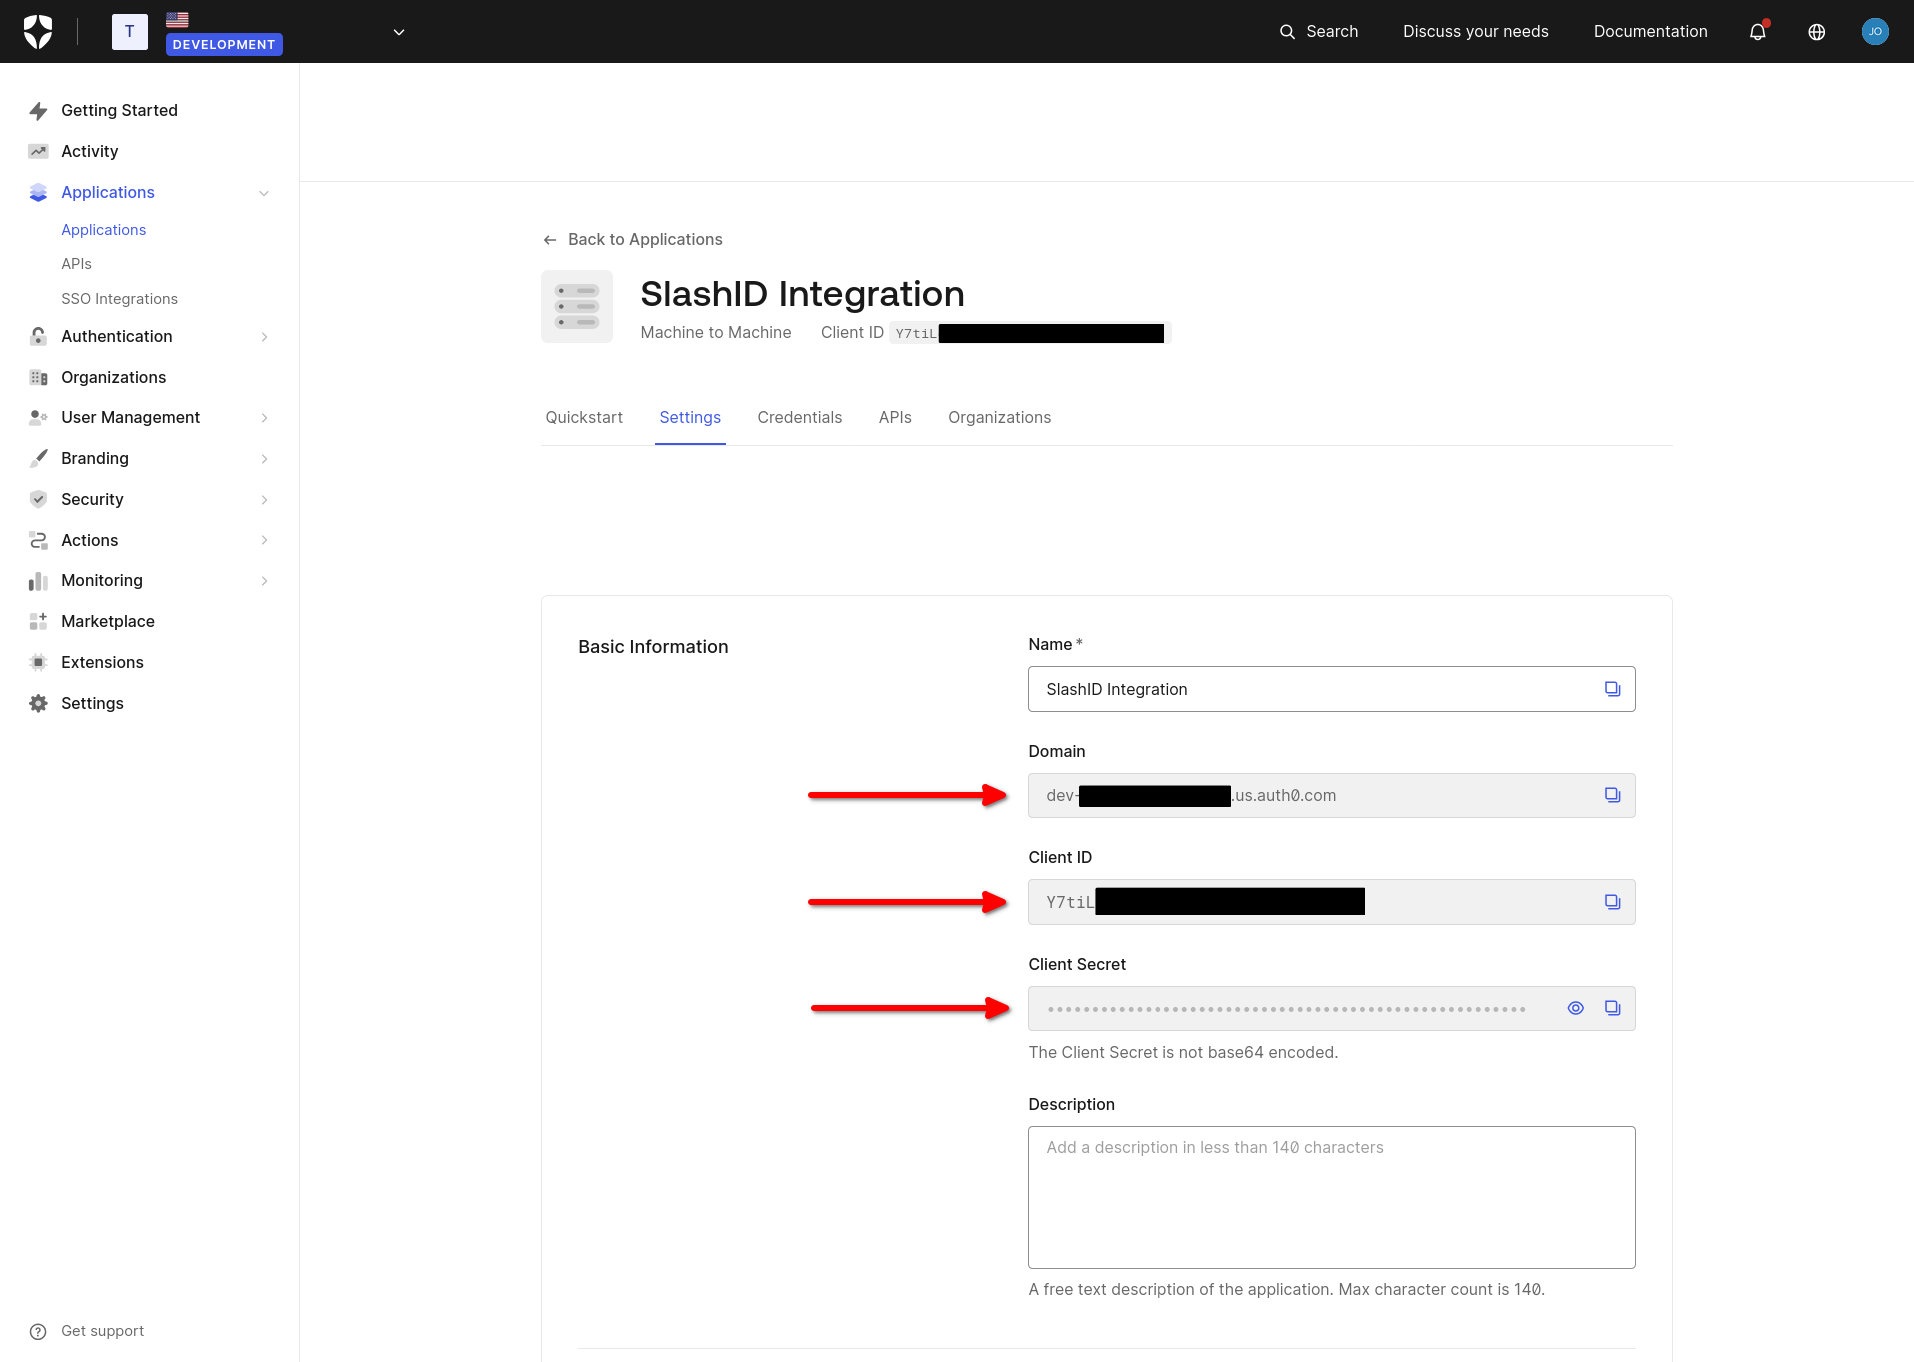
Go to the 'Settings' tab of the application.
Copy and store the application's 'Domain', 'Client ID' and 'Client Secret', which you will need in the next step.
Step 3: Create your Auth0<>SlashID integration
Go to the SlashID Console and navigate to 'Identity Protection' > 'Configuration' > 'Data sources' and click on 'Add data source'.
Select 'Auth0' from the list of providers in the drop-down menu.
Paste the Auth0 Application's 'Domain', 'Client ID', and 'Client Secret' in the boxes provided and click on the 'Connect' button to complete the setup.
The Auth0 Application Domain must start with https://. E.g., https://dev-wazrwbcy42bqhbxr.us.auth0.com.
SlashID is now monitoring your Auth0 Tenant for potential security issues. The initial data sync may take a couple of minutes, after which you can start exploring security events in the 'Identity Protection Dashboard' section of the SlashID Console.