Integrate with Azure (Event Streaming)
Follow this step-by-step guide to allow SlashID to monitor and protect your Microsoft Azure cloud environment using event streaming. To this end, we’ll need to assemble a data pipeline.
Prerequisites
You'll need:
- A user account with the appropriate access permissions in an Azure tenant, that features a subscription
- An identity protection connector for the Azure tenant in a SlashID organization
Build the data pipeline
This document will guide you through the process of creating the following data pipeline:

The data flowing through the pipeline are logs. Microsoft Azure allows their customers to configure log exports to Azure Event Hub. Event Hub has pull semantics, so we need to add something to the pipeline to pull data from the Event Hub and push it to an Event Grid topic. We'll use a Logic App to achieve this. An Event Grid Subscription forwards data from an Event Grid Topic to a sink. We'll create a web hook-type sink to forward data to SlashID over HTTPS.
Azure Event Grid
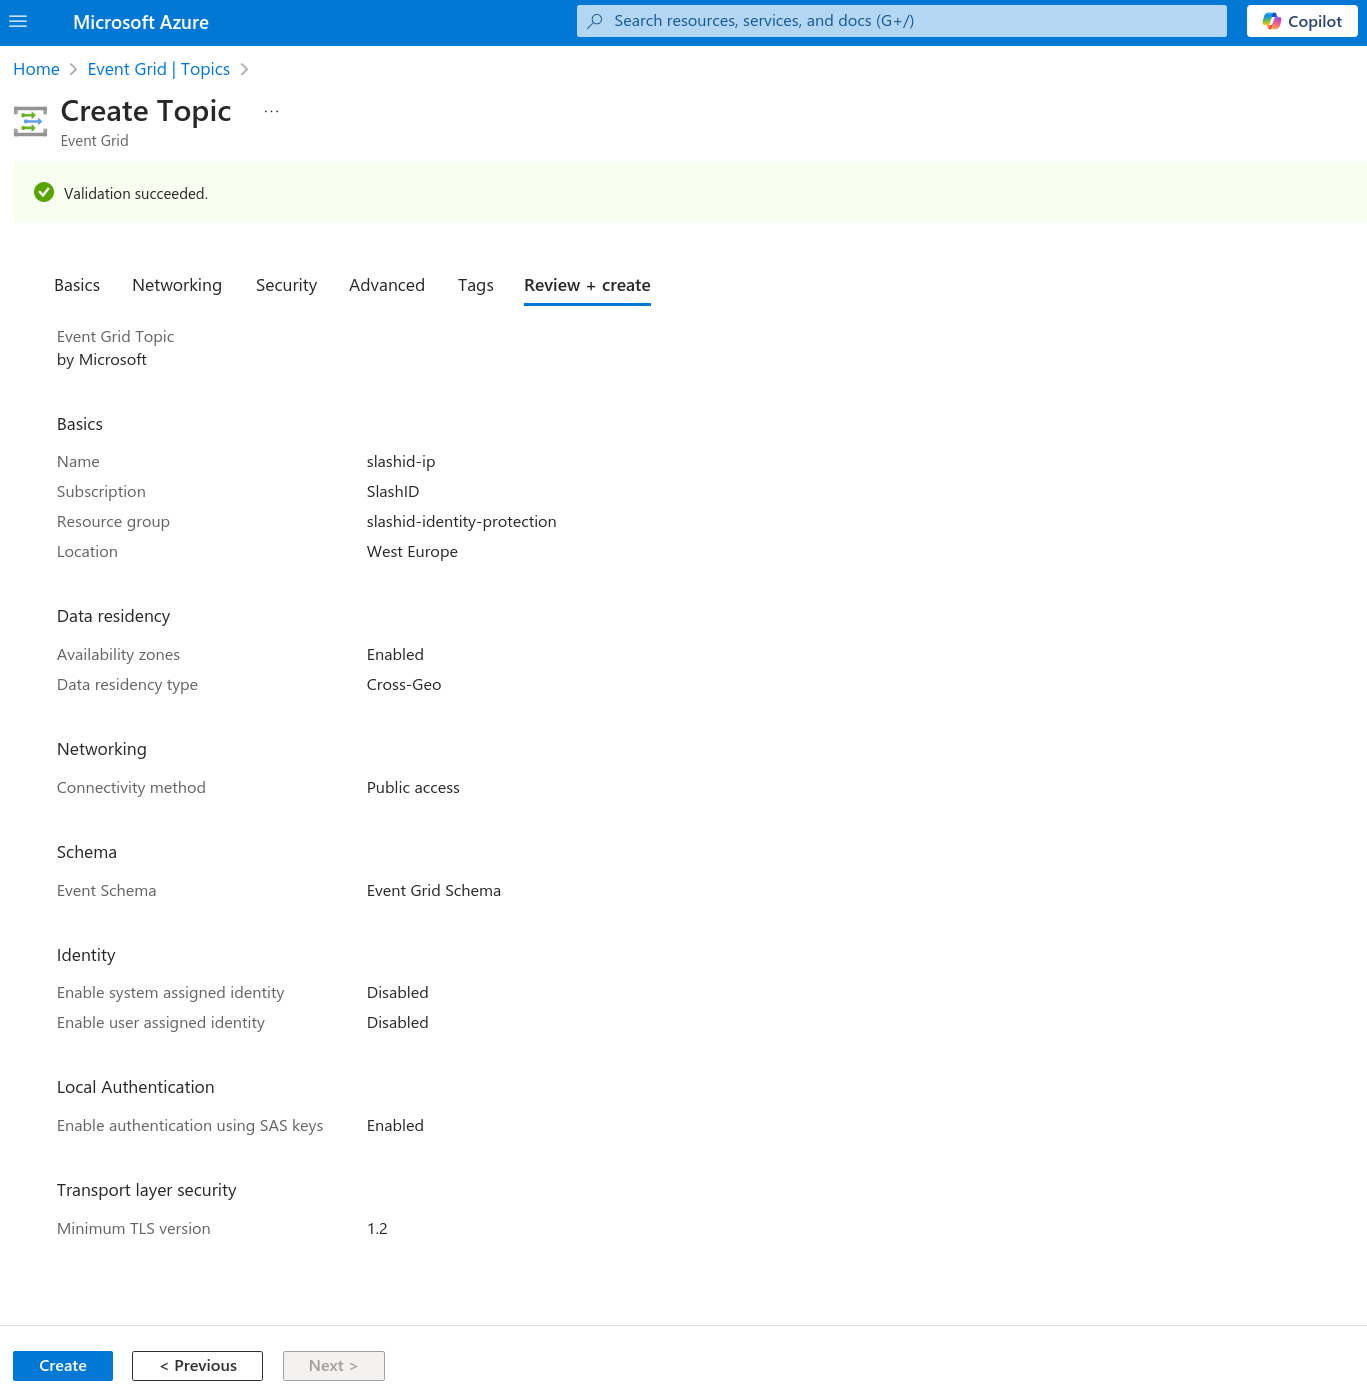
We’ll start at the end of the data pipeline. Go to Event Grid | Topics and create a new topic.
In the "Basics" tab, under section "Project Details", select your subscription. We advise you to create a new resource group so you can easily keep track of all the resources we’ll create. Under section "Topic Details", name your topic as you please, and set its region to "West Europe". You can now click on the "Review + Create" button and proceed to create the topic.
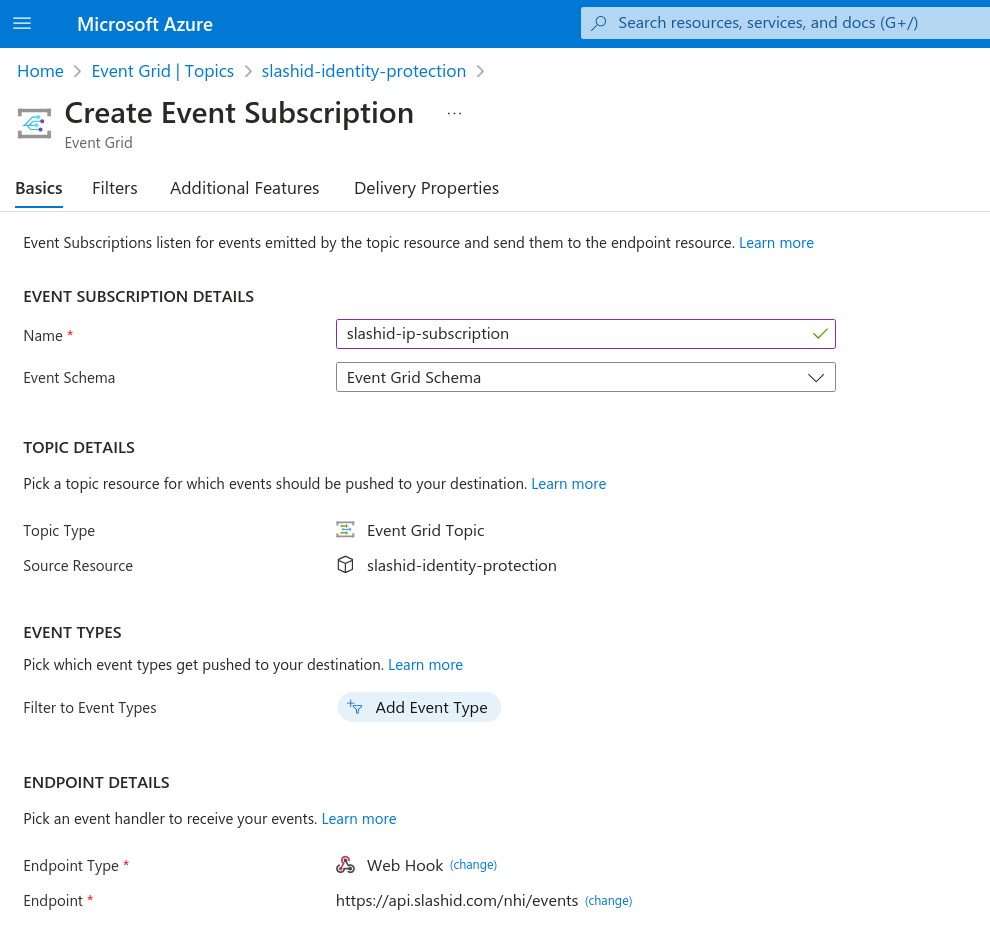
Once the topic is provisioned, open it, and go to "Event Subscriptions". Click to create a new event subscription.
In the "Basics" tab, name your subscription and, under section "Endpoint
Details", select "Web Hook" as the "Endpoint Type". Click to configure an
endpoint, and enter
https://api.slashid.com/nhi/events as
the subscriber endpoint.
In the "Additional Features" tab, feel free to configure dead-lettering and retry policies as you please. SlashID supports batched events, but we don’t require it.
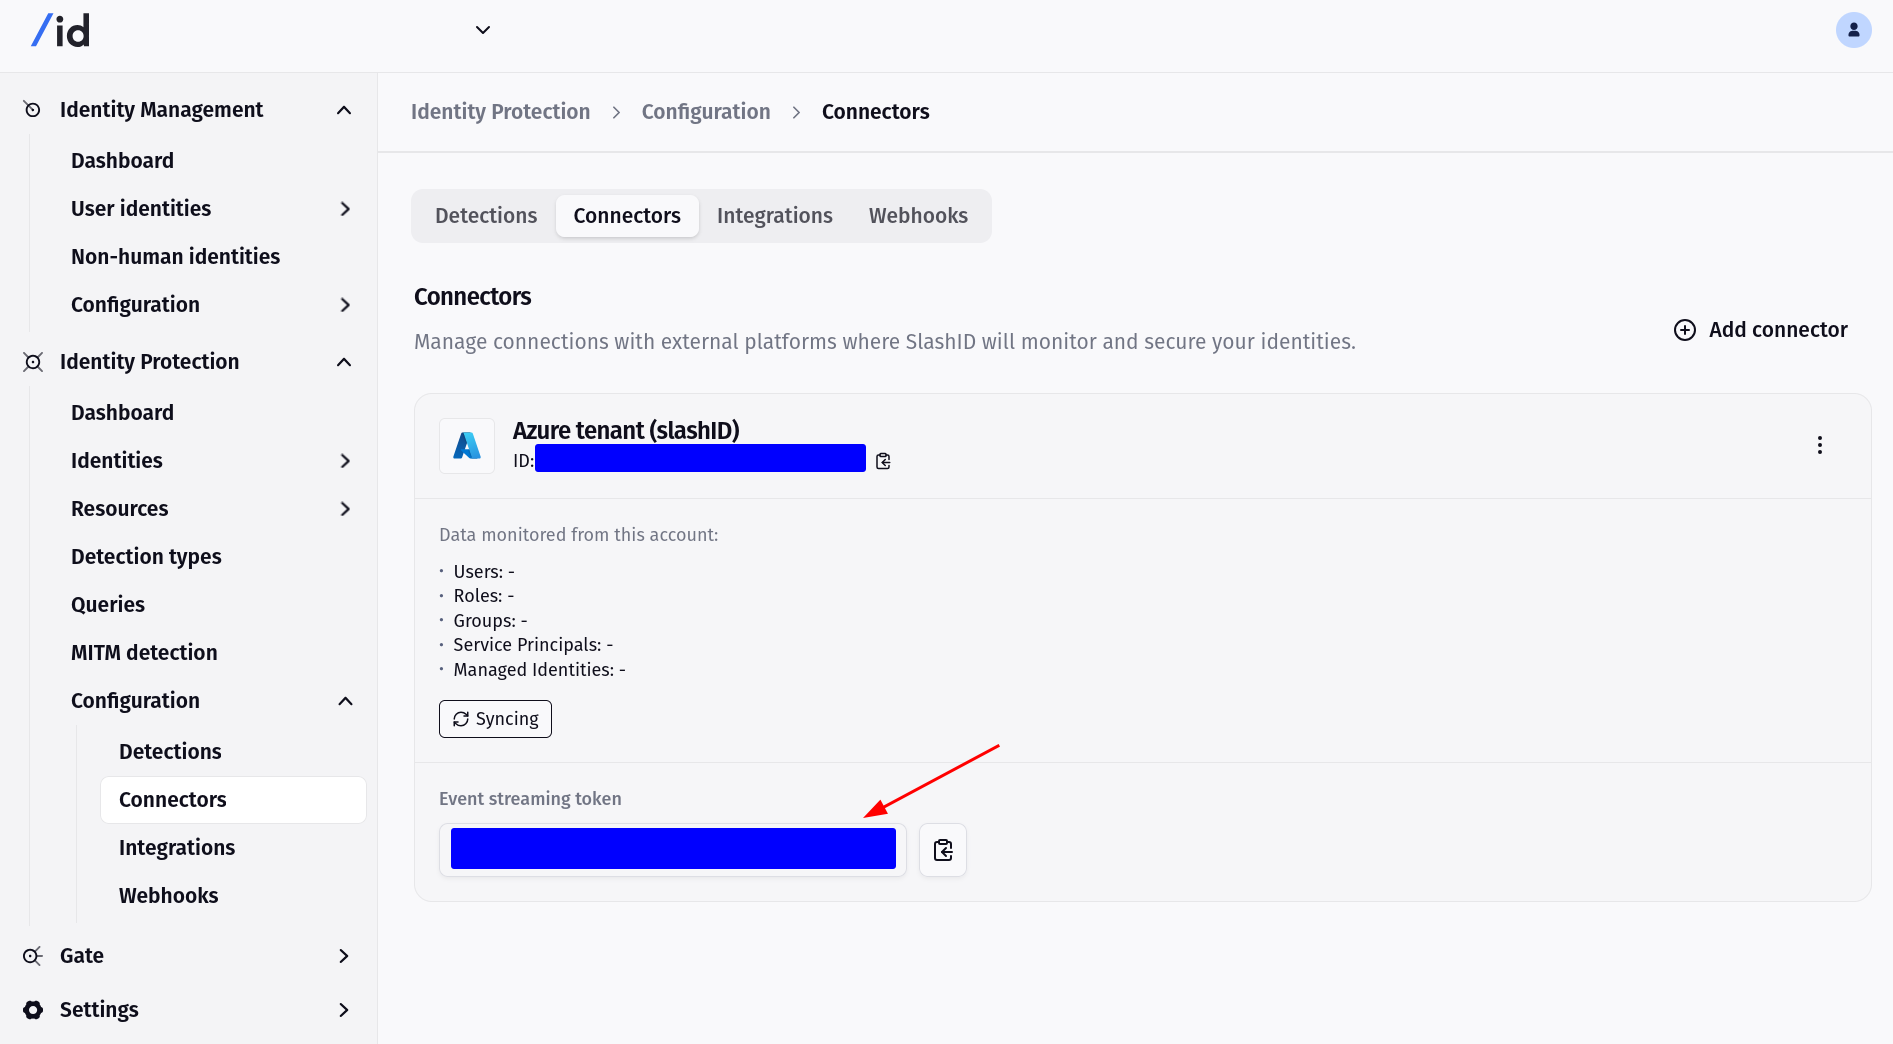
You'll now need the Event Streaming Token for your SlashID connection. You can find this in SlashID’s console.
In the "Delivery Properties" tab, under section "Properties Sent on Event
Delivery", add a static header named "Authorization". Its value must be Bearer <TOKEN>
where <TOKEN> is your SlashID’s connection event streaming token.
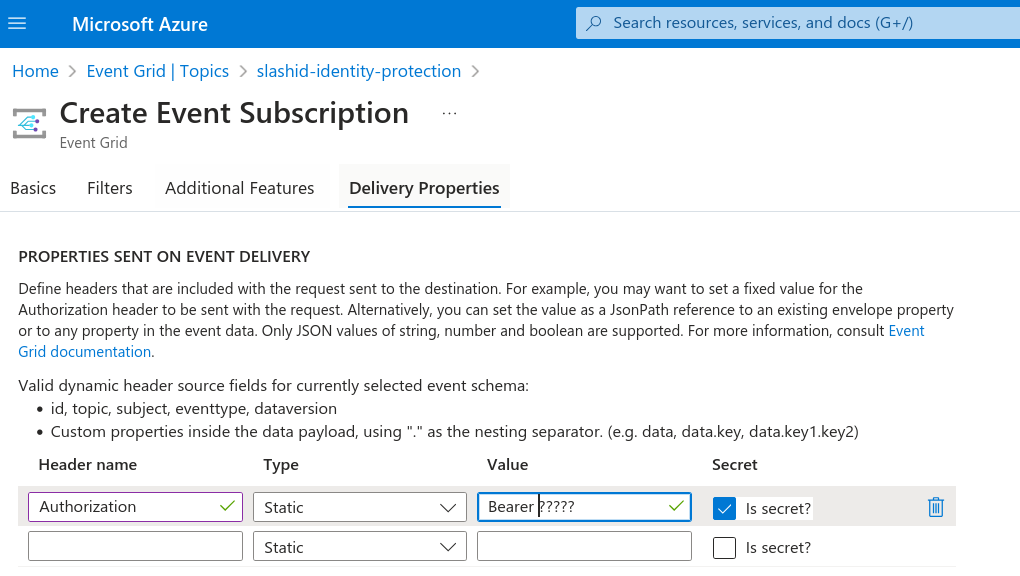
Check the "Is secret?" checkbox, as the token is a secret, and proceed to create the subscription.
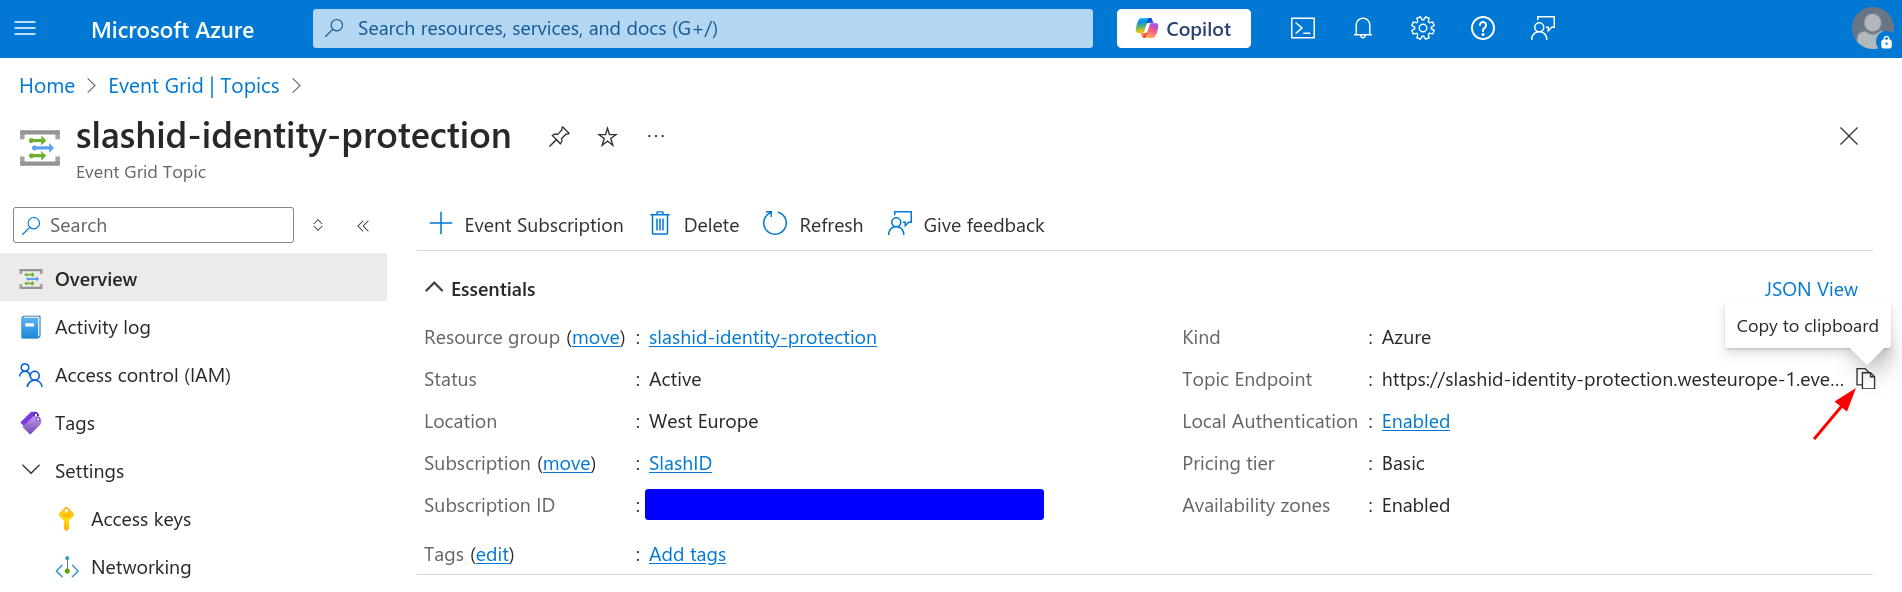
Go back to the Event Grid topic you just created. Navigate to "Overview" and
copy the topic's endpoint to a temporary location as you'll need it later. It
should look similar to
https://slashid-identity-protection.westeurope-1.eventgrid.azure.net/api/events
where slashid-identity-protection is the name of the topic.
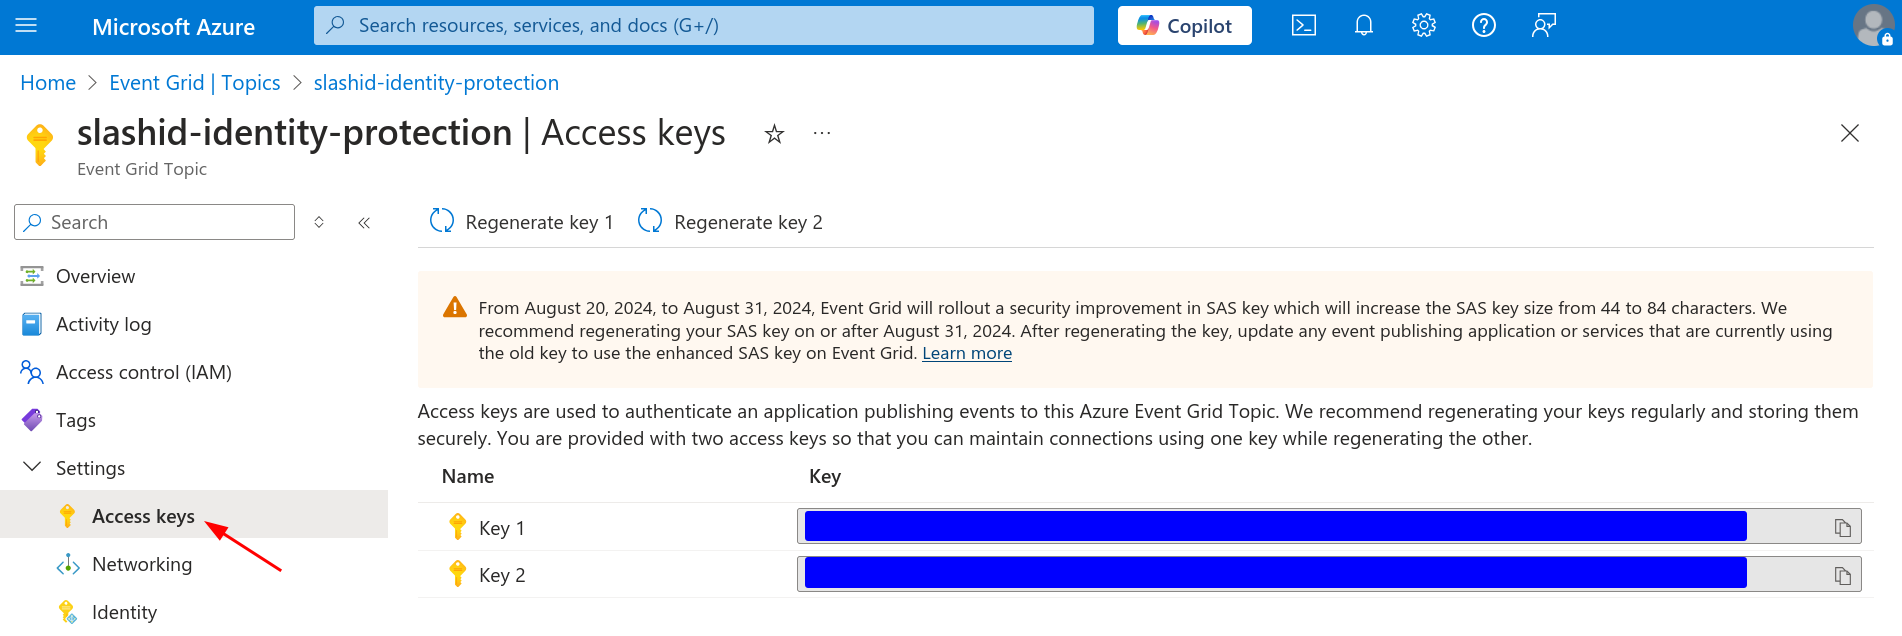
Next, navigate to "Settings > Access keys". You should see two keys. Copy either of them to a temporary location, like you did with the topic's endpoint.
Azure Event Hubs
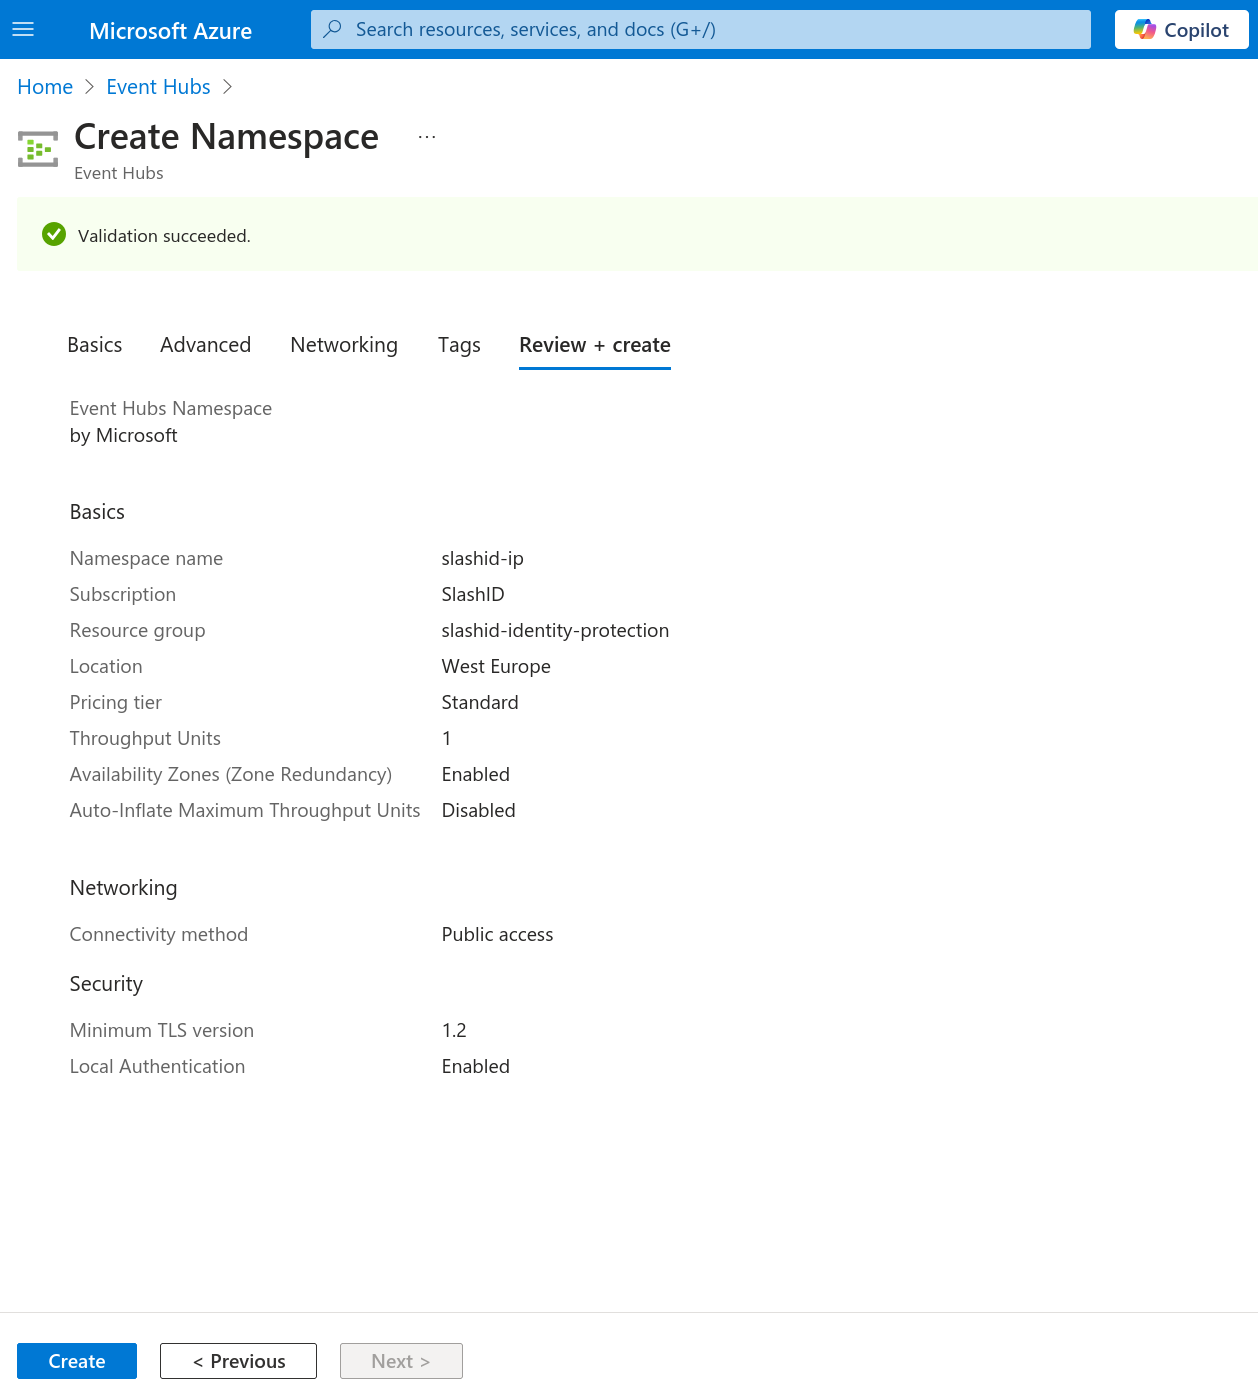
Go to Azure Event Hubs and click to create a namespace.
In the "Basics" tab, under section "Instance Details", name your namespace and set its location to "West Europe". Select the pricing tier according to your needs. Proceed to create the namespace.
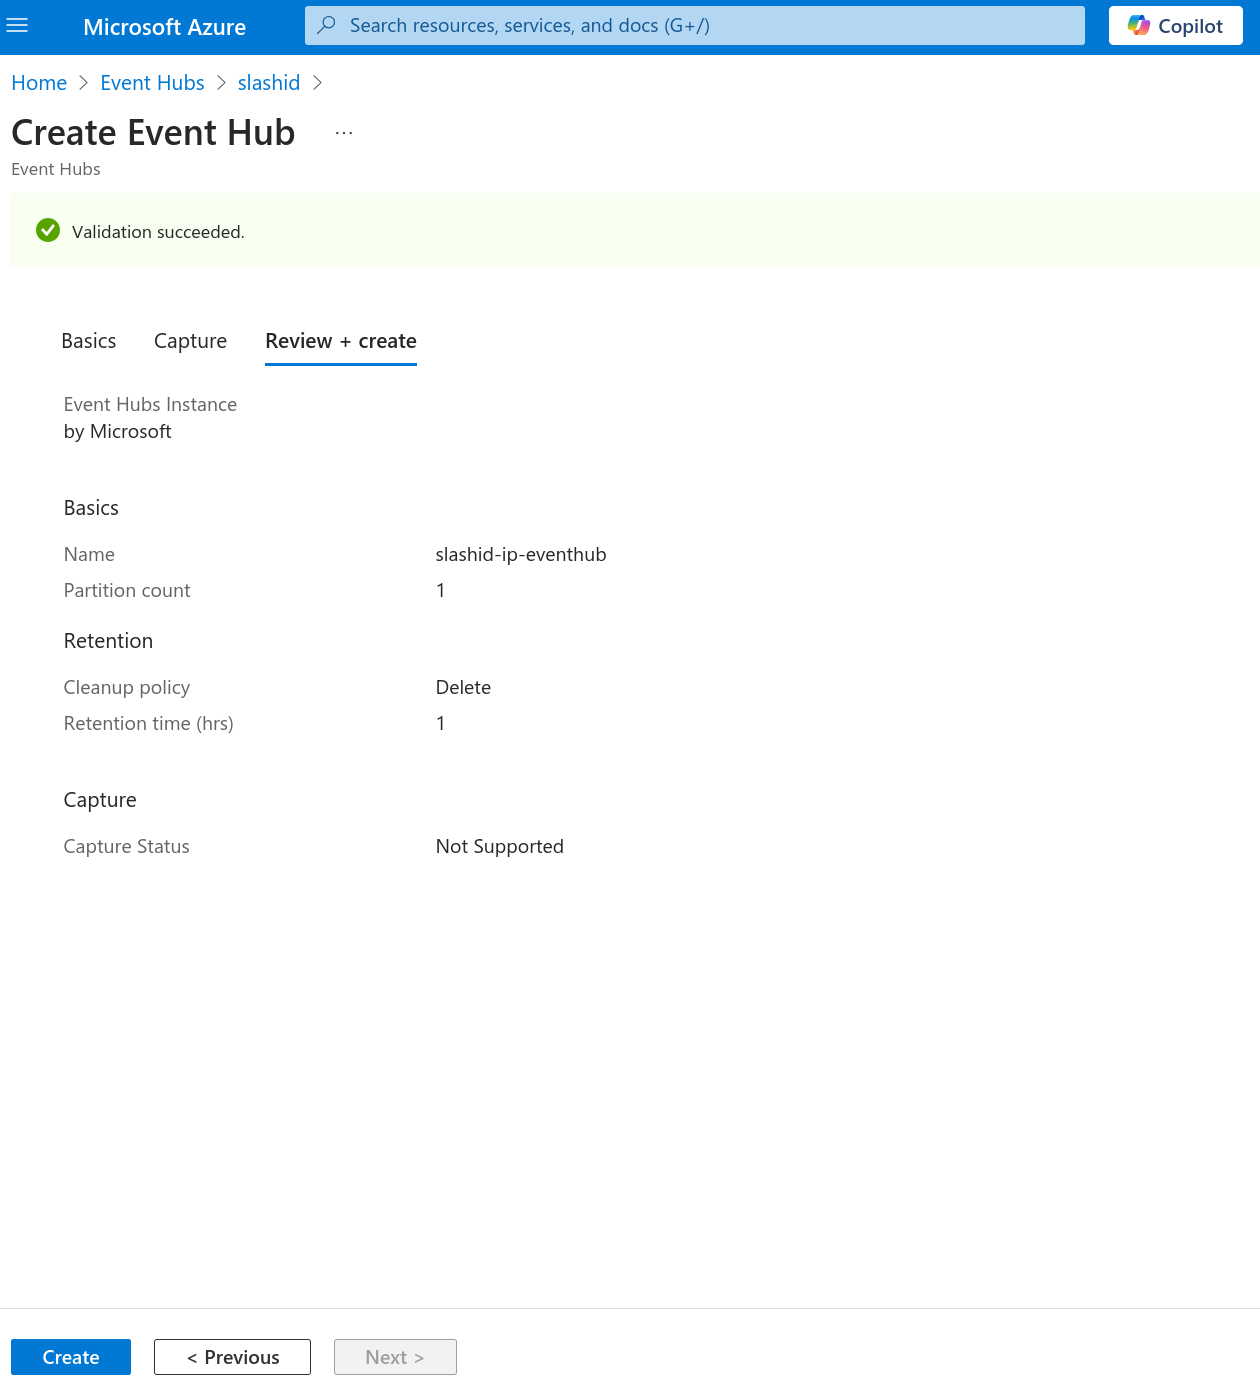
Once the namespace is provisioned, click to create an event hub.
In the "Basics" tab, under section "Event Hub Details", name your event hub and configure the event hub’s retention as you please. Proceed to create the event hub.
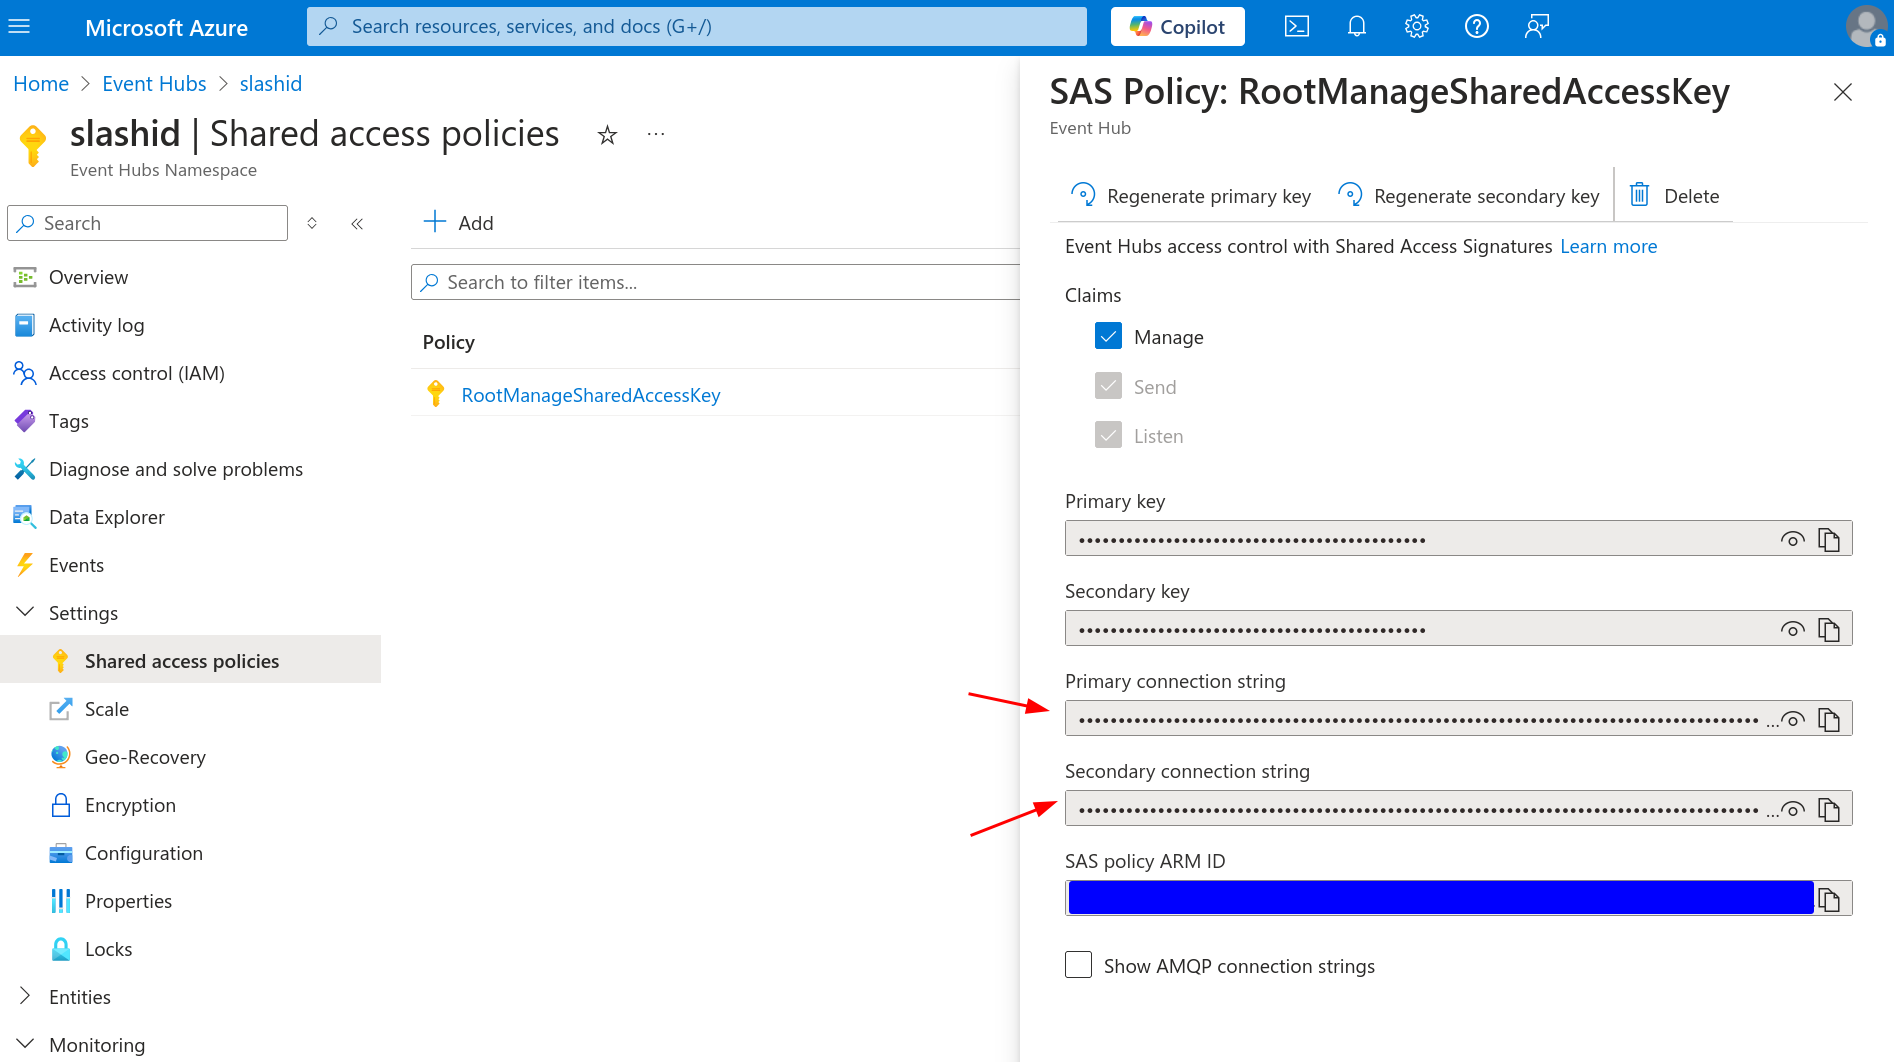
Go back to the Event Hub Namespace you just created. Navigate to "Settings >
Shared access policies" where you’ll find a default policy named
RootManageSharedAccessKey. Click to open it and copy either connection
string. Keep this secret in a temporary location as we'll need it later on.
Azure Logic Apps
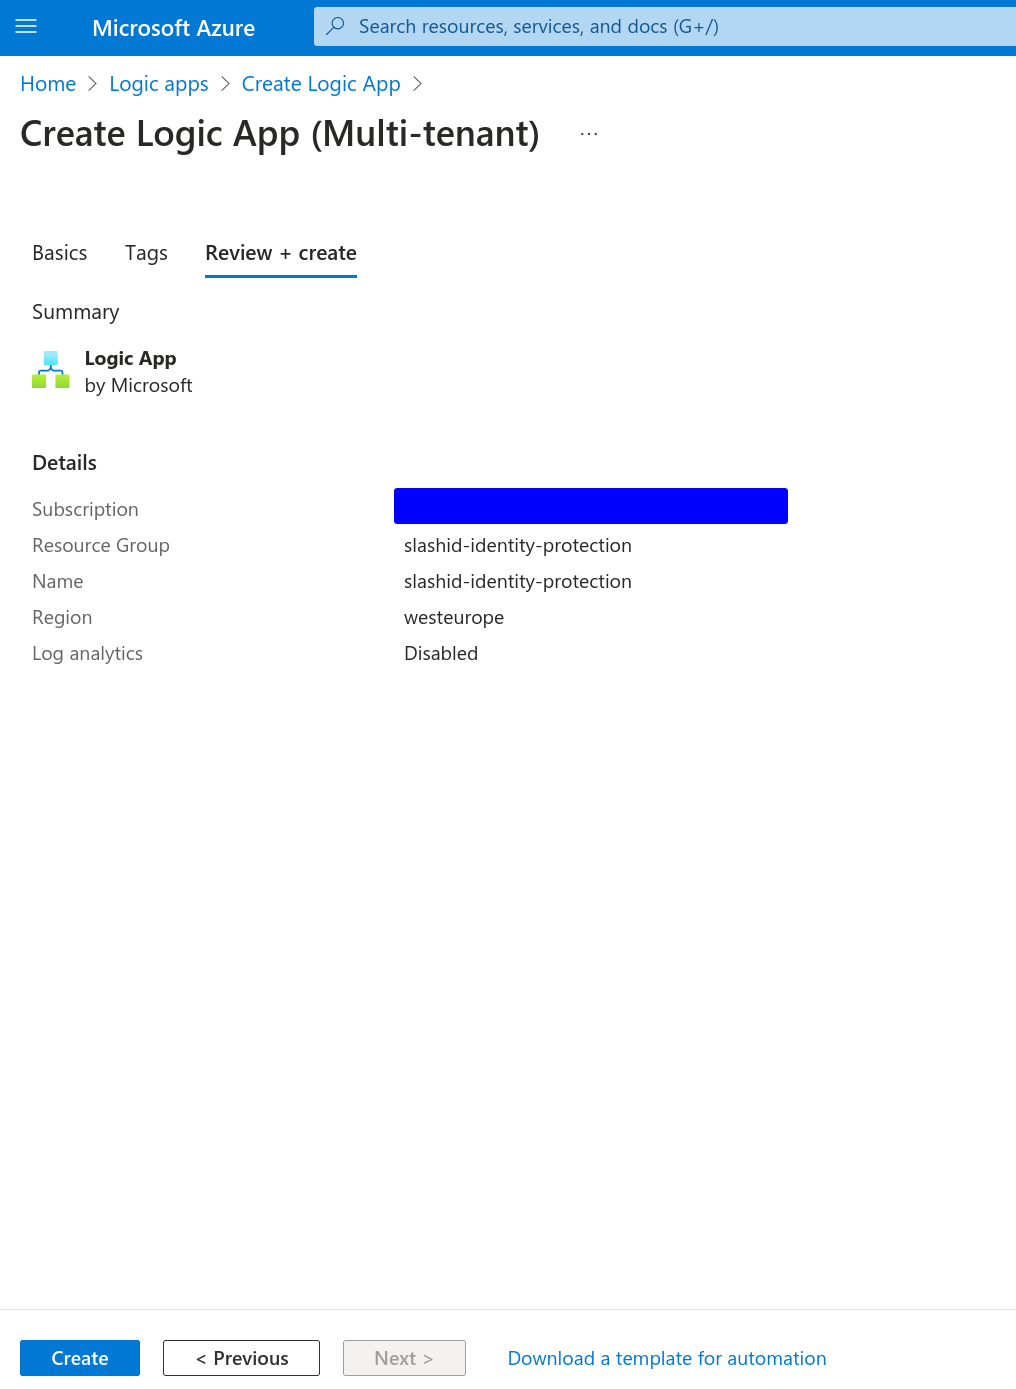
Go to Azure Logic Apps and click to add a new logic app.
Start by selecting the hosting option that better suits your needs. In the "Basics" tab, under the "Instance Details" section, name your logic app as you please, and set its location to "West Europe".
While logic apps can be represented as code (JSON), Azure’s Logic Apps visual editor is currently broken and doesn’t allow us to edit apps that need "API Connections" - configuration that allows Logic Apps components to interact with systems like Event Hub and Event Grid - when those API connections don’t yet exist. At the same time, it’s currently impossible to precreate API connections. Therefore, we’ll build the workflow from scratch.
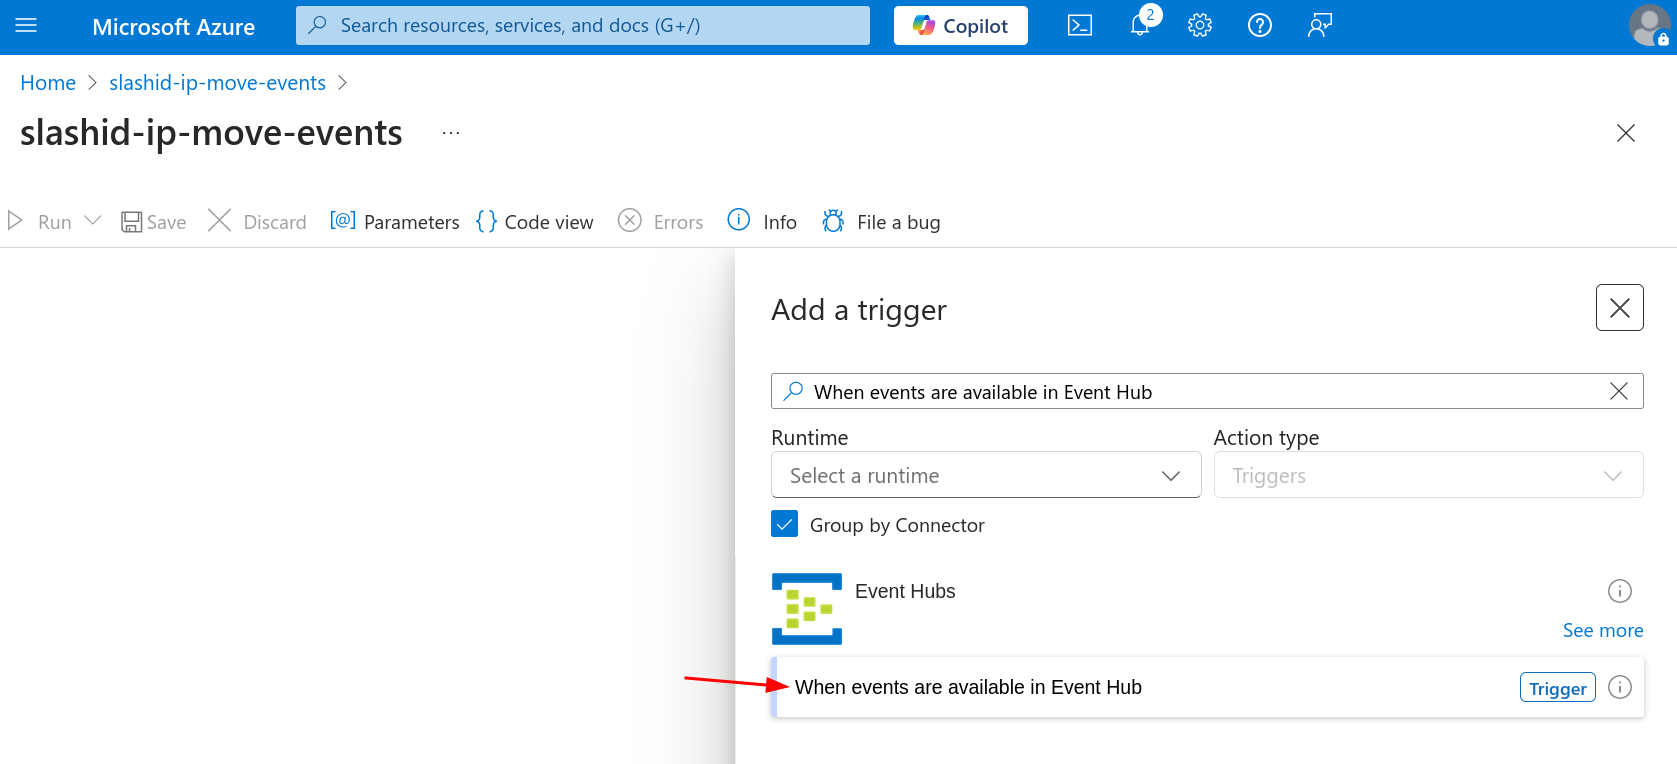
Click to edit the logic app. Now click to add a trigger. Search for "When events are available in Event Hub" under "Event Hubs" and add it. You'll be prompted to create a connection with an Event Hub Namespace. Name the connection as you please, and leave "Authentication Type" as "Access Key". When asked for a "Connection String", paste the value you previously copied to a temporary location, after creating the Event Hub Namespace.
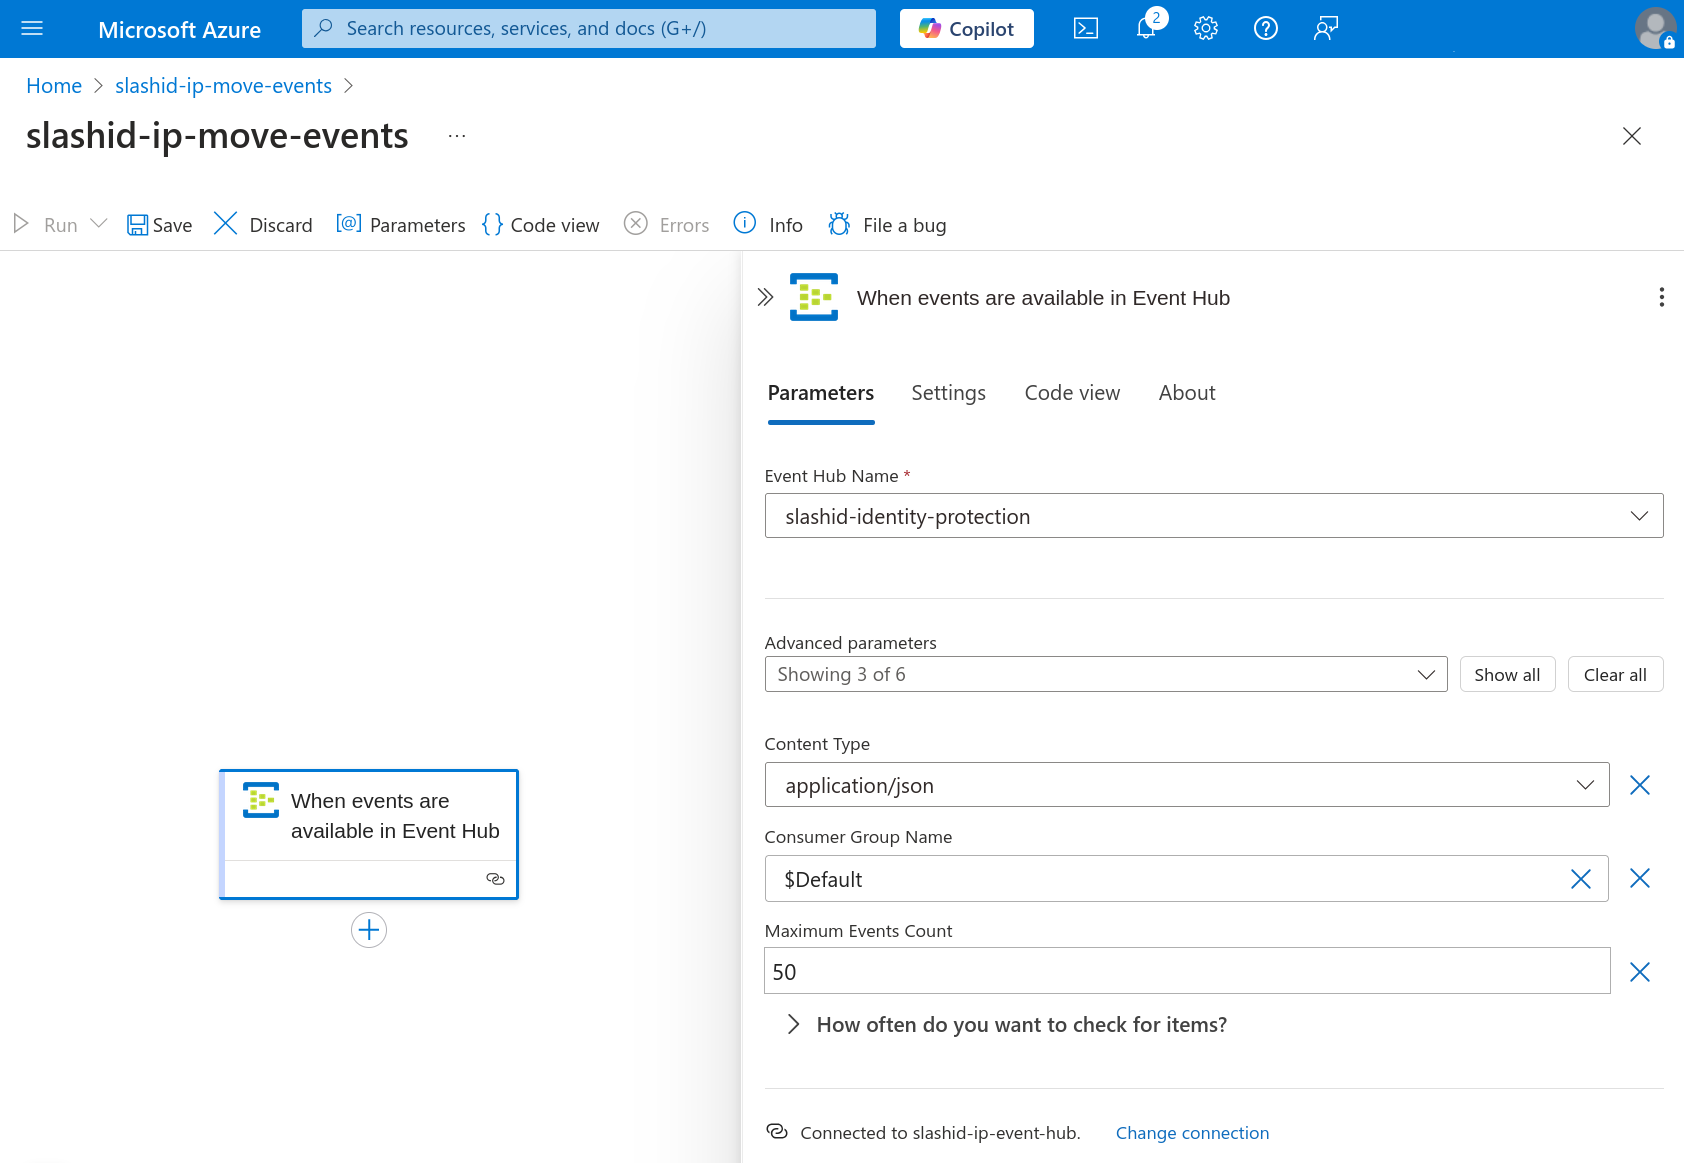
In the "Parameters" tab, select the event hub you previously created by name,
and change "Content Type" to application/json. Adjust frequency with which the
trigger must check for new items. We recommend a value between 30 seconds and 3
minutes. In the "Settings" tab, disable "Split on". The trigger is now complete.
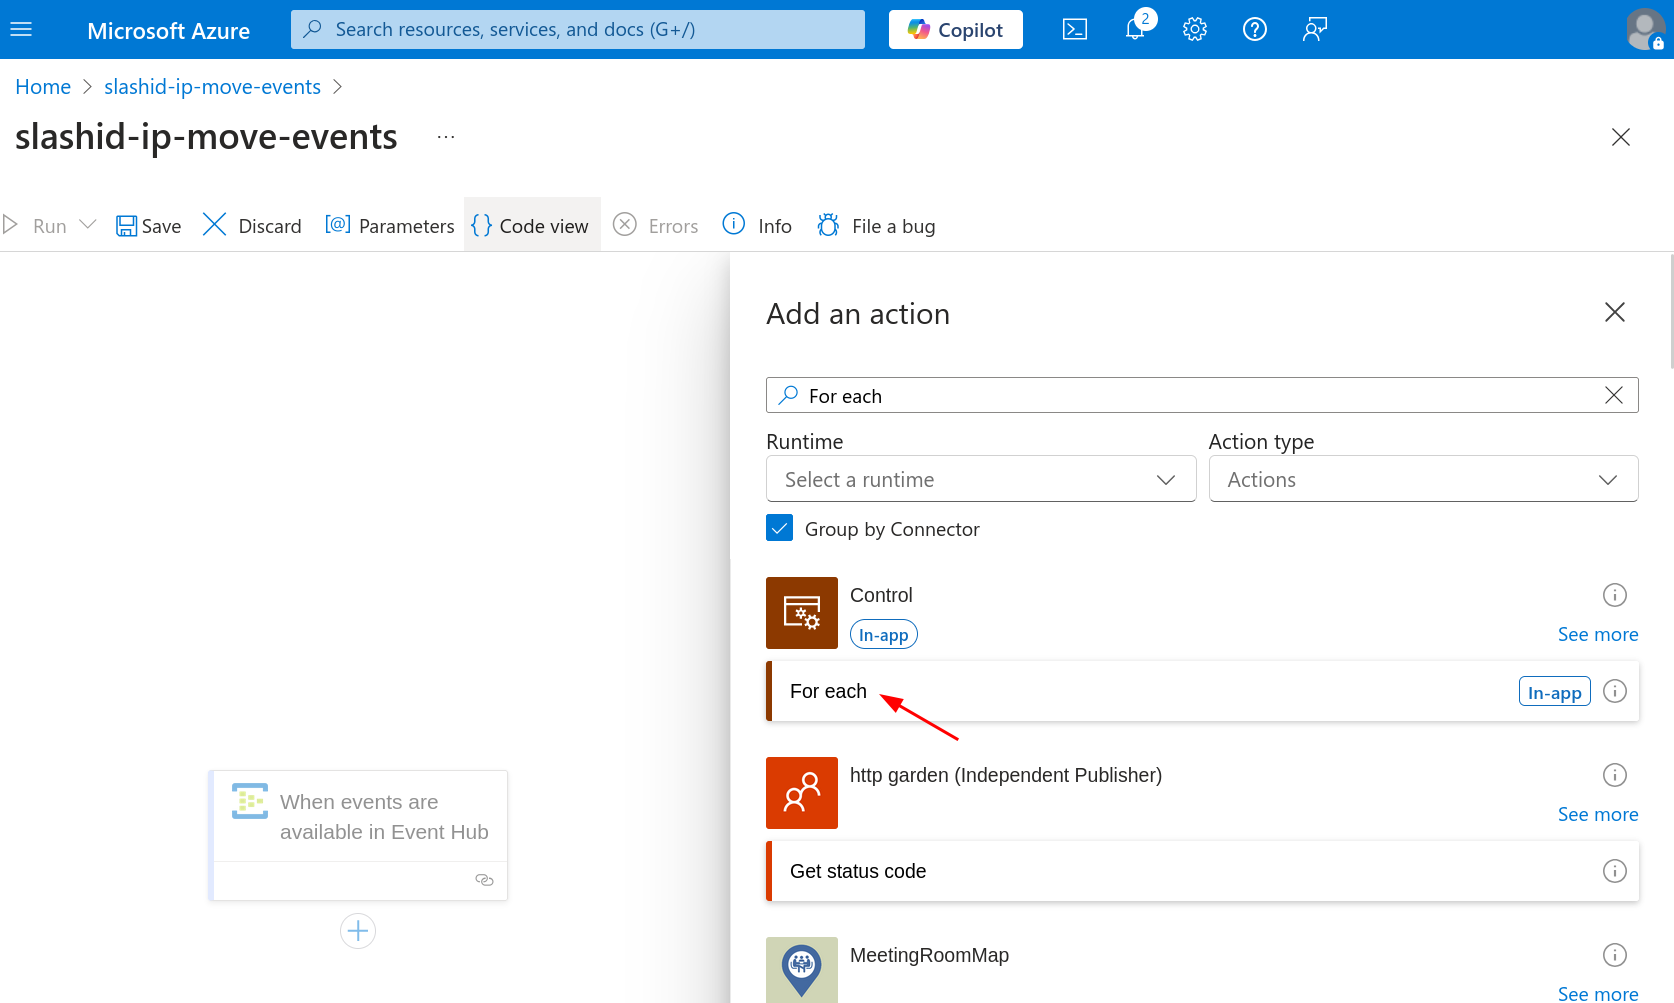
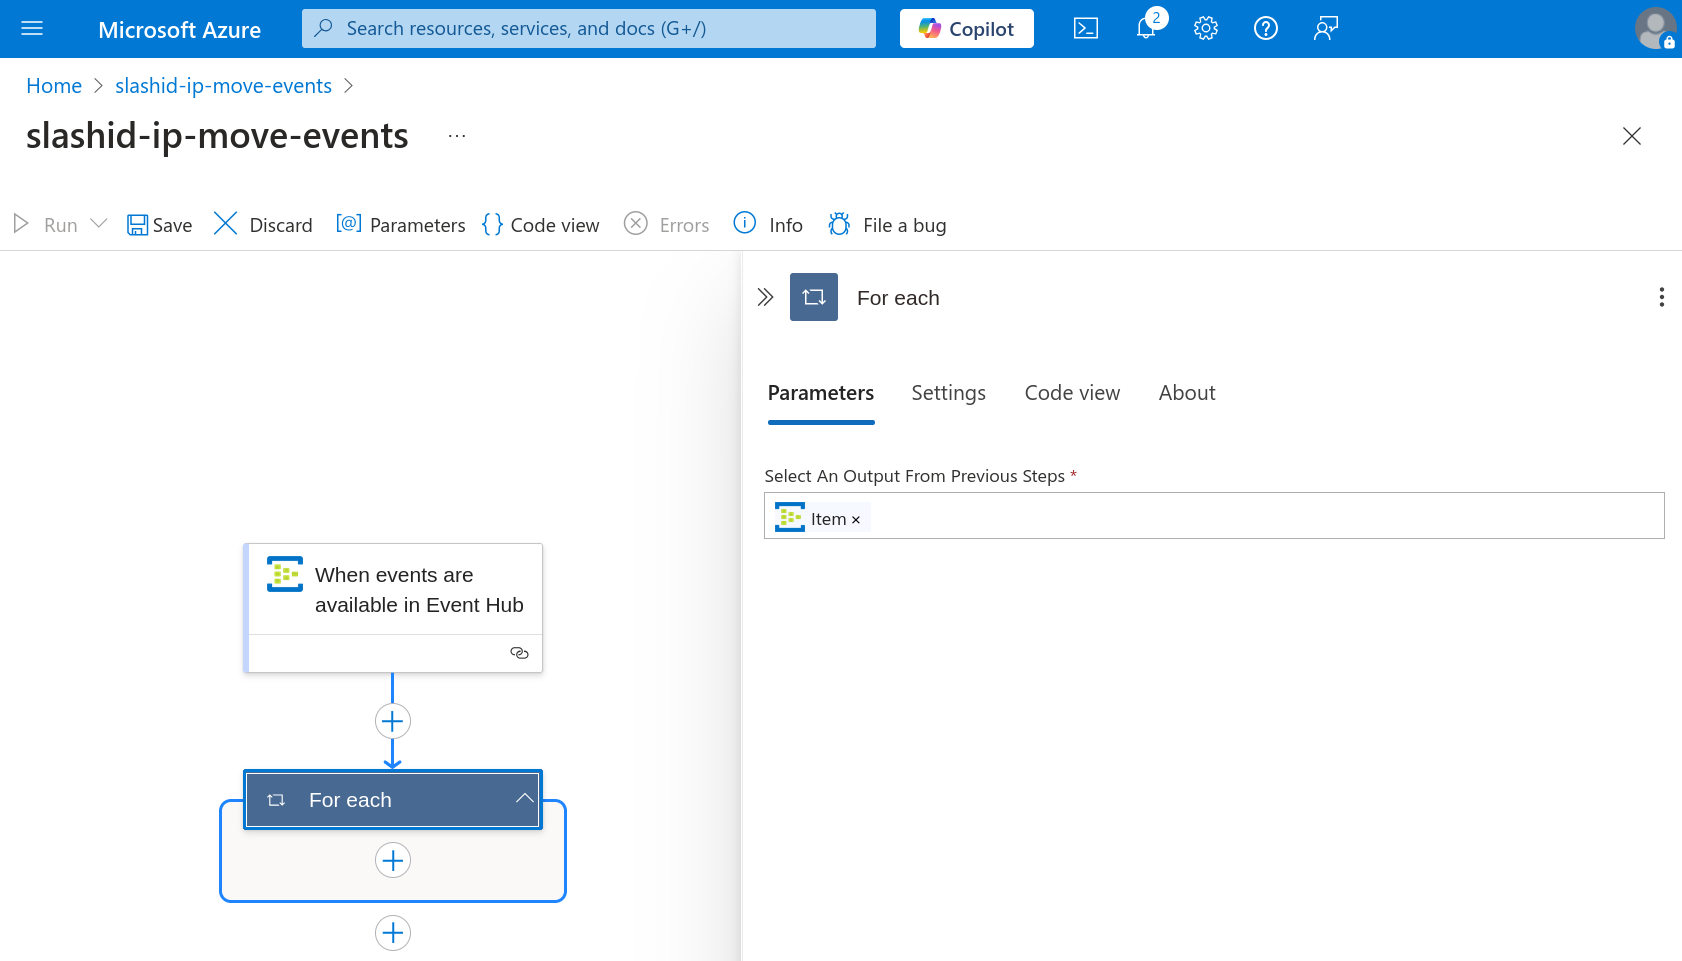
Proceed to click on the plus sign under the trigger you just added to add a new step. Search for the "For each" action under "Control" and add it.
In the "Parameters" tab, write @triggerBody() under "Select an output from
previous steps".
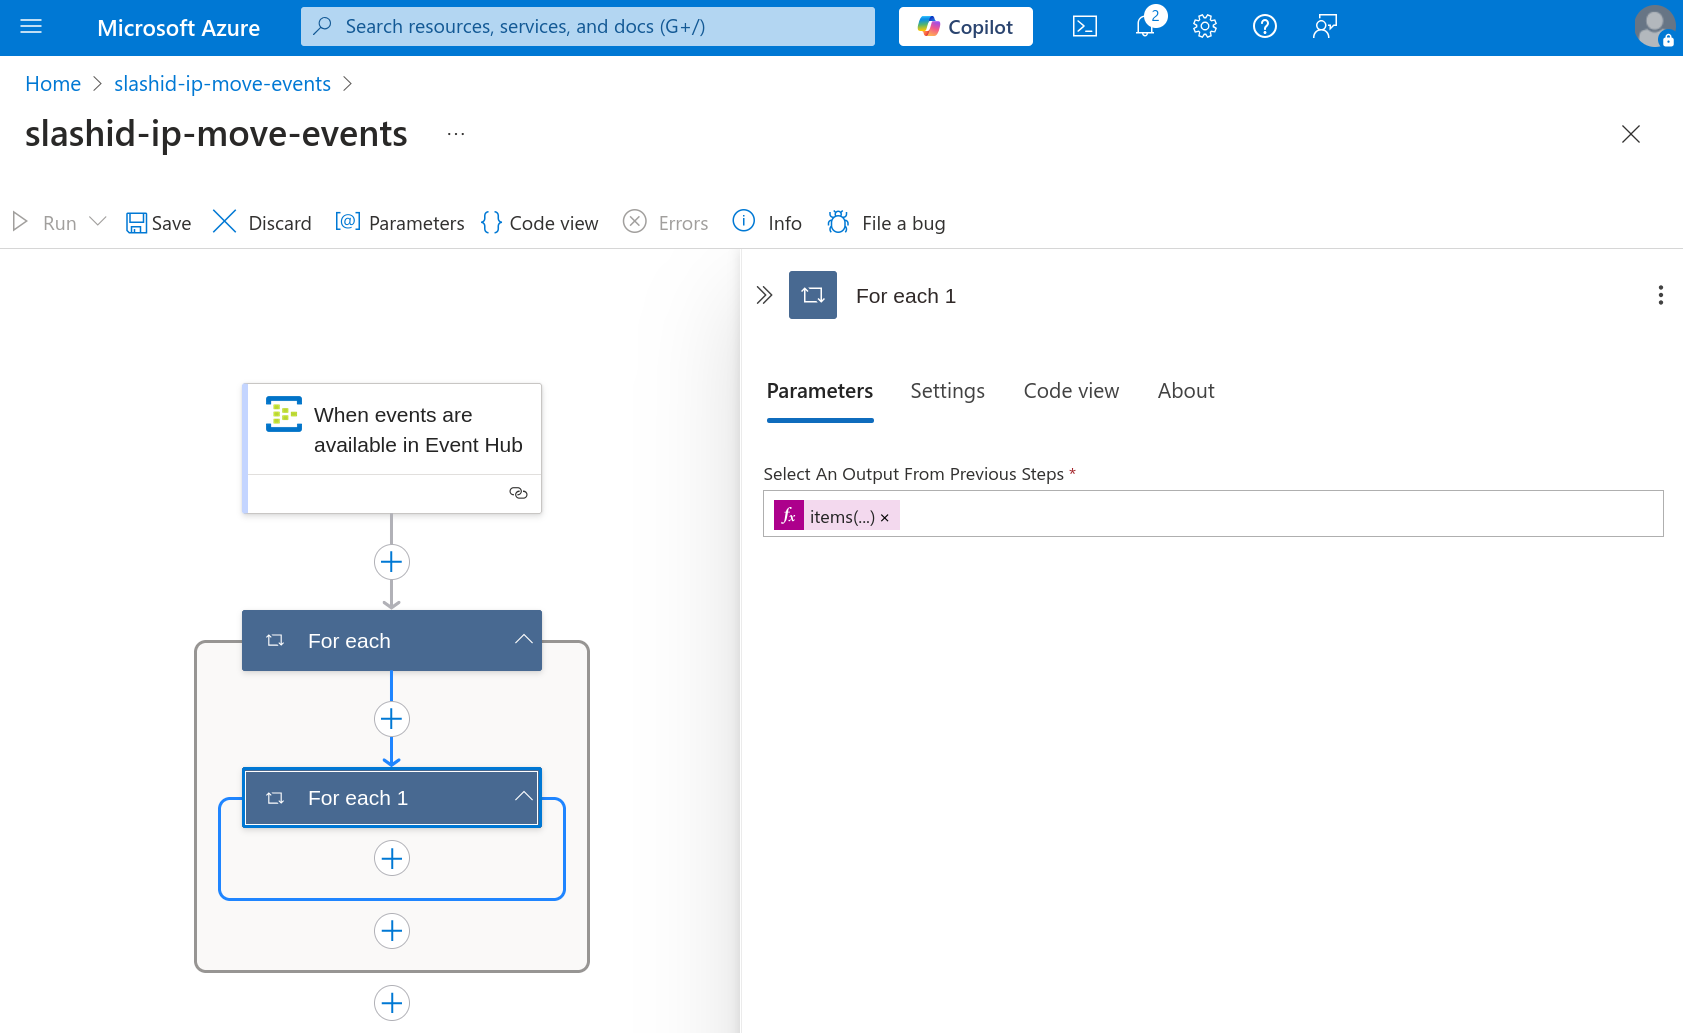
Now click to add a new action inside "For Each", and add yet
another "For Each" action; you should end up with two nested "For Each" steps.
Paste @items('For_each')['ContentData']['records'] under "Select an output
from previous steps" in the "For each 1" step.
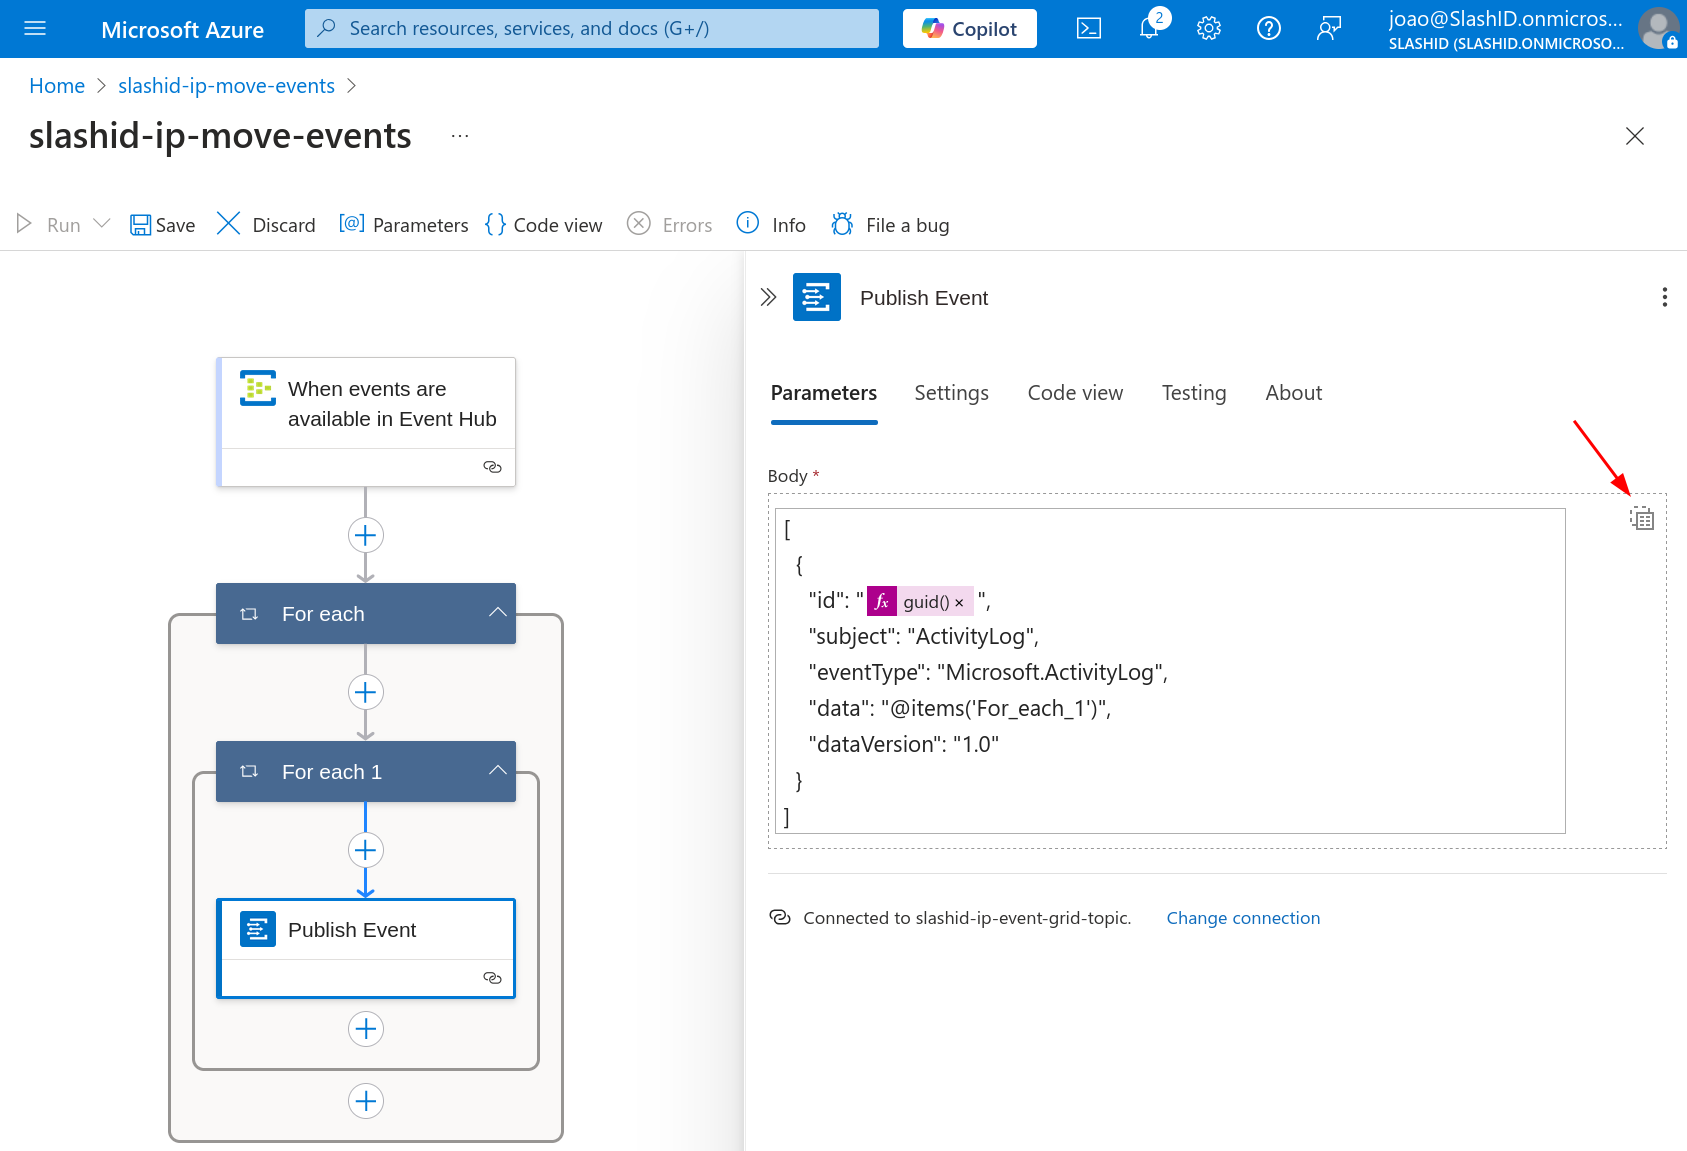
Next, click to add a new step under "For Each 1", search for "Publish Event" and add the one under "Azure Event Grid Publish".
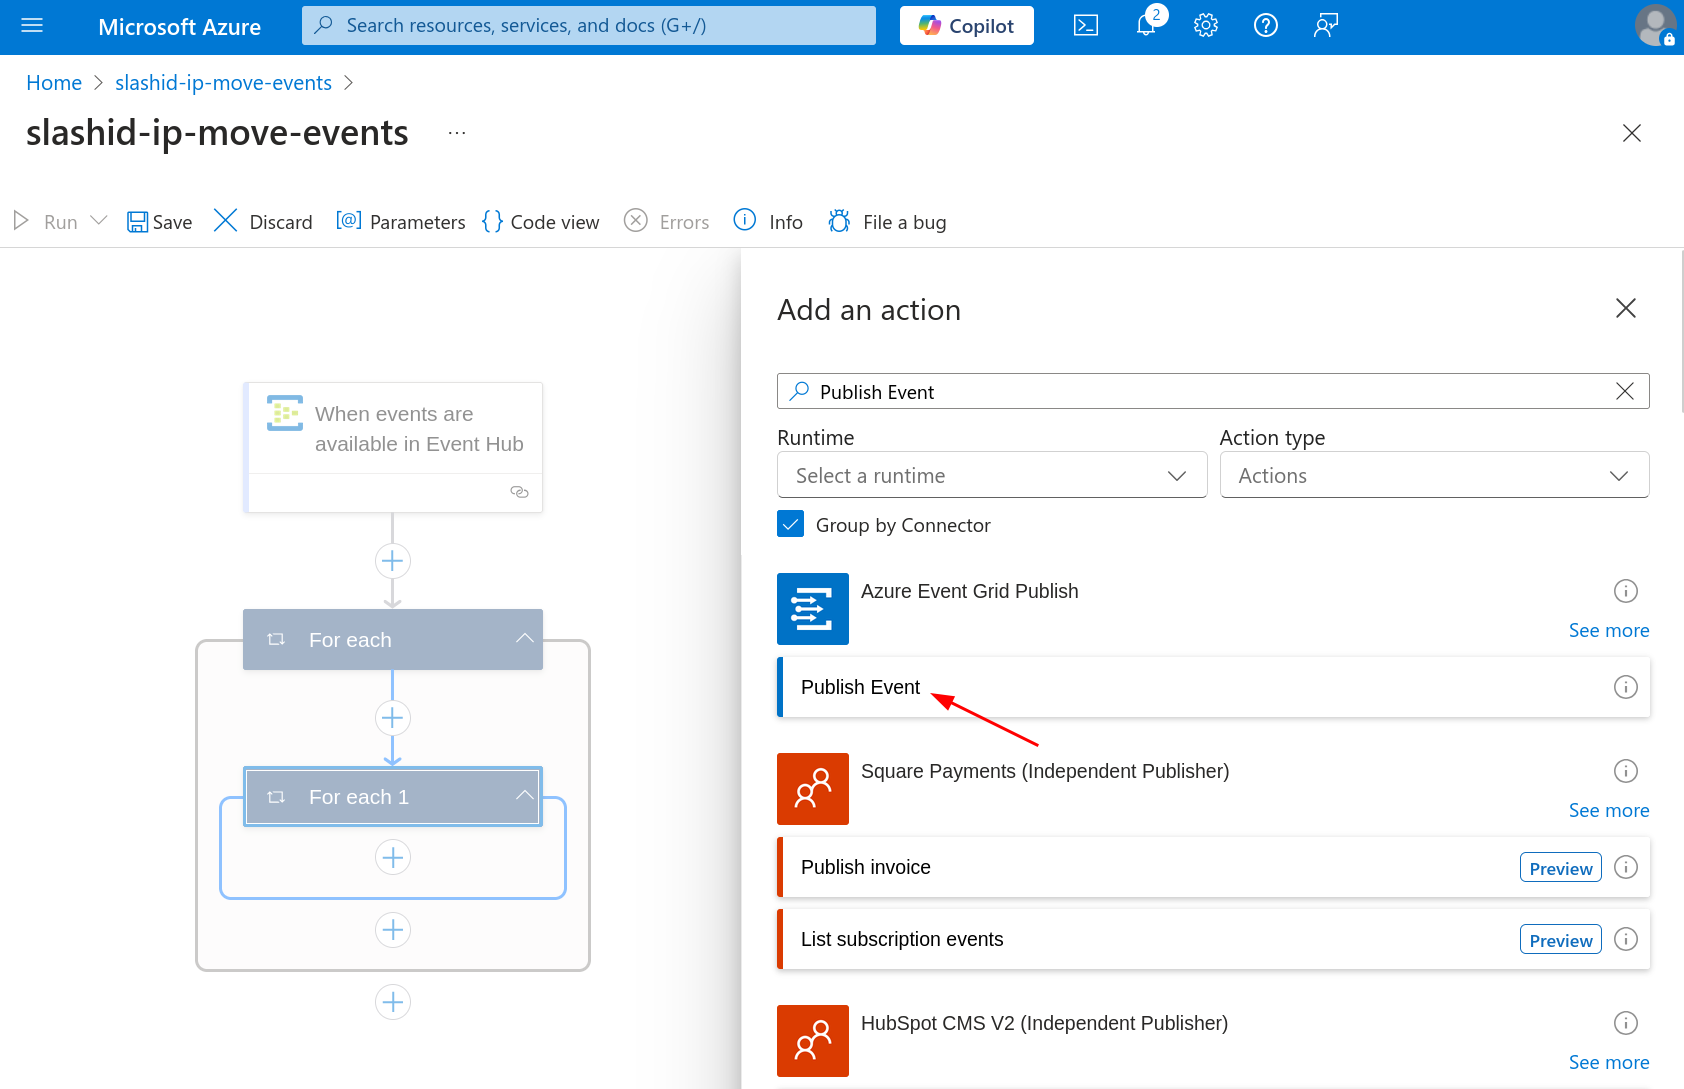
Provide the Event Grid topic endpoint you previously copied to a temporary location when asked for a "Topic Endpoint". Do the same when asked for a "Shared Access Signature", where you must paste the access key of the Event Grid topic you previously created.
Finally, paste the following JSON code in the "Parameters" tab, under field "Body". You'll need to switch the input type to input the entire array (see image).
[
  {
    "id": "@{guid()}",
    "subject": "ActivityLog",
    "eventType": "Microsoft.ActivityLog",
    "data": "@items('For_each_1')",
    "dataVersion": "1.0"
  }
]
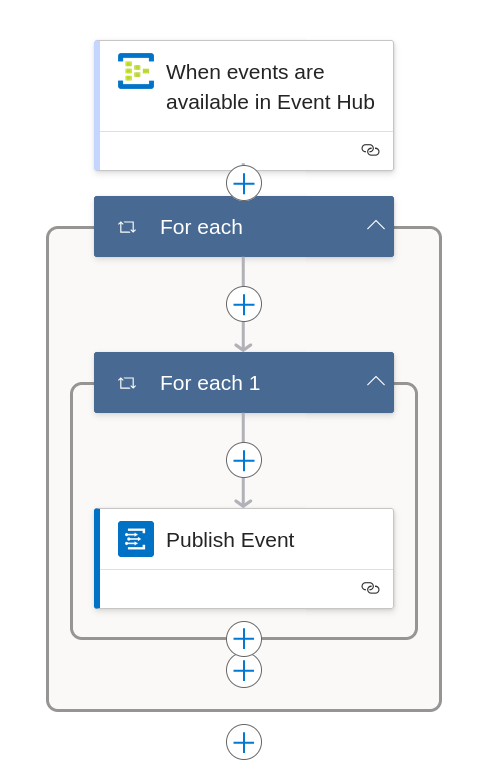
You can now click on "Save" in the visual editor to persist the workflow.
Your Logic App should look as follows:
You can click on "Code view" in the visual editor to see your workflow as a JSON file. It should look similar to the following:
{
  "definition": {
    "$schema": "https://schema.management.azure.com/providers/Microsoft.Logic/schemas/2016-06-01/workflowdefinition.json#",
    "contentVersion": "1.0.0.0",
    "triggers": {
      "When_events_are_available_in_Event_Hub": {
        "type": "ApiConnection",
        "inputs": {
          "host": {
            "connection": {
              "name": "@parameters('$connections')['eventhubs-1']['connectionId']"
            }
          },
          "method": "get",
          "path": "/@{encodeURIComponent('slashid-activity-logs')}/events/batch/head",
          "queries": {
            "contentType": "application/json",
            "consumerGroupName": "$Default",
            "maximumEventsCount": 1
          }
        },
        "recurrence": {
          "interval": 30,
          "frequency": "Second"
        }
      }
    },
    "actions": {
      "For_each": {
        "type": "Foreach",
        "foreach": "@triggerBody()",
        "actions": {
          "For_each_1": {
            "type": "Foreach",
            "foreach": "@items('For_each')['ContentData']['records']",
            "actions": {
              "Publish_Event": {
                "type": "ApiConnection",
                "inputs": {
                  "host": {
                    "connection": {
                      "name": "@parameters('$connections')['azureeventgridpublish-1']['connectionId']"
                    }
                  },
                  "method": "post",
                  "body": [
                    {
                      "id": "@{guid()}",
                      "subject": "ActivityLog",
                      "eventType": "Microsoft.ActivityLog",
                      "data": "@items('For_each_1')",
                      "dataVersion": "1.0"
                    }
                  ],
                  "path": "/eventGrid/api/events"
                }
              }
            }
          }
        },
        "runAfter": {}
      }
    },
    "outputs": {},
    "parameters": {
      "$connections": {
        "type": "Object",
        "defaultValue": {}
      }
    }
  },
  "parameters": {
    "$connections": {
      "value": {
        "eventhubs-1": { ... },
        "azureeventgridpublish-1": { ... }
      }
    }
  }
}
You should soon see successful runs of your workflow when you go to "Development Tools > Run history" inside your Logic App.
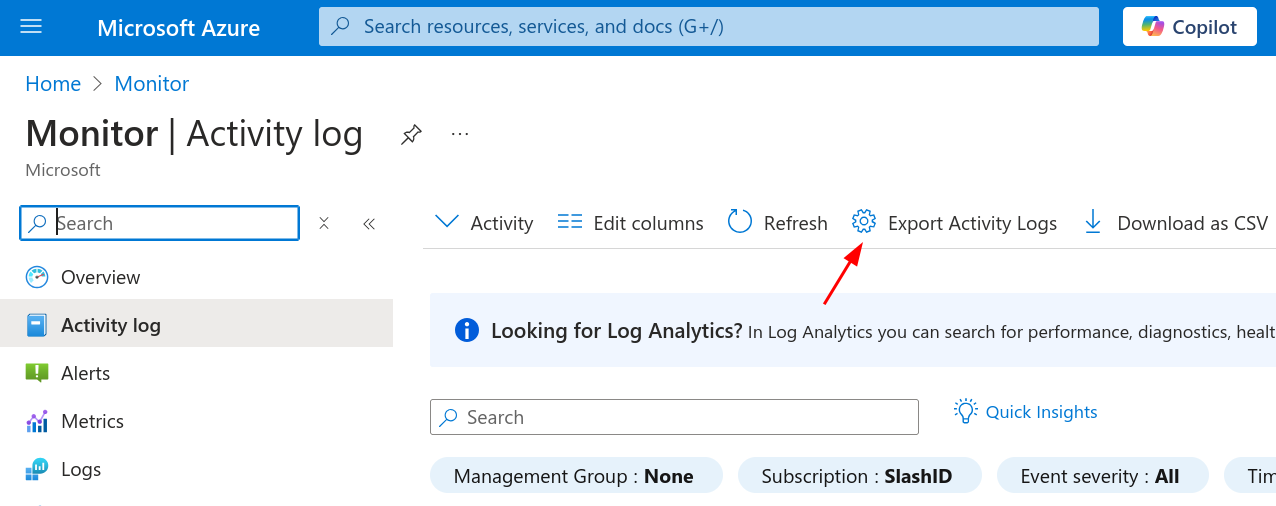
Export the Azure Monitor Activity logs
These include insight into subscription-level events for Azure services.
Go to Monitor | Activity log and click on "Export Activity Logs":
Click on "Add diagnostic setting". Name the diagnostic as you please, select all log categories, and check "Stream to an event hub" under section "Destination details". Select the Event Hub your previously created.
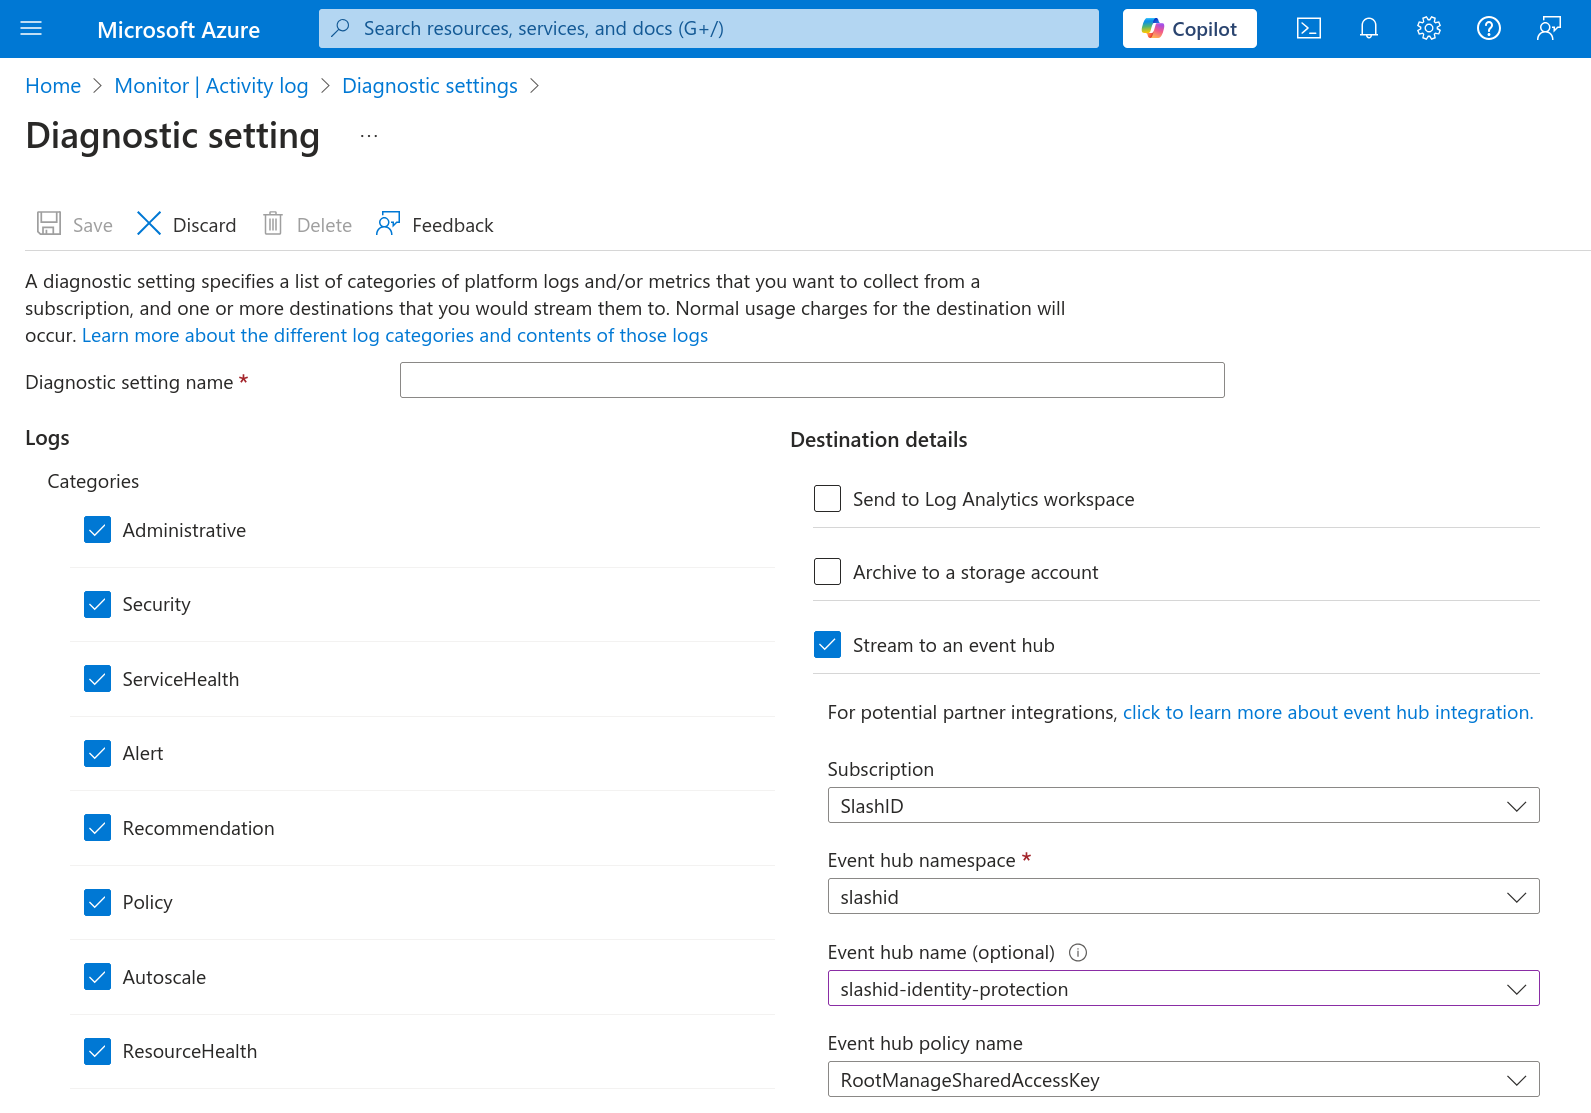
Save, and you're done.